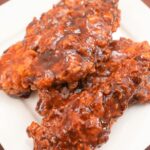
Honey Butter Chicken Tenders
These Korean style Honey Butter Fried Chicken are so deliciously crispy and super flavorful when coated in a sweet & salt honey butter sauce! They're perfect for a party or even a party of one!
Servings: 3
Ingredients
Chicken
- 1 lb chicken tenders
- 1 tsp kosher salt
- 1/2 tsp white pepper
- 1/2 tsp black pepper
- 1/2 tsp garlic powder
- 1/2 tsp onion powder
- 1/2 tsp ginger powder
- 1/4 tsp cayenne pepper
Seasoned Flour
- 2 cups flour all-purpose
- 1 tbsp kosher salt
- 1 tbsp white pepper
- 1 tsp black pepper
- 1 tsp garlic powder
- 1 tsp onion powder
Neutral oil for frying
Instructions
- Marinate chicken tenders in a bowl with kosher salt, white pepper, black pepper, garlic powder, onion powder, ginger powder, and cayenne pepper. Mix until thoroughly coated and set aside.
- In a large bowl, combine 2 cups of flour with kosher salt, white pepper, black pepper, garlic powder, and onion powder.
- In a separate bowl, make a wet batter by combining flour with egg and ice cold sparkling water. Whisk until combined. In a separate bowl, add 1 cup of flour. In a line, place your plain flour, wet batter, and seasoned flour next to each other. Add 1 tbsp of soda water to the seasoned flour and rub together with your hands to create small clumps of flour.
- Dust your chicken tenders in the plain flour (shake off excess), then into the wet batter until fully coated, letting excess batter drip off. Finally, coat the chicken in the seasoned flour and pack in the dredge until completely coated. Let the tenders rest on a tray while you heat your oil.
- In a heavy bottomed pot or dutch oven, heat oil to 350F and fry the chicken in batches for 4-5 minutes until lightly golden. Remove, then fry a second time at 350F for 1-2 minute until golden and extra crispy. Season with salt to taste.
- In a pan over medium heat, melt butter then add honey, soy sauce, and sugar. Stir and mix until the sugar has dissolved and the sauce is bubbling. Cook 1-2 minutes until the sauce has thickened. Coat or brush the sauce on your chicken tenders and enjoy!
Video
Notes
Craggily bits on Korean Honey Butter Fried Chicken add extra texture and create grooves for the sauce to cling to. (They're oftentimes the best part about the breading!) I like to make them by adding 1-2 tbsp of soda water to the seasoning flour and rubbing the flour with your hands. (This should be done before dredging the chicken in the seasoning flour.)
Create an Assembly Line - Create your assembly line by having four items in a row: 3 bowls that include flour, wet batter, and seasoning flour, as well as 1 baking sheet or tray. Here is the order of operation:
- Dust the marinated chicken in plain flour.
- Dip dusted chicken in the wet batter.
- Dredge the wet chicken with the seasoning flour.
- Place dredged chicken on a tray and let rest for 15-20 minutes before frying.
Nutrition
Calories: 807kcal | Carbohydrates: 104g | Protein: 47g | Fat: 22g | Saturated Fat: 11g | Polyunsaturated Fat: 2g | Monounsaturated Fat: 6g | Trans Fat: 1g | Cholesterol: 191mg | Sodium: 4109mg | Potassium: 778mg | Fiber: 4g | Sugar: 20g | Vitamin A: 597IU | Vitamin C: 3mg | Calcium: 62mg | Iron: 7mg
