Sweet and Sour Chicken – Better Than Takeout! (VIDEO)
This post may contain affiliate links. Please read our disclosure policy.
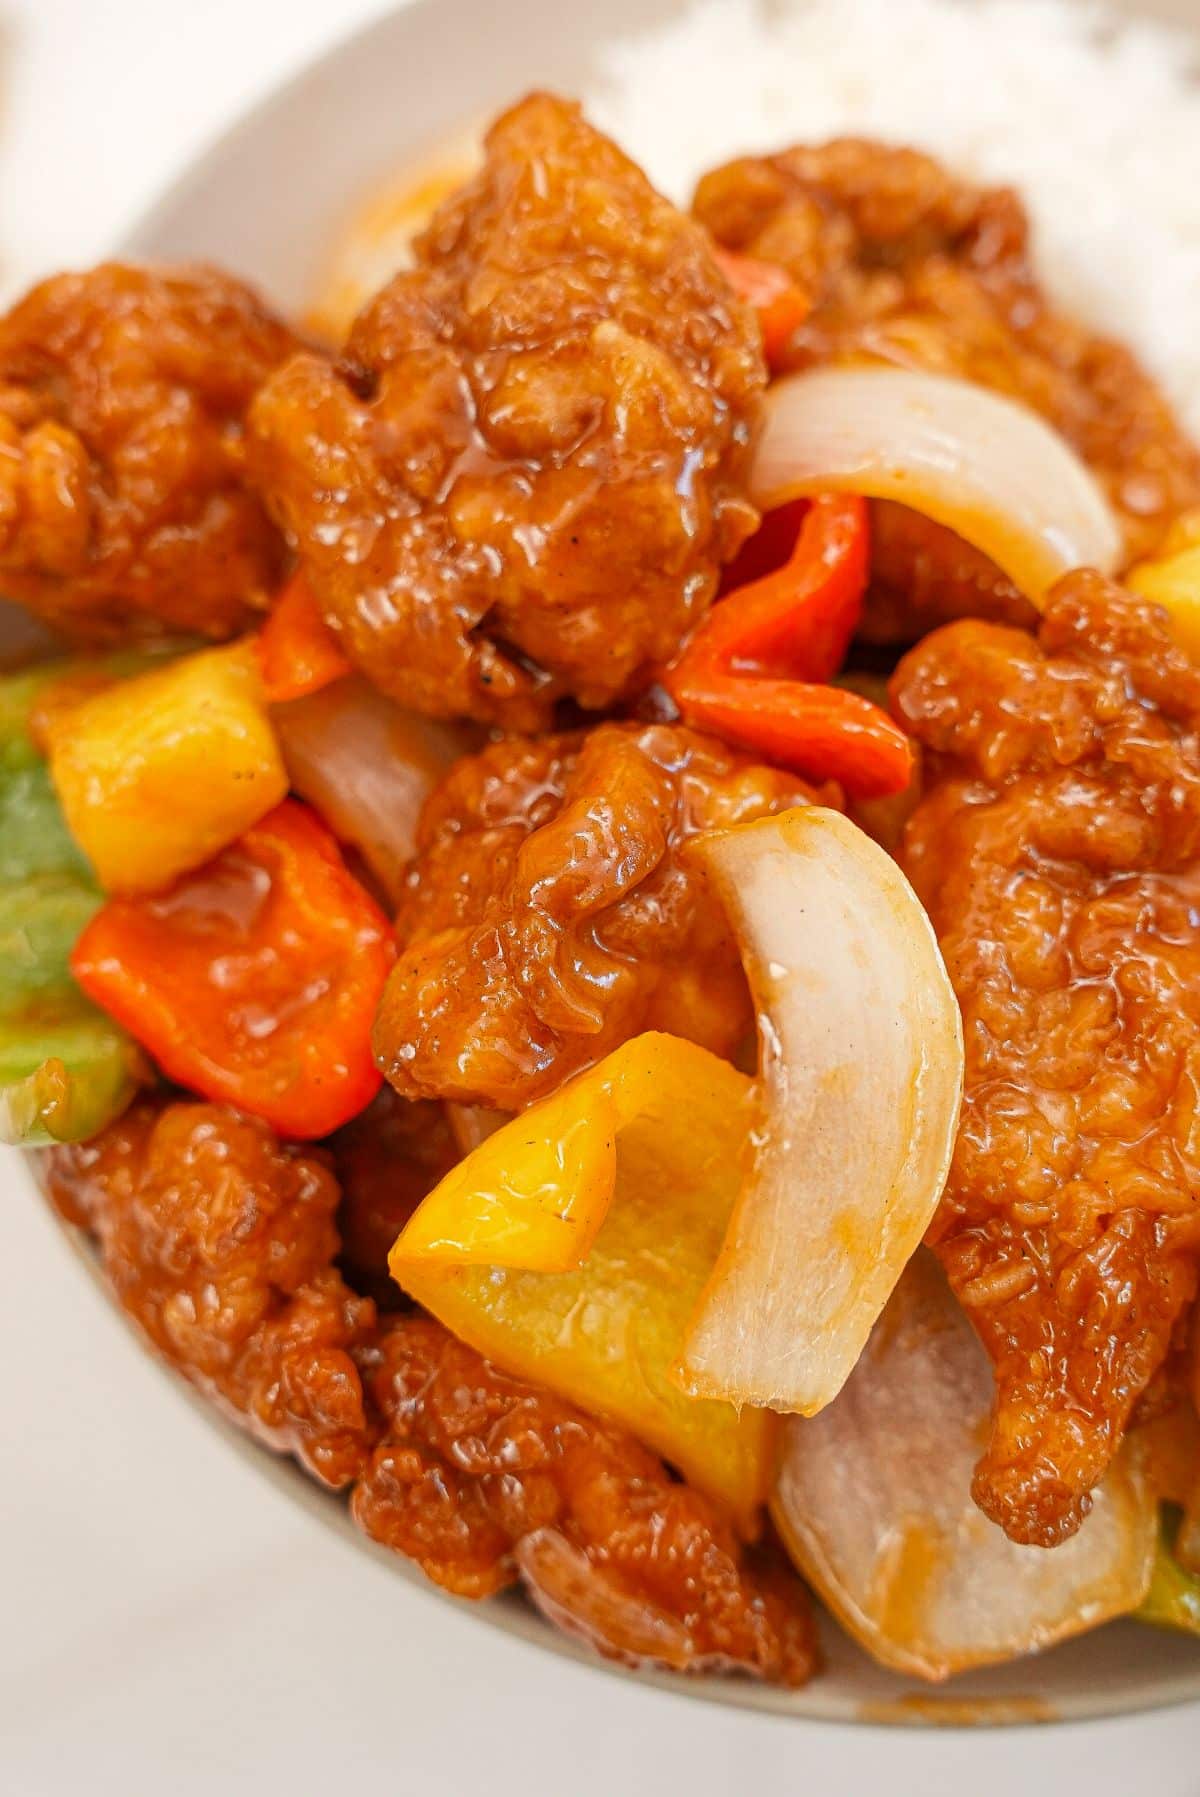
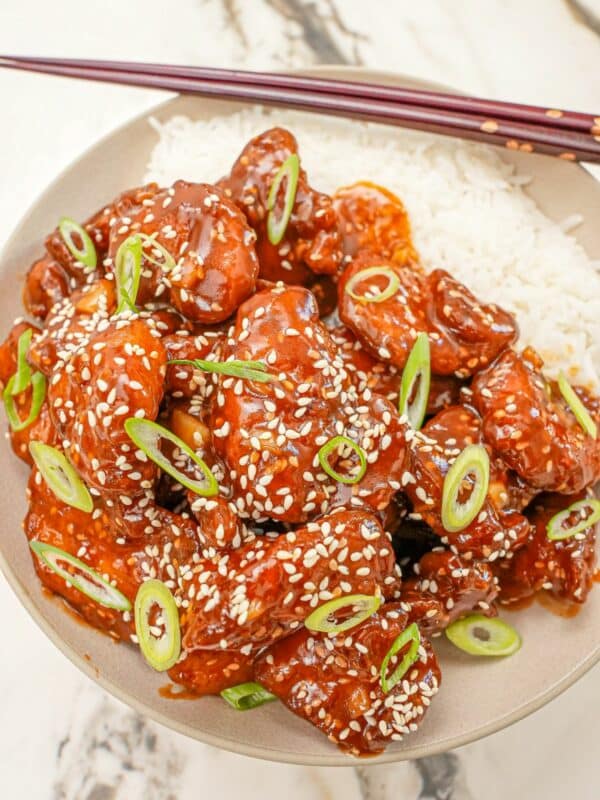
Sweet and Sour Chicken is probably your favorite American Chinese takeout dish but did you know you can easily make it at home? Learn how to make super crispy chicken tossed in the classic sweet and sour sauce that you’ll want to pour over everything!
Watch the Sweet and Sour Chicken Recipe Video!
A Note from CJ

Your Chinese Takeout Menu at Home!
If you’re going to make better-than-takeout Sweet and Sour Chicken at home, I recommend you go all-out and recreate your perfect Chinese Take-Out meal! Start with Egg Rolls, make Chicken Fried Rice or Shrimp Fried Rice, Shrimp Lo Mein or Chicken Lo Mein, and don’t forget Egg Drop Soup or Hot and Sour Soup!
Made this 5 times already for both my family and my in-laws. Everyone is absolutely astounded that it isn’t a take away. It is so good and authentic!
Ingredient Tips
Refer to the recipe card for the full list of ingredients and measurements!
- chicken thighs – I recommend boneless, skinless chicken thighs; if you want to use chicken breast, keep an eye on the cooking time as chicken breast usually cooks/dries out faster.
- white pepper – white pepper is earthier and spicier than black pepper – if you love cooking Chinese food, I recommend having some in your pantry.
- all-purpose flour + cornstarch + baking powder – this is for the crispiest batter. The baking powder reacts with the oil and creates tiny air bubbles, which helps the outer layer get crispy while keeping it light and airy.
- chicken stock or broth – I prefer chicken but you can use any broth/stock you have.
- ketchup + brown sugar – both add sweetness; adjust if you prefer Sweet and Sour Chicken on the less sweet side.
- distilled white vinegar – you can also use apple cider vinegar or rice vinegar.
- neutral oil – I used avocado oil but you can also use canola, vegetable, or grapeseed oil. Avoid olive oil or sesame oil for frying.
- bell peppers – I used all three colors but you can use what you have.
- pineapple – I like using fresh cut pineapple but you can also use canned – make sure to drain well.
How to Make Sweet and Sour Chicken
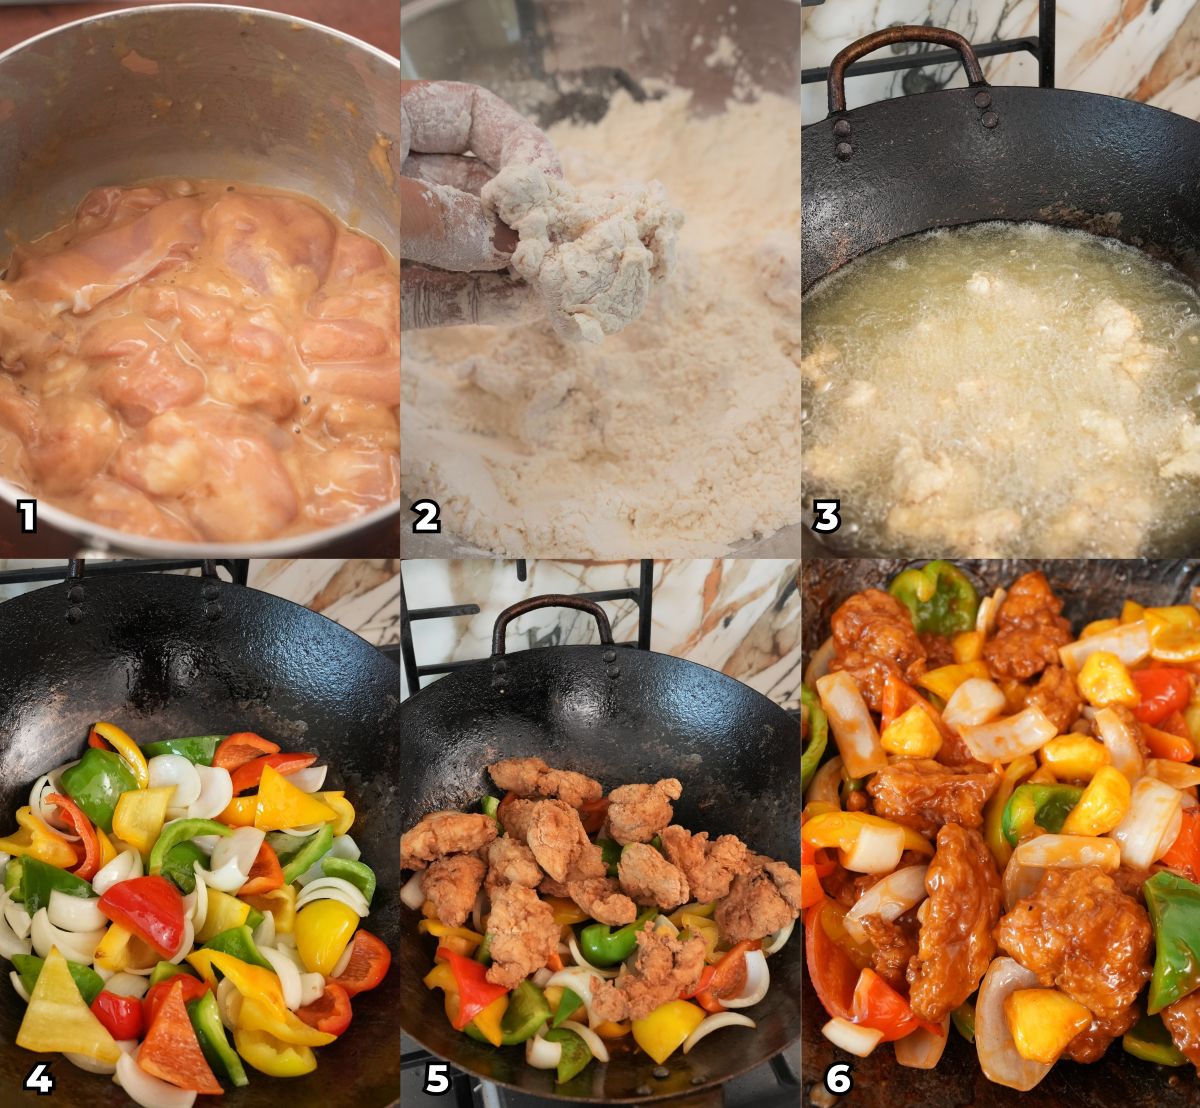
Marinate Chicken and Mix Sauce – Cut the chicken thigh into similar size 2″ pieces and place in a mixing bowl. Season the chicken with light soy sauce, salt, white pepper, egg and flour. Mix until combined and marinate for 20 minutes. In a bowl, mix together ketchup, brown sugar, white vinegar, chicken stock and cornstarch.
Dredge the Chicken – In a large bowl, mix together the dry seasoning mix ingredients. Give the chicken another mix to evenly distribute the wet batter, then let any excess drip off and dredge the chicken in the dry mix. Pat the chicken pieces well to ensure there are no bald spots.
Fry Chicken – In a large dutch oven or wok, heat neutral oil to 350F and fry the chicken for 3-4 minutes until golden brown and remove. Bring the oil temperature back to 350F and fry the chicken again for 1-2 minutes until dark golden brown and crispy.
Saute Vegetables and Pineapple, Add Sauce, and Toss with Chicken – In a wok or large pan over high heat, add 1 tbsp of neutral oil and cook the peppers and onions for 1 minute. Add pineapple and cook for another 30 seconds. Add the premixed sauce and combine with peppers and onions until the sauce has thickened slightly. Add back the chicken and toss to combine and enjoy!
PRO TIPS
CJ’s Recipe & Storage Tips
Cut chicken, vegetables, and pineapples into similar sizes so everything cook uniformly and also makes for a better eating experience.
Individually coat the chicken pieces in the dry seasoning mix so that there are no dry spots. I like to pack the dry mix into the chicken with my hands (similar to a squeezing motion) so the batter sticks.
Do not let your frying oil drop below 325F when frying! I highly recommend you use a thermometer to keep an eye on the temperature. If you see it dropping below 325F, remove some of the chicken and fry in batches – frying at a low temperature will result in too much moisture and the chicken will be soggy.
Avoid crowding your pan – crowding can lead to your Sweet and Sour Chicken not cooking thoroughly and becoming mushy. If you think your dish will be crowded, use a larger pan, cast iron, or dutch oven, OR cook in batches.
Storage and Reheating – Store any leftovers in an airtight container in the refrigerator for up to 3-4 days. The chicken will soften as it sits – this is normal. Reheat in the microwave until warmed through.
If you tried this Sweet and Sour Chicken or any other recipe on my website, please leave a 🌟 star rating and let me know how it went in the comments below!
Sweet and Sour Chicken (VIDEO)

Video
Equipment
Ingredients
Chicken
- 1 lb chicken thigh, cut to 2" pieces
- 2 tbsp light soy sauce, (low sodium)
- 1/2 tsp kosher salt
- 1/4 tsp white pepper
- 1 egg
- 2 tbsp all-purpose flour
Sweet and Sour Sauce
- 1/2 cup high-quality chicken stock
- 1/4 cup ketchup
- 3 tbsp brown sugar
- 2 tbsp distilled white vinegar
- 1/2 tbsp cornstarch
Dry Seasoning Mix
- 1/2 cup all purpose flour
- 1/2 cup cornstarch
- 1/2 tbsp kosher salt
- 1 tsp white pepper
- 1 tsp baking powder
- 1 quart neutral oil for frying, canola, vegetable, avocado oil is best
Vegetables and Fruit
- 3 cups bell pepper, I used red, yellow and green bell pepper, cut to 2" pieces
- 1/2 onion, cut into 2" pieces
- 1/2 cup pineapple, cut into 2" pieces
Instructions
- Cut the chicken thigh into similar size 2" pieces and place in a mixing bowl. Season the chicken with light soy sauce, salt, white pepper, egg and flour. Mix until combined and marinate for 20 minutes.
- In a bowl, mix together ketchup, brown sugar, white vinegar, chicken stock and cornstarch.
- In a large bowl, mix together the Dry Seasoning Mix ingredients. Give the chicken another mix to evenly distribute the wet batter, then let any excess drip off and dredge the chicken in the dry mix. Pat the chicken pieces well to ensure there are no bald spots.
- In a large dutch oven or wok, heat neutral oil to 350F and fry the chicken for 3-4 minutes until golden brown and remove. Bring the oil temperature back to 350F and fry the chicken again for 1-2 minutes until dark golden brown and crispy.
- In a wok or large pan over high heat, add 1 tbsp of neutral oil and cook the peppers and onions for 1 minute. Add pineapple and cook for another 30 seconds.
- Add the premixed sauce and combine with peppers and onions until the sauce has thickened slightly. Add back the chicken and toss to combine and enjoy!
Notes
Nutrition
Nutrition information is automatically calculated, so should only be used as an approximation.
This Sweet and Sour Chicken recipe was originally published in August 2023, and updated in February 2026.


hello….can I marinate the chicken for a few hours or does it have to be 20 minutes?
A few hours is totally fine – I would say no more than 12 hours.
Hi!
Is there a chance I can put it in the oven?( only the chicken part, of course)
Hi Adva! Do you mean to keep warm? If so, yes you can!
Amazing. 🥰
Thank you Jen!
Yeap, Mr. Joe great recipe!……I did some tweaks, but the recipe turned out truly Tastalicious! Be safe and blessed always out there y’all.
Thank you so much Ida!
Great recipe, best sweet and sour recipe I’ve tried. I just replaced the broth with pineapple juice. Excellent will be making again.
Thank you so much Cathie! Happy new year!
Looks delicious and easy. Is there a way to modify the recipe to air fry the chicken instead of frying?
Hi Nitza – check out my air fryer orange chicken or air fryer general tso’s chicken recipes for how to do this! Then follow the steps as you normally would for the sauce and preparation.
Delicious. We like heat so I added chilies. Better and cheaper than in a restaurant.
I’m so glad you loved it!
I think this is way better than takeout! And way healthier!