Air Fryer Chicken Thighs – Juicy with Crispy Skin! (VIDEO)
This post may contain affiliate links. Please read our disclosure policy.
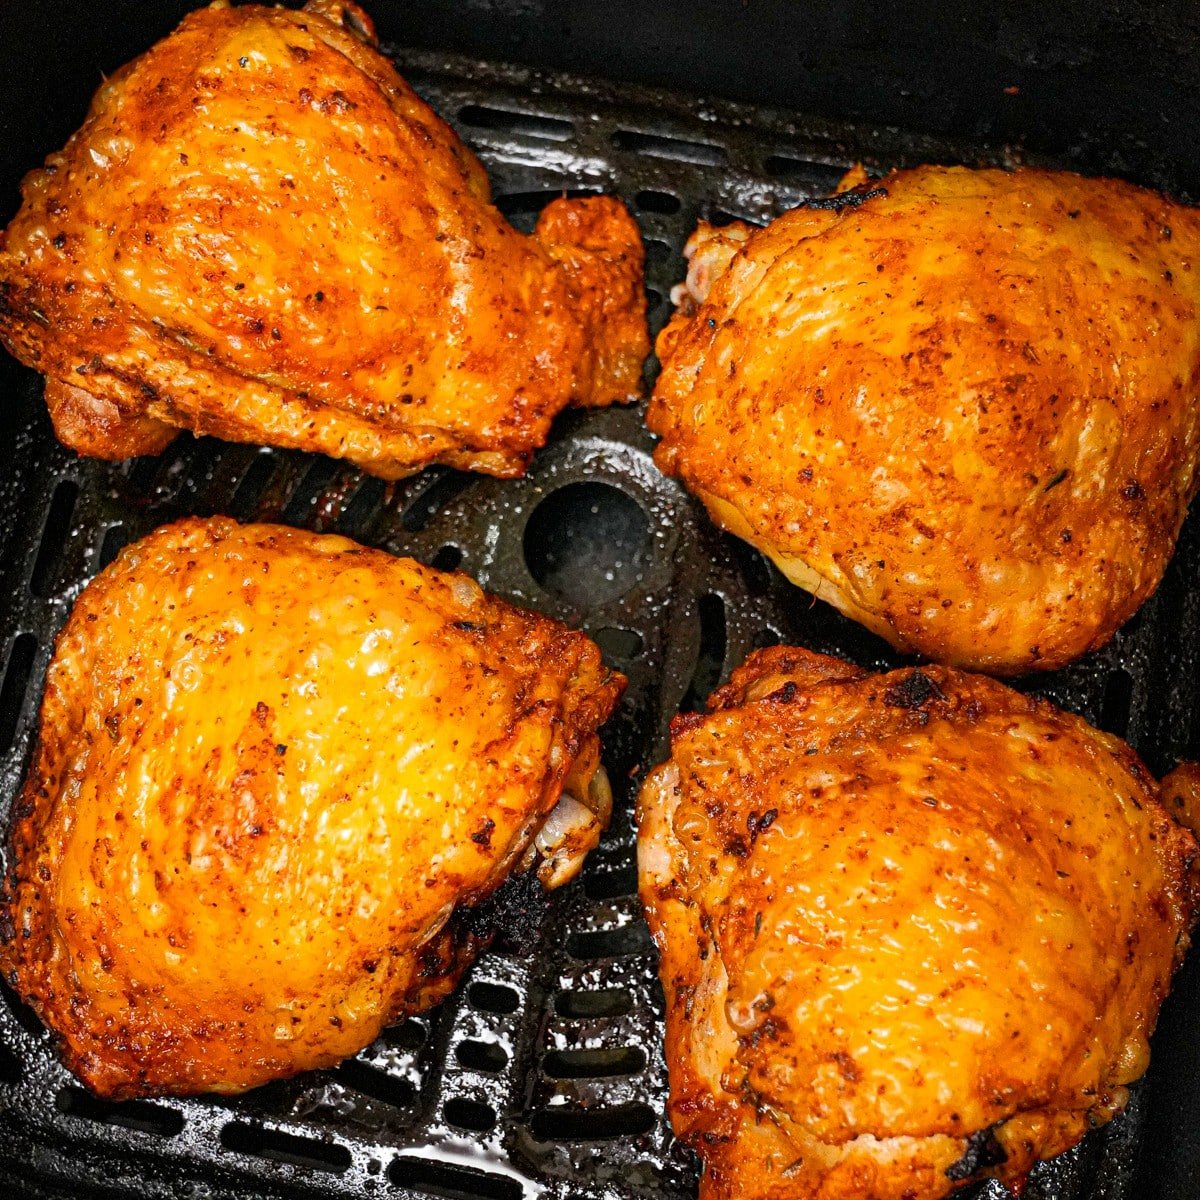
Air Fryer Chicken Thighs are going to be your new easy go-to dinner! The chicken is so juicy and the skin is so crispy – all in 25 minutes! Keep reading for my key tips and techniques to making the best chicken thighs in the air fryer!

Watch the Air Fryer Chicken Thighs Recipe Video Below!
A Note from CJ
These are the best Air Fryer Chicken Thighs!

I absolutely love this recipe – the chicken thighs are so juicy and the skin is extra crispy, due to one key ingredient (baking powder!) The best part is that it takes less than half the time it would take in the oven!
This is why I love cooking chicken in the air fryer and have so many recipes like Air Fryer Chicken Wings, Air Fryer Chicken Tenders, Air Fryer Fried Chicken, Air Fryer Chicken Skewers, Air Fryer Chicken Breast, and Air Fryer Chicken Nuggets!
This came out perfectly! I also love that you can pop it in the air fryer and walk away. The chicken came out perfectly crispy, but still juicy and tender on the inside. The seasoning combo was delicious.
Ingredient Tips
Refer to the recipe card for the full list of ingredients and measurements!
- bone-in, skin-on chicken thighs – I like to use bone-in, skin-on chicken thighs because the skin and bone makes it harder for the chicken to dry out, the bone adds extra flavor to the chicken meat, and the skin gets super crispy in the air fryer.
- seasoning – I used kosher salt, black pepper, paprika, paprika, as well as dried herbs (rosemary, thyme or herbs de province are all great) – you can customize this to your liking! See the notes in the recipe card.
- baking powder – This is my secret ingredient to the crispiest chicken skin! Simply put: baking powder increases the ph level of the chicken skin, which allows the bonds in the skin to break out more easily, leading to a crispier skin when cooked!
- neutral oil – use an oil with little to no flavor and a high smoking point (my go-to is avocado oil).
How to Make Chicken Thighs in the Air Fryer
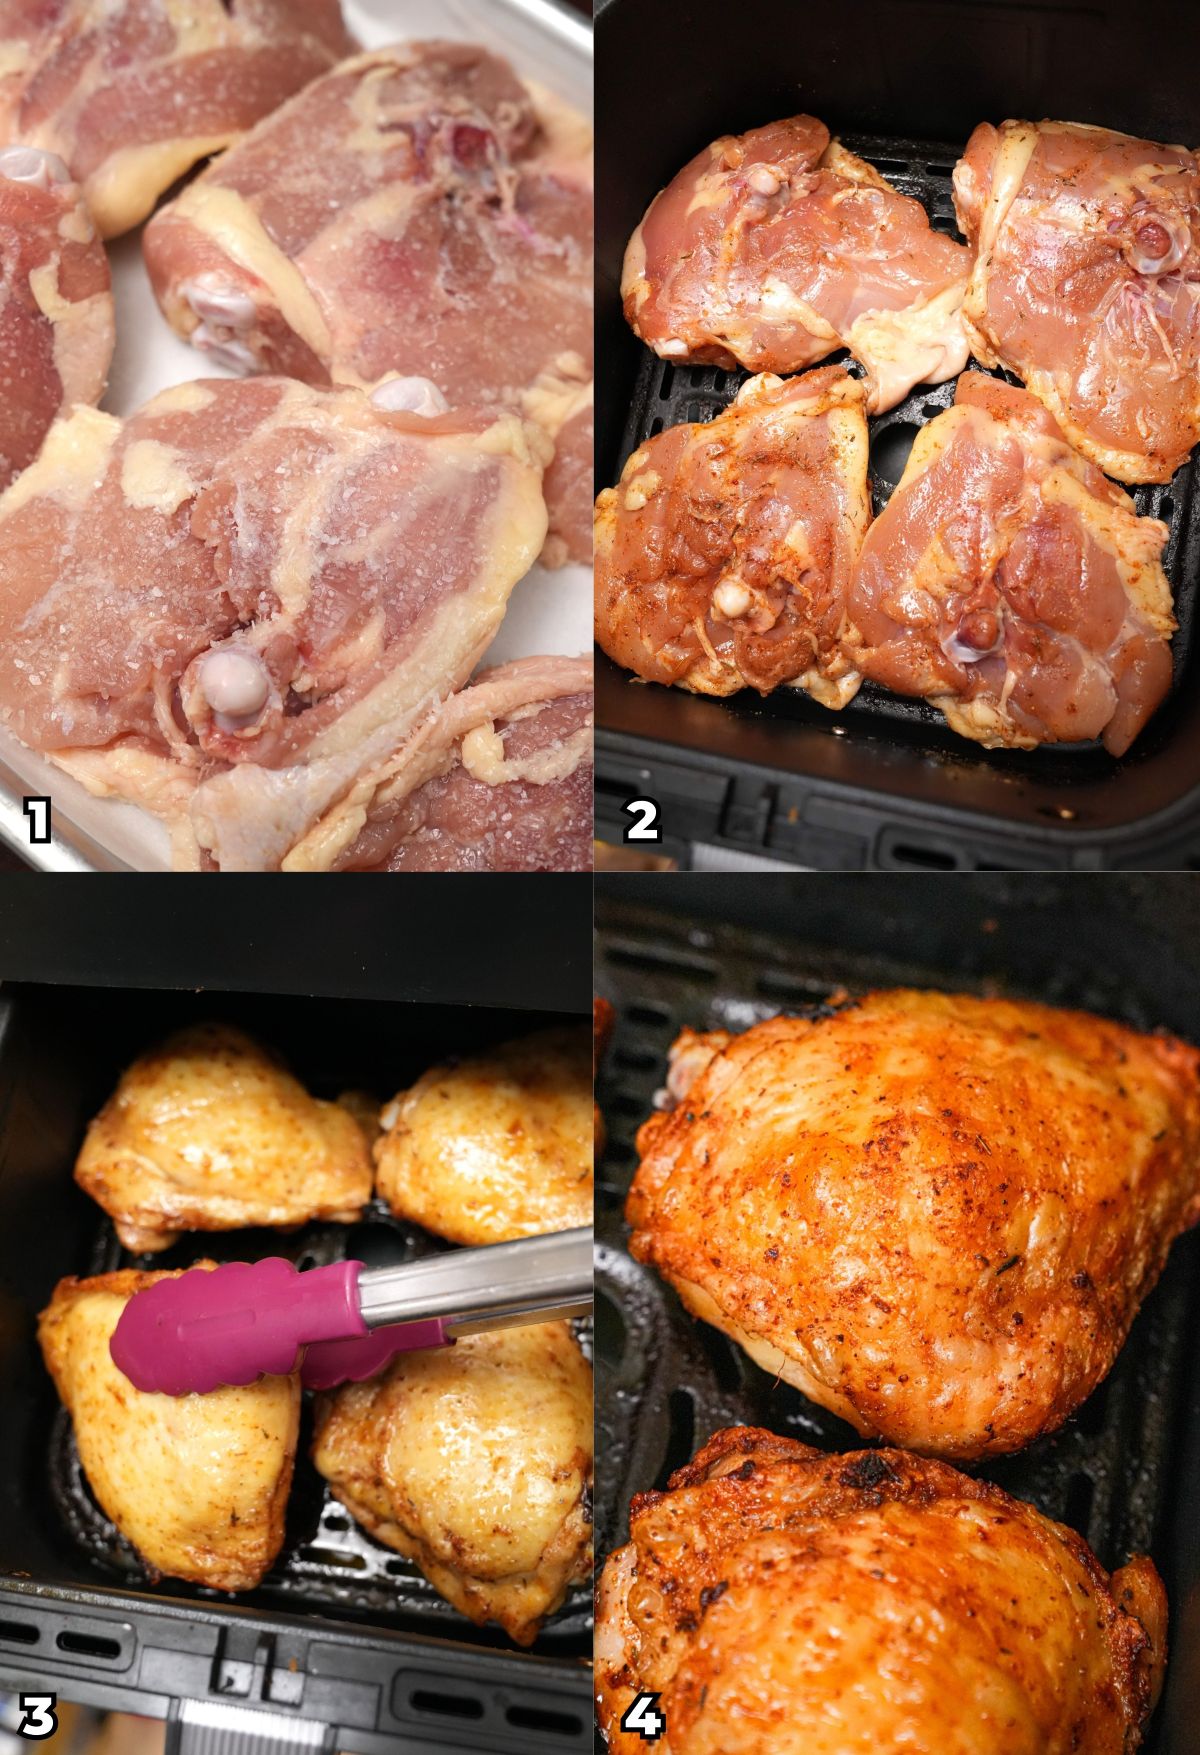
Dry Brine and Season the Chicken Thighs – Place your raw bone-in, skin-on chicken thighs in a mixing bowl or tray. Sprinkle kosher salt generously on the meat side of the chicken. Set aside and let rest for at least 15 minutes. Combine the remaining salt, black pepper, paprika, and dried herbs to a bowl. Add the chicken along with a tablespoon of neutral oil and mix to combine well. Turn the chicken skin side up and sprinkle a pinch of baking powder onto the skin of each chicken thigh and rub it in well until no longer visible.
Air Fry the Chicken – Place the chicken skin side down in the air fryer tray and air fry at 400F for 12 minutes. After 12 minutes, flip each chicken thigh so the skin is facing up. Pat the skin dry with a paper towel to remove any excess moisture. Air fry again for 12-14 minutes until the chicken is cooked through and skin looks golden crispy.

PRO TIPS
CJ’s Recipe & Make Ahead, Storage, and Reheating Tips
Cooking times may vary – Depending on your air fryer, cooking times may vary. If the skin is not as crispy as you’d like after the 14 minute mark in step in step 3, increase the cooking time in intervals of 3 minutes until the desired crispiness is achieved.
If using boneless, skinless chicken thighs – Reduce the cooking time to 6 minutes for the first side. Flip the chicken and cook for only 8-10 minutes on the second side.
Make Ahead, Storage and Reheating – If you’re want to prepare ahead of time: Season the raw chicken (steps 1-2) and cover in the refrigerator until ready to cook. (I would only do this 1-2 days in advance.) Once ready to cook, resume step 3.
Storage once the chicken thighs are cooked: Refrigerate cooked Air Fryer Chicken Thighs in an airtight container in the refrigerator for up to 3-4 days. NOTE: the skin will not remain crispy once refrigerated. Freeze cooked Air Fryer Chicken Thighs in an airtight container for up to 1 month. When ready to reheat, first thaw overnight in the refrigerator.
Reheating Instructions for Air Fryer Chicken Thighs: To reheat, place the cold chicken thighs skin side up in the air fryer and reheat at 350F for 6-8 minutes until the skin becomes crispy and meat is warmed through.
If you tried this Air Fryer Chicken Thighs Recipe or any other recipe on my website, please leave a 🌟 star rating and let me know how it went in the comments below!
Air Fryer Chicken Thighs (VIDEO)

Equipment
Ingredients
- 3 lbs bone in chicken thighs
- 1 tsp kosher salt, divided
- ½ tsp black pepper
- ½ tsp paprika
- 1 tsp garlic powder
- 1/2 tsp dried herbs, rosemary, thyme or herbs de province
- ¼ tsp baking powder
- 1 tablespoon neutral oil, avocado, canola, or vegetable oil work well
Instructions
- In a large mixing bowl or tray, place chicken thighs meat side up. Sprinkle salt on the meat side of the chicken thighs and let sit for 15 minutes.
- Combine all spices in a small bowl. Pour the spice mixture over the chicken thighs along with the oil in a bowl and mix to combine well. Once combined, turn the thighs skin side up and sprinkle a pinch of baking powder onto the skin and rub it in until the baking powder is no longer visible.
- Place skin side down in the air fryer tray and air fry at 400F for 12 minutes. Flip each chicken thigh so skin side is up. Pat the skin dry with a paper towel. Air fry again for 12-14 minutes until the chicken is cooked through and skin is golden crispy.
Video
Notes
- Parmesan Air Fryer Chicken Thighs – you can add 2 tablespoons of freshly grated parmesan cheese (yum!)
- Lemon or Lemon Pepper Air Fryer Chicken Thighs – add zest of 1 lemon to the spice mixture. You can also swap with 1 tbsp of lemon pepper seasoning. NOTE – if your lemon pepper seasoning has salt in it, omit the salt from your spice mix.
- Spicy Air Fryer Chicken Thighs – add 1/4 teaspoon of your favorite spicy pepper to the spice mixture. It can be anything from cayenne pepper to ground sichuan peppercorns!
Prepare Ahead, Storage, and Reheating Tips
If you’re want to prepare Air Fryer Chicken Thighs ahead of time: Season the raw chicken (steps 1-2) and cover in the refrigerator until ready to cook. NOTE: I would only do this 1-2 days in advance. Once ready to cook, resume step 3. Storage once the Air Fryer Chicken Thighs are already cooked: Refrigerate cooked Air Fryer Chicken Thighs in an airtight container in the refrigerator for up to 3-4 days. NOTE: the skin will not remain crispy once refrigerated. Freeze cooked Air Fryer Chicken Thighs in an airtight container for up to 1 month. When ready to reheat, first thaw overnight in the refrigerator. To reheat, place the cold chicken thighs skin side up in the air fryer and reheat at 350F for 6-8 minutes until the skin becomes crispy and meat is warmed through.Nutrition
Nutrition information is automatically calculated, so should only be used as an approximation.


AMAZING!!! Please send recipes to my email I want to try more of your fabulous food.
This chicken is absolutely the best! I’ve made it quite a few times and it never disappoints. Thank you!
Thanks for the great review, Barbara!