This post may contain affiliate links. Please read our disclosure policy.
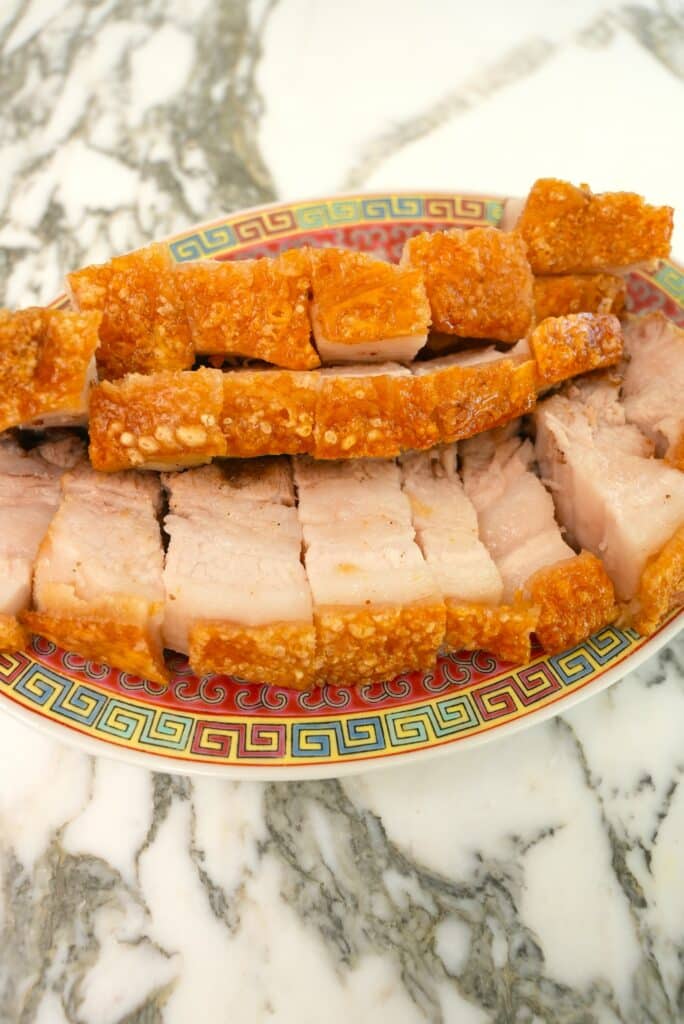
I’ve spent months perfecting this Air Fryer Crispy Pork Belly recipe. I’ve tried many different methods at different temperatures, times, and air fryers, and this is the method that consistently puts out a crispy, puffed up skin and juicy, tender meat.
If you have an air fryer at home and also love Chinese roast pork with the super crispy skin, you’re going to love this recipe!
Watch the Air Fryer Crispy Pork Belly Recipe Video Below!
Want a non-meat alternative? Try my super crispy Air Fryer Tofu!
Ingredients for this Recipe
This crispy pork belly is incredibly easy to make in the air fryer and only require a few ingredients and seasonings! Here is what you’ll need to make this super crispy pork!
- pork belly skin on
- kosher salt
- white pepper
- five spice powder
- sugar
- Shaoxing wine
- kosher salt
- white vinegar
- neutral oil
Getting the perfect crispy pork belly is not as hard as it looks! I’ve made so many versions of this over the years and have learned a few KEY tips & techniques that will ensure your pork belly is JUICY & the skin is CRISPY!
If you love crispy, you’ll LOVE my Air Fryer Chicken Wings, which is the top recipe on my site!
Key Tips for the best Crispy Pork Belly in the air fryer!
- Select the Right Cut: Start with a good cut of pork belly. Look for one with a nice balance of meat and fat, as this will ensure both flavor and crispiness.
- Poke the Skin: Use a sharp knife or piercing tool to poke holes into the pork belly skin, just enough to pierce the skin but not too deep that it pierces into the meat. This helps the skin crisp up by allowing some of the fat to render out more easily, effectively frying the skin and allowing it to puff up.
- Dry the Skin: Pat the skin of the pork belly dry with paper towels. Moisture is the enemy of crispy skin, so make sure it’s as dry as possible.
- Salt the Skin: Rub a generous amount of coarse sea salt into the skin. This helps draw moisture out of the skin and aids in crisping it up.
- Rest Before Slicing: Once done, let the crispy pork belly rest for a few minutes before slicing. This allows the juices to redistribute, resulting in juicier meat.
If you liked this Air Fryer Pork Belly recipe, check out some of the most popular recipes on the blog for your next lunch or dinner!
Love pork? Try my Sweet and Sour Pork recipe!
If you tried this Air Fryer Crispy Pork Belly or any other recipe on my website, please leave a 🌟 star rating and let me know how it went in the comments below!
Air Fryer Crispy Pork Belly
Ingredients
- 3 pound pork belly, 1.5 kg, skin on
- 1/2 tablespoon kosher salt
- 1/2 tablespoon white pepper, 5 g
- 1/2 tablespoon five spice powder, 5 g
- 1/2 tablespoon sugar, 6 g
- 1/2 tablespoon Shaoxing wine, 7 ml
- 1 cup kosher salt
- 1 tablespoon white vinegar, 15 ml
- 1 tablespoon neutral oil, 15 ml
Instructions
- To the meat side, use a knife to make 1/2" deep cuts lengthwise across the pork belly. In a small bowl, combine salt, white pepper, five spice powder, sugar, and Shaoxing wine to make a paste. Evenly spread the paste on the meat side of the pork and crevices ensuring not to touch the skin.
- Pat the skin-on pork belly dry with a paper towel and poke holes all across the skin of the pork using skewers or sharp knife. Ensure that the holes only puncture the skin and fat (do not pierce all the way through the meat). Cut the slab of pork belly so it will fit in your air fryer.
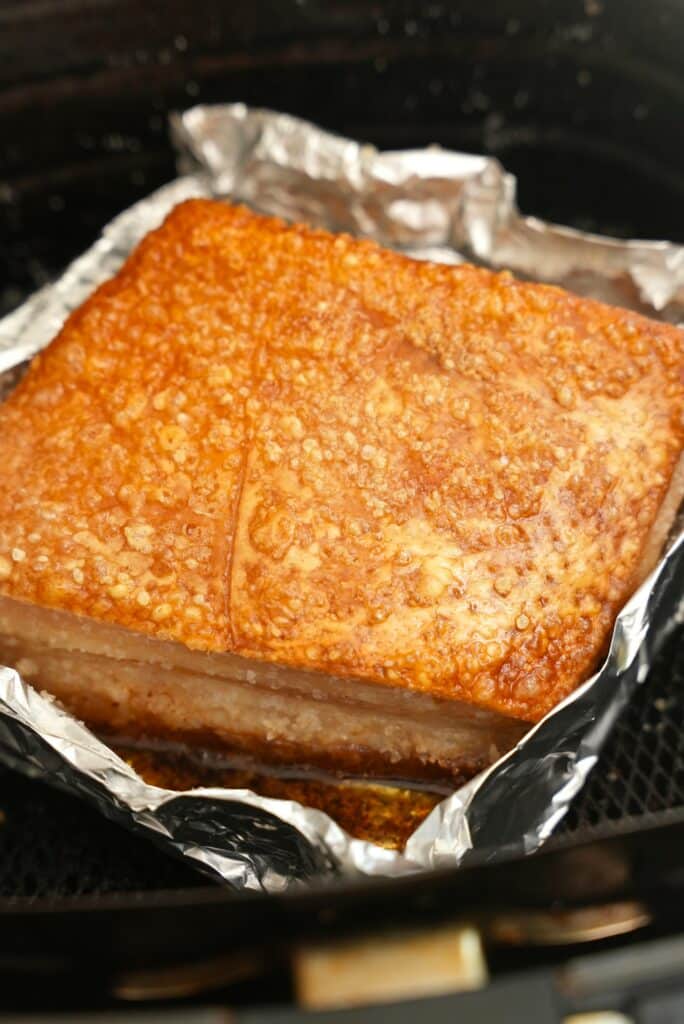
- Create a tin foil frame around the pork belly, leaving a ½” gap up from the edges of the pork to prevent salt from spilling over. Brush a layer of vinegar on the skin, then cover the skin completely with a layer of salt.
- Air fry at 250F for 30 minutes or until the salt has dried completely.
- Remove the salt from the pork belly and brush off any excess. Pat dry with a paper towel.
- Brush the skin with neutral oil, then air fry at 400F for 30-40 minutes until the skin is puffed and crispy. Check at the 20 minute mark and every 5 minutes to monitor the skin, checking for burning, as the time will vary with different air fryers! If spots of the skin begin to burn, place a small piece of foil over the specific area to cover it and allow the exposed areas to continue crisping up.
Notes
- Select the Right Cut: Start with a good cut of pork belly. Look for one with a nice balance of meat and fat, as this will ensure both flavor and crispiness.
- Poke the Skin: Use a sharp knife or piercing tool to poke holes into the pork belly skin, just enough to pierce the skin but not too deep that it pierces into the meat. This helps the skin crisp up by allowing some of the fat to render out more easily, effectively frying the skin and allowing it to puff up.
- Dry the Skin: Pat the skin of the pork belly dry with paper towels. Moisture is the enemy of crispy skin, so make sure it’s as dry as possible.
- Salt the Skin: Rub a generous amount of coarse sea salt into the skin. This helps draw moisture out of the skin and aids in crisping it up.
- Rest Before Slicing: Once done, let the crispy pork belly rest for a few minutes before slicing. This allows the juices to redistribute, resulting in juicier meat.
Nutrition
Nutrition information is automatically calculated, so should only be used as an approximation.





Looking forward to making this recipe! Should the cooking times be adjusted if I use half the weight of pork belly (750g)?
Hi Alex – if you have a pork belly with a good amount of fat, you should be fine on the time. If it’s a leaner cut, you may want to reduce the time by about 10 minutes during the second cook to try and prevent drying out the meat. Hope that helps!
Thank you, CJ. I didn’t have a cup of salt so I did my best with my sea salt salt grinder. Also, my Ninja Foodie won’t do 250 F so I used the min of 300 at 23 minutes. Two months of your trial and error paid off here. This stuff is delicious. Presumably, this is why there are so many 5-star reviews.
Excellent recipe. It’s going in my favourite file.
Thank you Don! I’m so glad you enjoyed it!
Despite all the +ve reviews I was still a bit sceptical as to whether the recipe would actually work or how well. Well it was fantastic! Crispiest skin and tastiest, tenderest pork meat. And so quick and simple to do. I’ve made it twice now – once as per this recipe and once just plain. Each time the result was perfect. Thank you for sharing this recipe.
Simply delicious
Thank you Richard!
I’ve tried several crispy pork belly recipes that were also highly rated, but this one is the best by far! I love that you don’t have to marinate it for hours so don’t have to plan that far in advance. Also, the air fryer produces a much crispier skin and this recipe/method produces more flavorful meat in my opinion. Highly recommend!
Thanks Carol! I’m so glad you loved it!
This is the best pork belly dish! I use it to make a Thai crispy pork belly stir fry and it always turns out perfectly. I can cook the pork belly before guests arrive and then do the quick stir fry so I’m not slaving in the kitchen. Thank you for the recipe!
Yummy!
@therealchris.s
Best air fryer crispy pork recipe and now my goto. IG r_o_n_n_y
We bought pork belly at 99 to try this and can’t wait!!
This is my family favourite served with oiled ginger rice. The recipe is just straight forward and simple to do with my air fryer. Thank you so much. Yummy!