Pan Seared Chicken Breasts – Guaranteed Juicy! (VIDEO)
This post may contain affiliate links. Please read our disclosure policy.
This is the easiest and best way to make Pan Seared Chicken Breasts that turn out perfect every time! I have one key tip that will change how you cook juicy, tender chicken breasts at home!
Watch the Pan Seared Chicken Breasts Recipe Video!
A Note from CJ

The best way to cook Chicken Breasts FAST!
Have you ever tried to cook chicken breasts on a pan and found the chicken to be overcooked on the outside and raw on the inside? My recipe guarantees you’ll never have to deal with overcooked, raw-in-the-middle chicken breast again!
If you love chicken, make sure to try Baked Chicken Breast, Air Fryer Chicken Breast, Air Fryer Chicken Thighs, Baked Chicken Thighs or Grilled Chicken Thighs, Air Fryer Chicken Wings, or Baked Chicken Wings!
There’s nothing worse than dry, overcooked, tough chicken breasts! That will never happen again with CJ’s recipe for Perfect Pan Seared Chicken Breasts! You’ll never be disappointed!
Ingredient Tips
Refer to the recipe card for the full list of ingredients and measurements!
- chicken breast – the key tip is to slice the chicken breasts into 2 filets that are about 1/2″ thick. This allows the chicken breasts to cook quickly on the pan while avoiding being raw in the center.
- seasoning – kosher salt, black pepper, garlic powder, onion powder, dried oregano, dried thyme – feel free to add other seasoning you enjoy, like red pepper flakes, paprika, cayenne pepper, chili powder, or even brown sugar!
- neutral oil – my go to neutral oil is avocado oil. You can also use vegetable, canola, or grapeseed oil.
How to Make Pan Seared Chicken Breasts
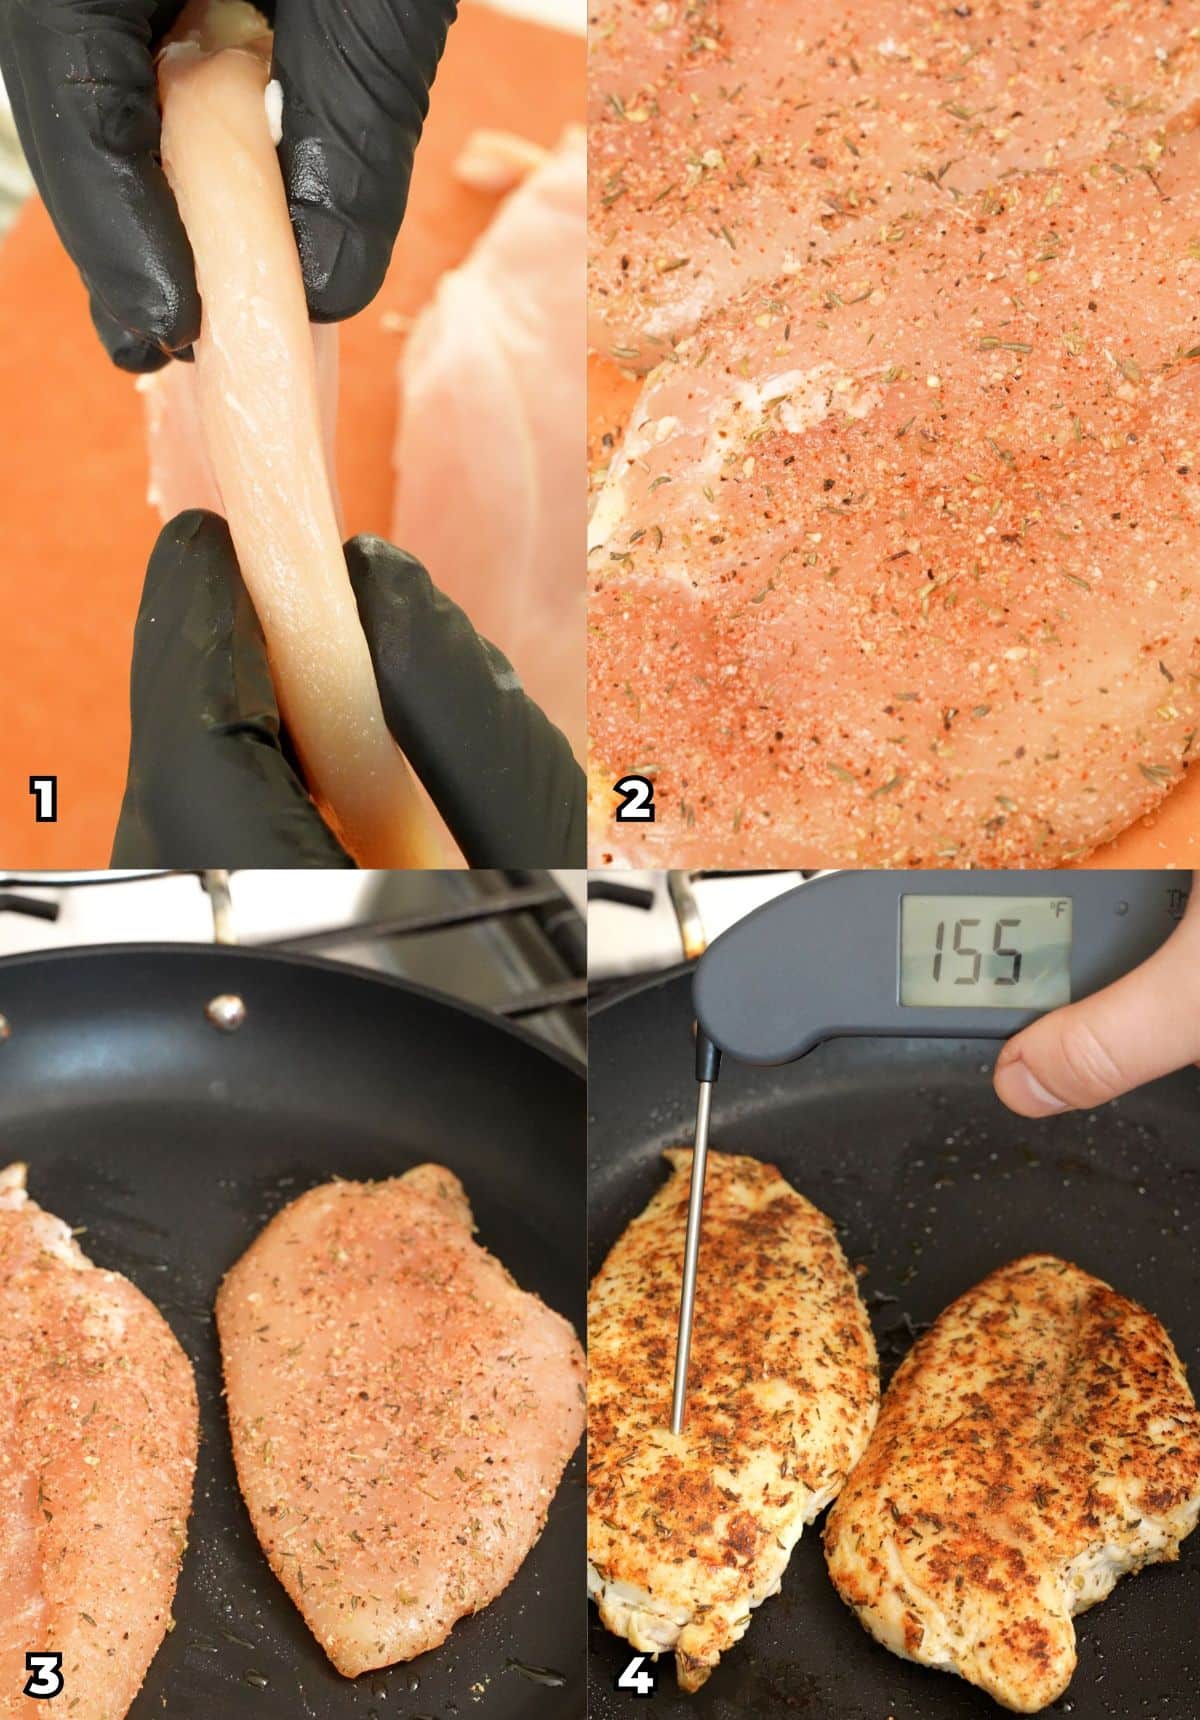
Slice the Chicken Breasts – Place the chicken breasts on a cutting board and carefully slice the chicken breasts into 2 filets about ½ inch thick (or use a meat mallet). Pat the chicken dry with a paper towel.
Season the Chicken – In a small bowl, mix together the salt, pepper, garlic powder, onion powder, dried oregano, and dried thyme. Season both sides of the chicken breast with the seasoning mix and let sit for 15 minutes. Pat dry excess moisture with a paper towel.
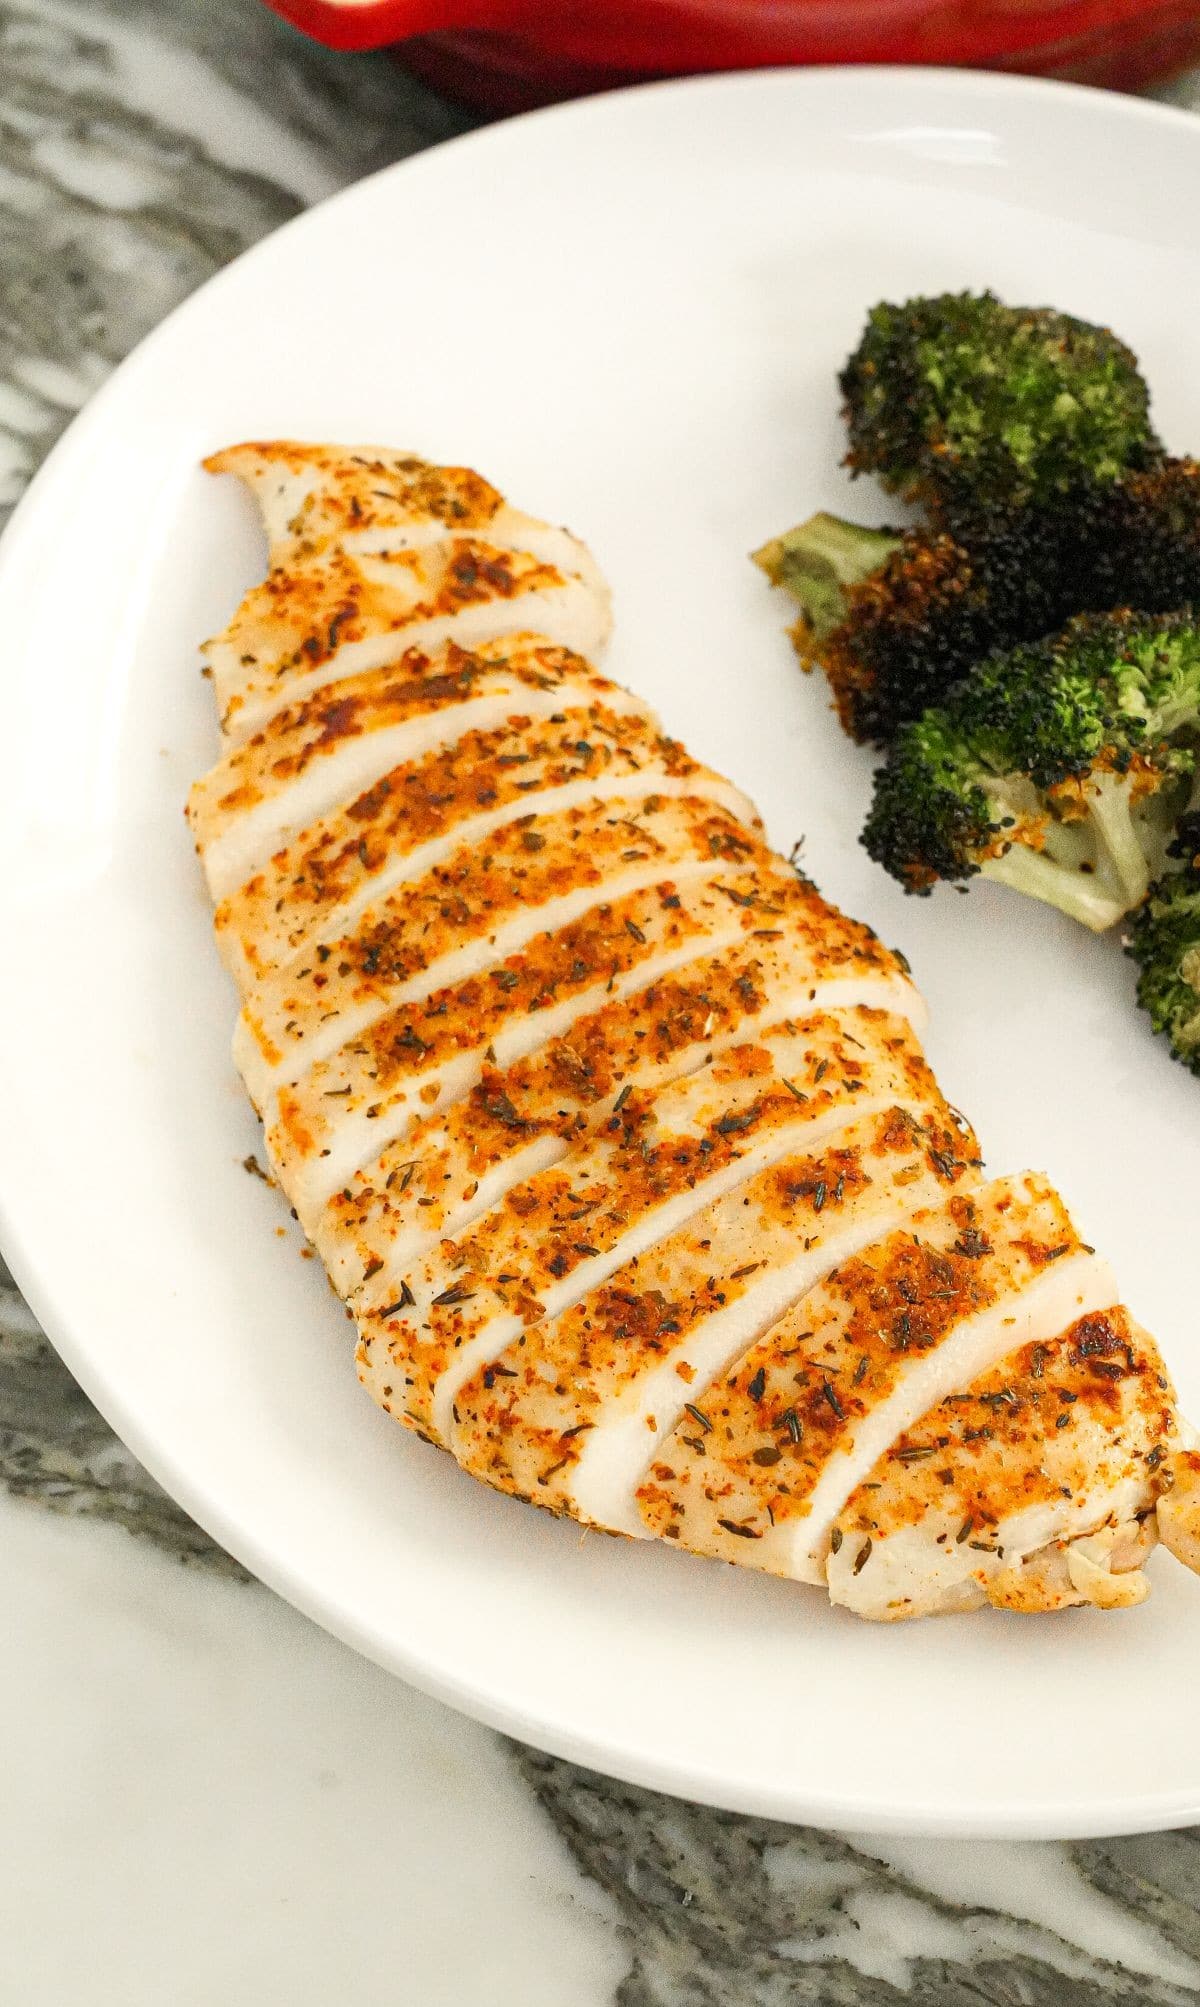
Cook the Chicken – In a large nonstick pan over medium high heat, add the neutral oil. Lay the chicken down in a single layer and sear for 3-4 minutes per side until golden brown. Flip and sear the other side and continue cooking until the internal temperature reads 155F. Remove and let rest 4-5 minutes so the carryover heat increases the temperature to 165F before slicing.
PRO TIPS
CJ’s Recipe & Storage Tips
Slice into thin filets – My secret to perfect Chicken Breasts cooked on a pan is slicing the chicken breasts into 1/2″ thick filets – this allows the chicken breasts to cook quickly on the pan while avoiding being raw in the center.
Season and let rest – Season both sides of the chicken breast with the seasoning mix and let sit for 15 minutes. This will help the chicken stay juicy and promote browning when cooked. You may notice some moisture on the chicken – pat dry excess moisture with a paper towel before searing.
Storage – Store any leftover cooked Chicken Breast in an airtight container in the refrigerator for up to 3-4 days. You can eat it cold (like on top of salads) or warm it up quickly in the microwave. This is a great recipe for meal prepping – you can make it ahead of time and keep it in the refrigerator for easy access during the week!
If you tried this Pan Seared Chicken Breasts Recipe or any other recipe on my website, please leave a 🌟 star rating and let me know how it went in the comments below!
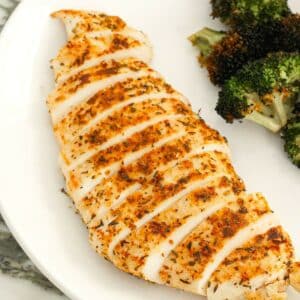
Perfect Pan Seared Chicken Breasts (VIDEO)
Equipment
Ingredients
- 1 lb chicken breast
- ½ teaspoon kosher salt
- ½ teaspoon black pepper
- 1 teaspoon garlic powder
- 1 teaspoon onion powder
- ½ teaspoon dried oregano
- ½ teaspoon dried thyme
- 2 tablespoons neutral oil
Instructions
- Place the chicken breasts on a cutting board and carefully slice the chicken breasts into 2 filets about ½ inch thick (or use a meat mallet). Pat the chicken dry with a paper towel.
- In a small bowl, mix together the salt, pepper, garlic powder, onion powder, dried oregano, and dried thyme.
- Season both sides of the chicken breast with the seasoning mix and let sit for 15 minutes. Pat dry excess moisture with a paper towel.
- In a large nonstick pan over medium high heat, add the neutral oil. Lay the chicken down in a single layer and sear for 3-4 minutes per side until golden brown. Flip and sear the other side and continue cooking until the internal temperature reads 155F. Remove and let rest 4-5 minutes and allow the carryover cooking to allow the chicken breast to hit 165F before slicing.
Video
Notes
Nutrition
Nutrition information is automatically calculated, so should only be used as an approximation.
This Pan Seared Chicken Breast recipe was originally published April 2025, and updated in November 2025.


There’s nothing worse than dry, overcooked, tough chicken breasts! That will never happen again with CJ’s recipe for Perfect Pan Seared Chicken Breasts! You’ll never be disappointed!
Thank you Suzanne!!