Crispy Pork Belly (Chinese Roast Pork Belly) (VIDEO)
This post may contain affiliate links. Please read our disclosure policy.
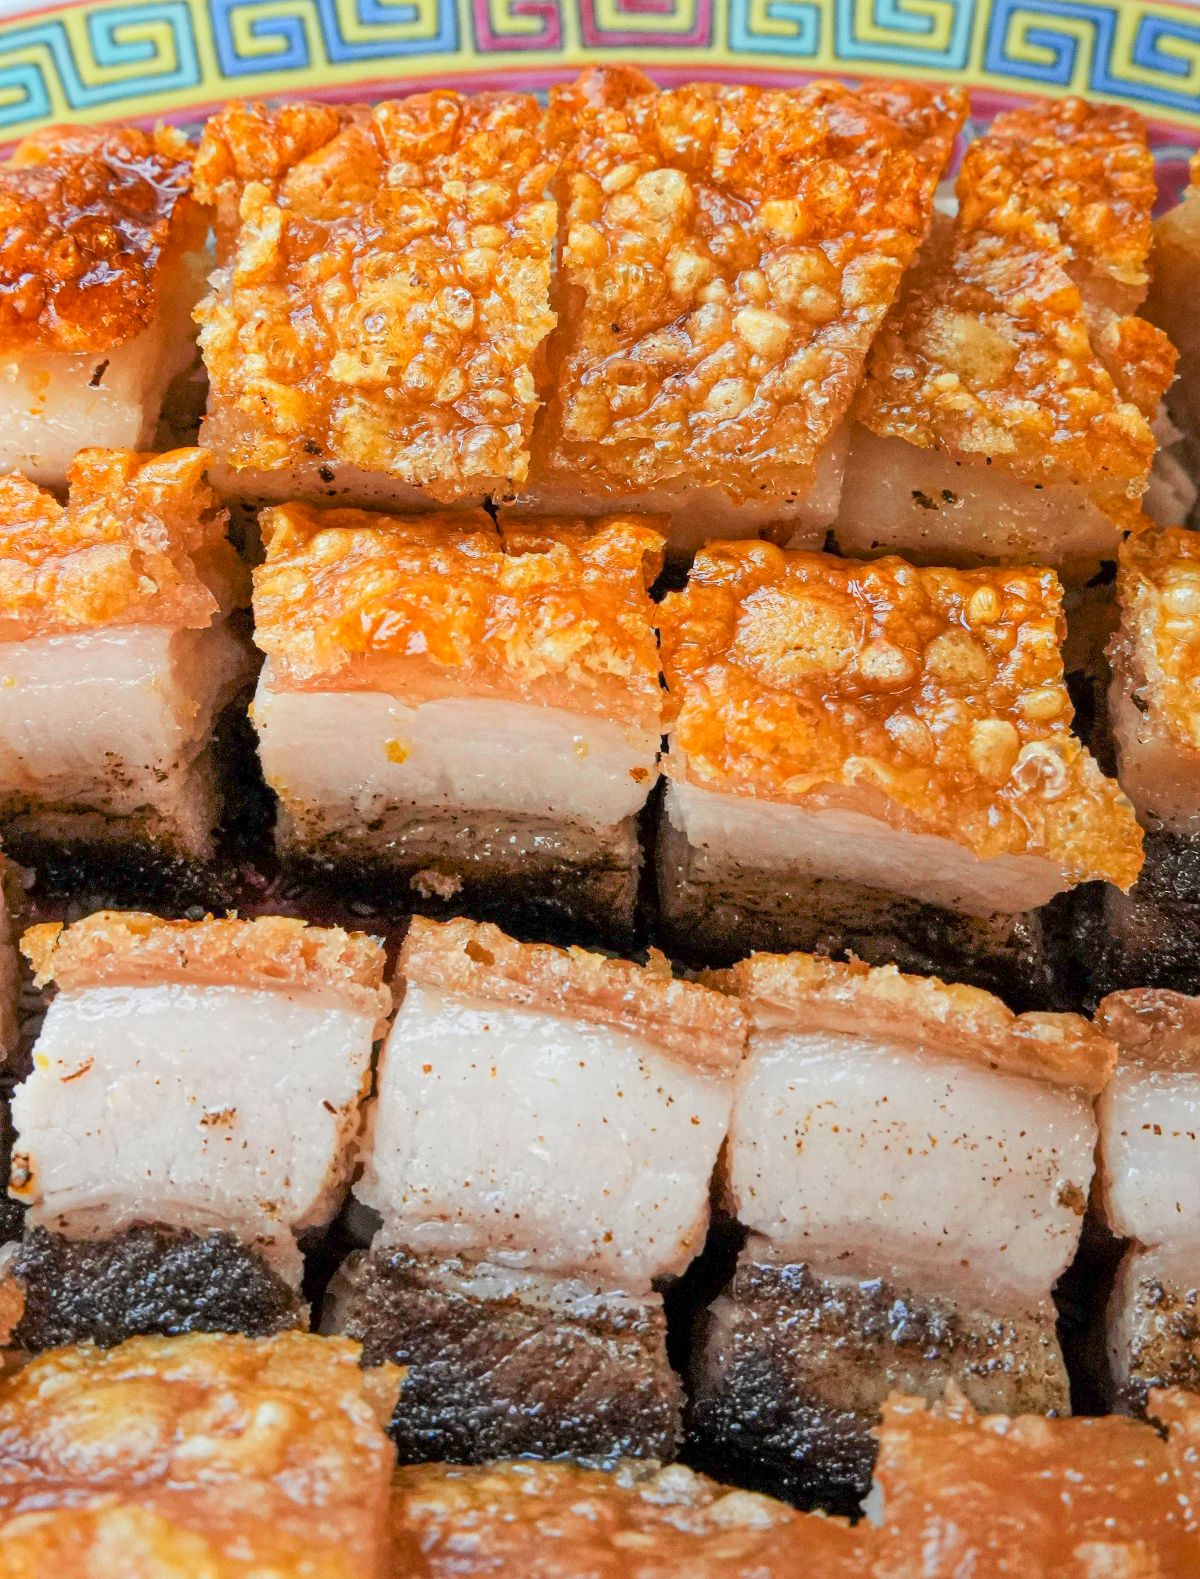
This is the juiciest Chinese Crispy Pork Belly (Siu Yuk) with the crispiest, crackling skin! Originally my grandfather’s recipe, I’ve perfected it over the years – make sure to check out my key tips and be prepared to have friends and family ask for this for every special occasion going forward!
Watch the Chinese Crispy Pork Belly (Siu Yuk) Recipe Video!
A Note from CJ
Make Crispy Chinese Roast Pork Belly at home!

Getting the perfect Crispy Pork Belly is not as hard as it looks! This is one of my most special recipes because I learned it from my grandfather (Yeh-Yeh) and I’ve fine-tuned it over the years for home cooks. (If you only have a 1 hour to make Crispy Pork Belly, make my Air Fryer Crispy Pork Belly instead!)
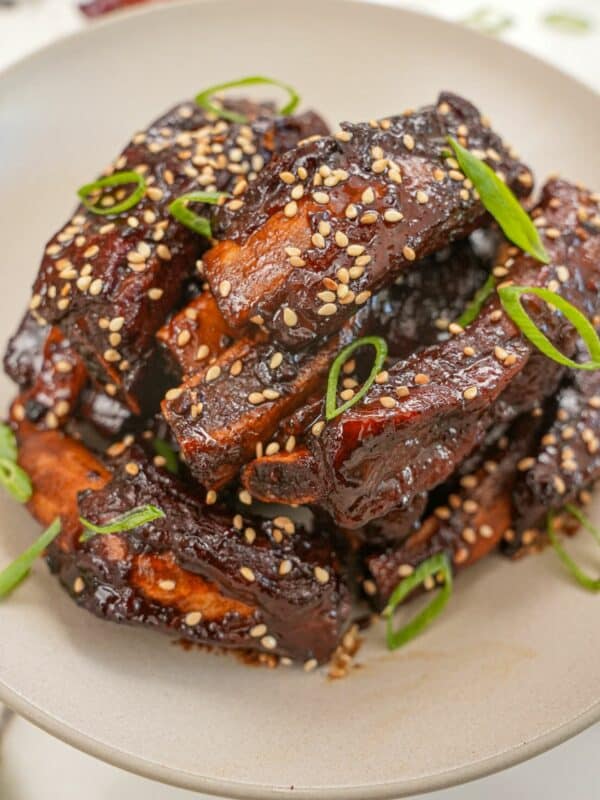
Serve it with Soy Sauce Pan Fried Noodles, Egg Fried Rice, Garlic Bok Choy or Gai Lan, and Ginger Scallion Sauce or Chili Oil!
Made this for the first time and started 48 hours before baking so skin could dry. Great recipe! I never thought I’d be able to make this, having grown up with this favourite store-bought Chinese BBQ item for dinner. Easy-to-follow instructions and tastes delicious, if not better than store bought!
Ingredient Tips
A note on ingredient substitutions – While I usually try my best to provide ingredient substitutions, for Crispy Pork Belly, I do not recommend using anything other than what I have listed. See recipe card for full list of ingredients and measurements.
- pork belly, skin-on – Go to your butcher and ask for a boneless, center cut, skin-on pork belly. (A center cut pork belly will be the most even and symmetrical piece, which should have an even proportion of skin and meat.) Ask for a piece that has a thin layer of white fat in between the meat sections. I have found that this results in the most optimal end proportion of meat to fat.
- kosher salt, white pepper, five spice powder, sugar, Shaoxing wine – this is for the seasoning paste. I do not recommend using any substitutions or omiting any ingredients.
- distilled white vinegar – Distilled white vinegar is a key ingredient! It helps soften the pork belly skin and removes any odors. (I have seen other recipes use baking soda but I prefer the results from white vinegar.)
How to Make Chinese Crispy Pork Belly (Siu Yuk)
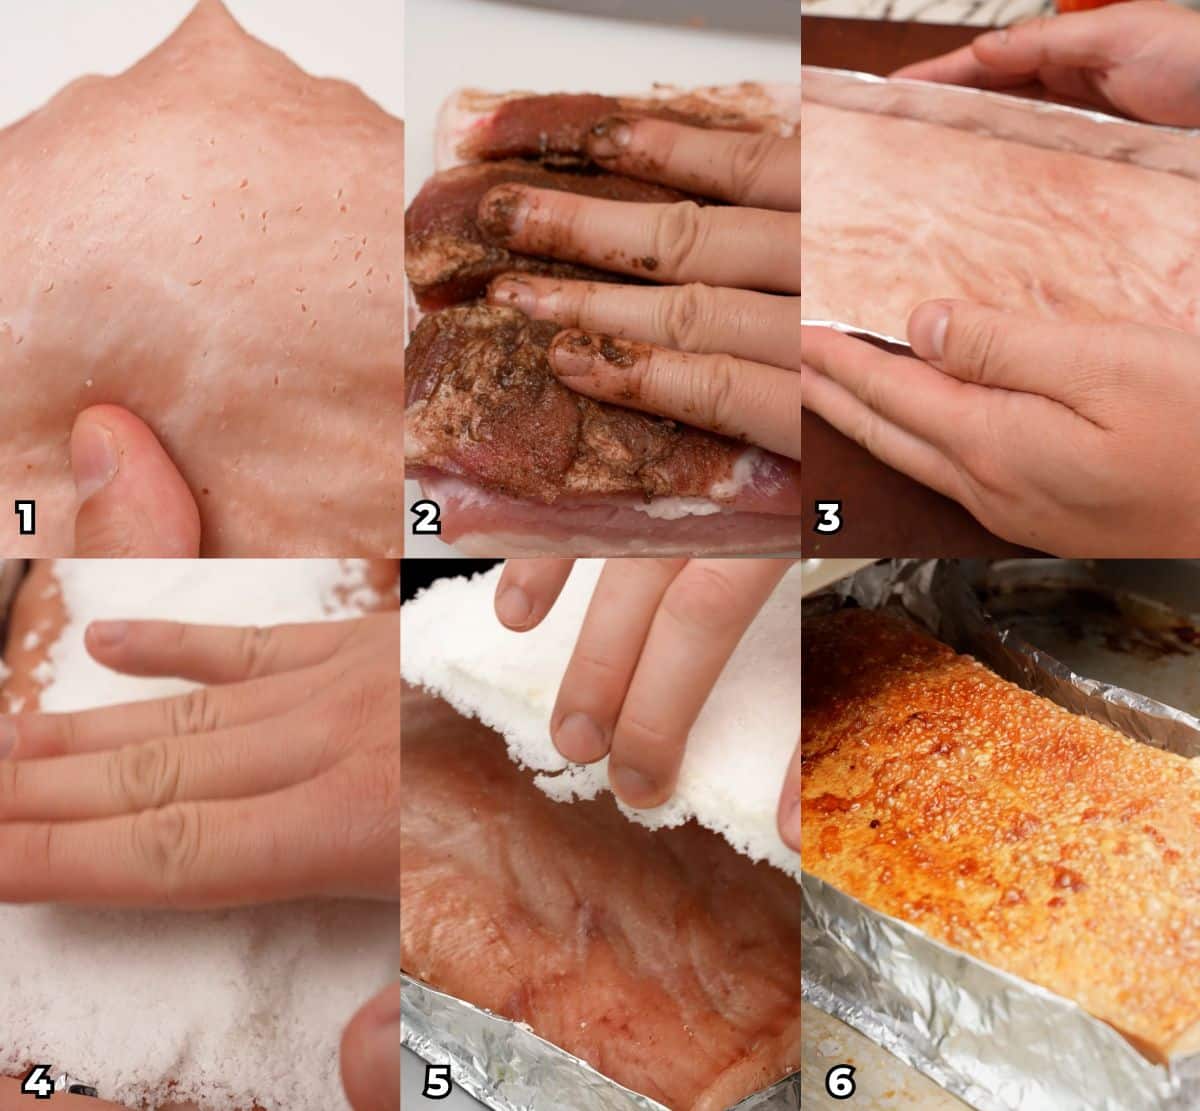
Prep The Pork Belly: To make the crispy Chinese roast pork belly, start by patting the skin completely dry, then poke small holes all over the surface, piercing only the skin and fat, not the meat. Flip the pork belly over and score the meat side with ½-inch deep cuts. Mix the seasonings and Shaoxing wine into a paste, then spread it evenly into the cuts and crevices (avoiding the skin). Set the pork belly on foil and fold it into a “boat,” leaving the skin exposed. Refrigerate uncovered for a minimum of 24 hours (48 hours is recommended) to fully dry the skin for maximum crispiness.
Roast The Pork Belly: Remove the pork belly from the fridge, and brush the dried skin with white vinegar and create a salt crust by mixing the salt and egg white. Spread it evenly onto the skin then bake at 300°F for 30 minutes, and remove the salt layer and brush off any excess. Poke additional holes into the softened skin and return the pork belly to the oven at 450°F for 30–45 minutes, or until the skin blisters and puffs into a crackly, golden crust. Watch it carefully and cover any darkening edges with foil and finish under the broiler if needed. Let your Chinese crispy pork belly rest and then cut it into sections and enjoy the shatteringly crisp skin and flavorful pork!
My Pro Tip
CJ’s Recipe Tips
24-48 hours beforehand – You must plan at least 24 hours ahead for this recipe, as drying the pork belly in the refrigerator for 24 hours (48 hours is best) is required for best results. (Drying the pork belly helps reduce moisture, which is key for a super crispy skin.) If you don’t have the time, make my Air Fryer Crispy Pork Belly instead!
Preparation tips
- Use a sharp knife or piercing tool to poke holes in the skin only – don’t poke so deep that you pierce the meat! Poking holes into the pork belly skin allows the fat to render out more easily, which will ‘fry’ the skin in the air fryer and help it puff up.
- Moisture is the enemy of crispy pork belly skin, so be thorough when patting dry the skin with paper towels. Make sure it is as dry as possible.
- The salt will help draw moisture out of the pork belly skin, which will also help the skin crisp up. 1 cup of kosher salt may look like too much but trust me – it is the appropriate amount!
Rest before slicing – Once the roast pork belly is done, make sure to let it rest before slicing (at least 5-10 minutes). Resting is a key step in cooking meat any meat, as it allows the meat’s fibers to relax and reabsorb the juices!
If you tried this Crispy Pork Belly or any other recipe on my website, please leave a 🌟 star rating and let me know how it went in the comments below!
Crispy Pork Belly (VIDEO)

Video
Ingredients
- 2.5 lb pork belly, skin-on
- 1 tbsp kosher salt
- 1/2 tbsp white pepper
- 1/2 tbsp five spice powder
- 1/2 tbsp sugar
- 1 tbsp shaoxing wine, plus 2 tsp as needed to form a paste
- 1 cup kosher salt
- 1 egg white, beaten
- 1 tbsp white vinegar
Instructions
- Pat your skin on pork belly dry and poke holes all across the skin of the pork. Ensure that the holes only puncture the skin and do not go all the way through the meat.
- To the meat side, use a knife to make 1/2" cuts lengthwise across the pork belly. In a small bowl, combine salt, white pepper, five spice powder, sugar, and shaoxing wine to make a paste. Evenly spread the paste on the meat side of the pork and crevices ensuring not to touch the skin.
- Place the punctured and marinated pork on a piece of foil and create a foil boat wrapping the pork, leaving the skin exposed. Place in the fridge for 24 hours (48 hours for best results) to help the skin further dry out.
- Once the skin is dry, mix together salt and a beaten egg white. Brush the skin with a layer of white vinegar, then evenly layer the salt/egg mixture directly on the skin.
- Bake at 300F for 30 minutes, then remove the salt from the skin and brush off any excess salt. At this point the skin should be softened. Poke more holes throughout the skin.
- Bake at 450F for 30-45 minutes or until the skin has puffed up. If any edges are starting to burn, place a small piece of foil to cover to get the skin as evenly crisp as possible. If needed, place pork under broiler for a few minutes to speed up the blistering process (watch carefully to ensure skin does not burn). Enjoy!
Notes
- Use a sharp knife or piercing tool to poke holes in the skin only – don’t poke so deep that you pierce the meat! Poking holes into the pork belly skin allows the fat to render out more easily, which will ‘fry’ the skin in the air fryer and help it puff up.
- Moisture is the enemy of crispy pork belly skin, so be thorough when patting dry the skin with paper towels. Make sure it is as dry as possible.
- The salt will help draw moisture out of the pork belly skin, which will also help the skin crisp up. 1 cup of kosher salt may look like too much but trust me – it is the appropriate amount!
Nutrition
Nutrition information is automatically calculated, so should only be used as an approximation.
This Crispy Pork Belly recipe was originally published in January 2021, and updated in January 2023, and November 2025.


Hi! I followed all your instructions to the T including letting the pork belly dry out in the fridge for 48 hrs, I did the vinegar step before the salt rub, etc and while the pork tasted delicious and got very crispy I found the skin still very tough and even hard to cut through. Is it supposed to turn out like that? Should I have not gone for 48 hrs in the fridge? Any thoughts would be appreciated. Thank you!
Hi Lauren! Sorry to hear the skin was tough. In my experience, that means that the holes were not deep enough for the fat to bubble up during baking OR there was not enough fat underneath the skin to begin with. Essentially the dried skin is crisped up by the rendered fat beneath which makes the skin blister and puff up. I hope you can give it another try with better results!
I’ve seen some recipes mention boiling the meat for 5 minutes to “remove impurities” (I assume to get rid of that pork smell?). I’m just not sure whether or not I should try it as sometimes there is that signature pork smell after the meat is cooked. Thoughts?
Thanks!
Hi Bob – thanks for the question! You can do this is if you prefer, but I find that the vinegar that’s added to the pork skin helps mitigate any odors that often times come from the skin. If you do boil, just be sure that the pork is completely dry before moving onto the subsequent steps! Enjoy!
Made this according to the instruction and it turned out perfectly. Everyone loved it! Delicious, flavourful and tender!! Will cut back on the salt but I will make it again.
I made this with Aldi pork belly. Def less meat than other places. I had about 2.2 lbs and followed the directions exactly except I used Chardonnay because I didn’t have the right wine. I would say if you have less than 2.5lbs, the salt in the marinade is gonna be too much. May seem obvious but, just saying, I would have scaled back the marinade salt by half. I also would have cooked it at a lower temp for longer. Probably an additional 10 to 15 minutes. I cooked it at 450 for around 40 minutes and the tip wasn’t crispy and the meat wasn’t tender. I poured off the excess grease, which was significant, and put it back in on broil for about 2 minutes on high. The skin did crisp but as I said, I really should have scaled back the salt on the marinade as it was salty! Base recipe is good, great even but, I would make my tweets when doing again.
This recipe is our go to for crispy pork belly! It comes out with crispy skin.
Incredibly crispy and tasty!
IG: pastor.danielseo
Bought pork belly and will be trying this!
Love this recipe!!
Love this recipe! We always pair it with jasmine rice, fried sunny side egg and bok choy (or fresh green beans). Everything is then topped off with some scallions and served with a sauce. Its our guilty pleasure!!
Loved this recipe!
Parker.jung@gmail.com
@parkerkjung