Crispy Baked Chicken Wings – So Easy! (VIDEO)
This post may contain affiliate links. Please read our disclosure policy.
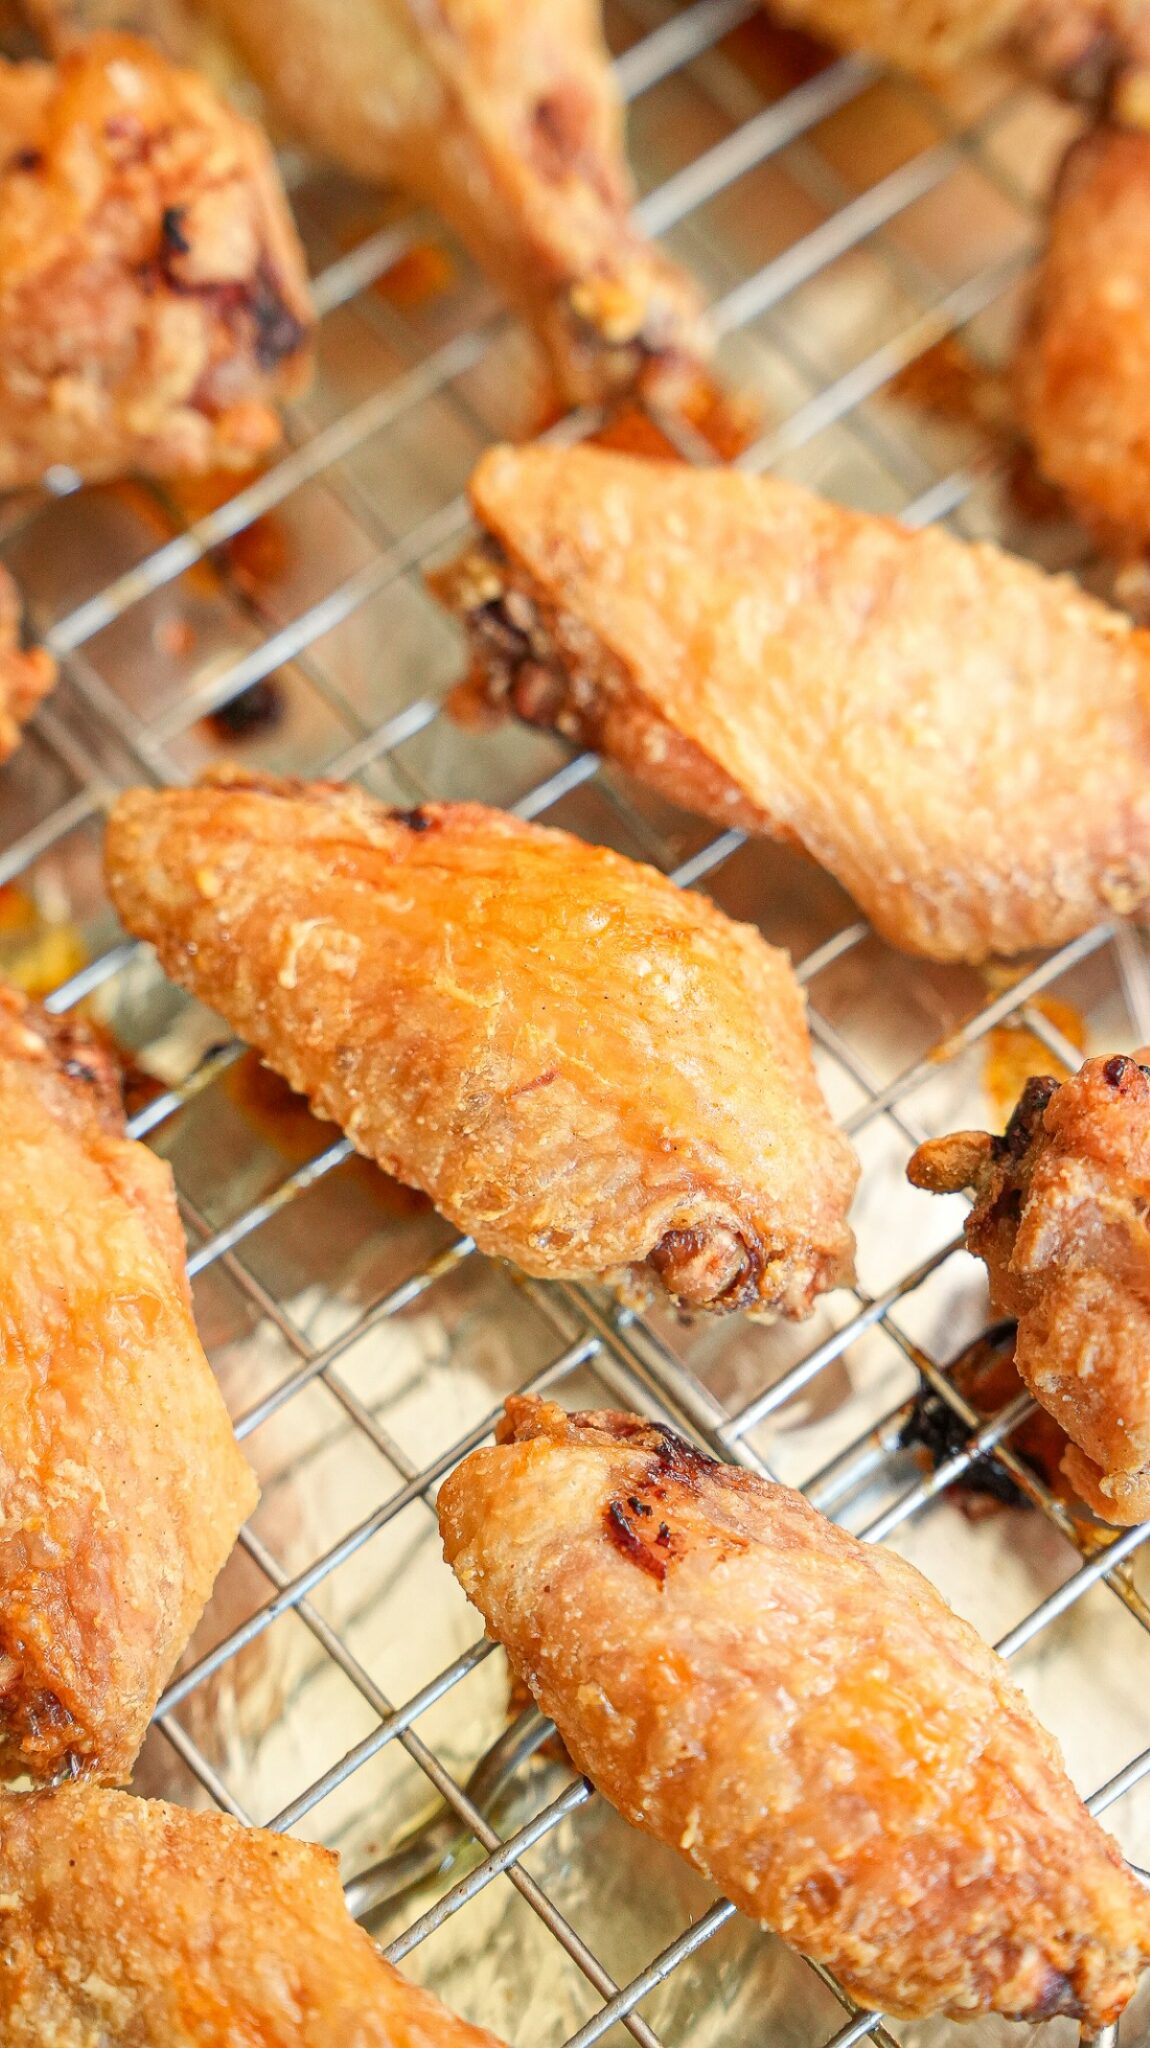
You’ll never need to deep fry chicken wings again after you make these super crispy Baked Chicken Wings! They’re so easy to make – you only need 5 ingredients and 5 minutes to prep before you slide them in the oven!
Watch the Baked Chicken Wings Recipe Video!
A Note from CJ
These are the Best Baked Chicken Wings!

Don’t believe me? Even Eater.com declared these the best chicken wings recipe on the internet! I love this method because it only takes 5 minutes of prep before you put them in the oven – it’s so easy, all thanks to my secret ingredient (hint: baking powder!)
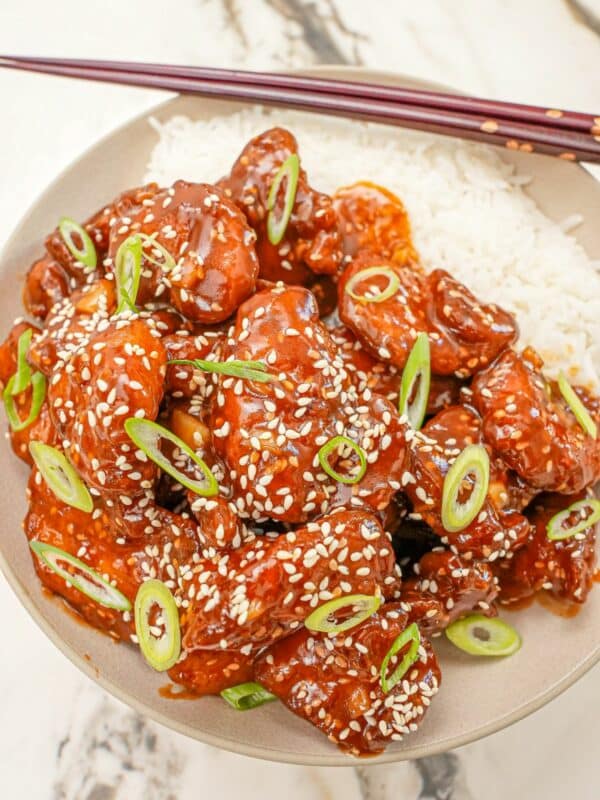
If you love wings, try my Air Fryer Chicken Wings, Grilled Chicken Wings, Korean Gochujang Honey Wings, classic Buffalo Wings (or Air Fryer Buffalo Wings)! Don’t forget to pair with my Homemade Ranch, Raising Cane’s Sauce, Popeye’s Blackened Ranch, Chick-Fil-A Sauce, Honey Mustard, or Barbecue Sauce!
WOW — these wings are FREAKIN’ AMAZING! Not only were they insanely crispy (that baking powder trick is genius), but they were so easy to make. Just a few ingredients, minimal prep, and the oven does the work — yet they taste like something you’d get at a top-notch wing spot.
Ingredient Tips
Refer to the recipe card for the full list of ingredients and measurements!
- chicken wings – Try to use wings of similar sizes, as this will help ensure your wings bake evenly. cut into drums and wings.
- baking powder – This is my secret ingredient to the crispiest Baked Chicken Wings! Baking powder does 2 things – 1. it draws moisture (which evaporates) to the surface of the skin, leading to a crispier skin, and 2. it increases the pH levels of the skin by breaking down the proteins, which helps the skin crisp up and brown evenly when baked!
- white pepper – I recommend using white pepper over black pepper because I personally find that the finer grind of white pepper works better in the seasoning. You can substitute with black pepper if you prefer.
- neutral oil – My go to neutral oil is avocado oil but you can also use canola or vegetable oil.
How to make Crispy Baked Chicken Wings
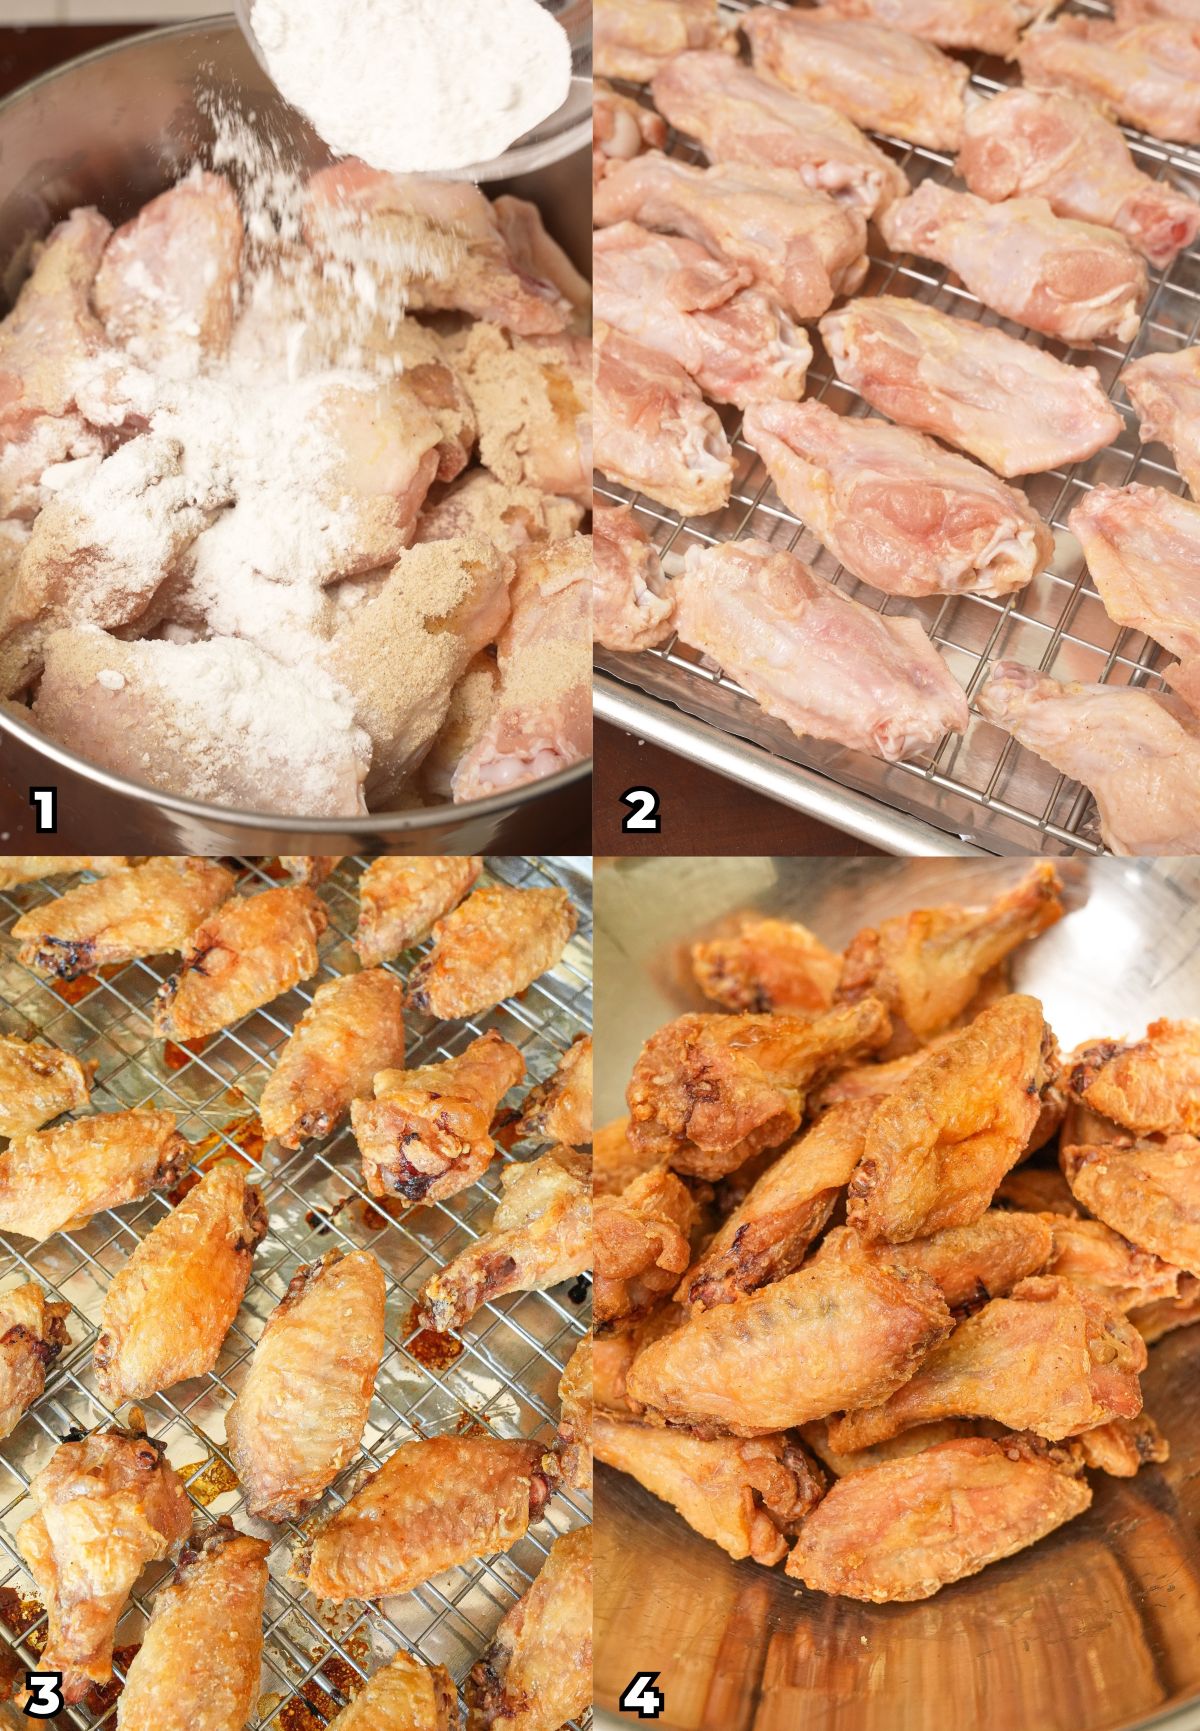
Season And Prep the Chicken Wings – Pat the chicken wings completely dry with paper towels. Add the dried chicken wings into a large mixing bowl and the neutral oil. In a small bowl, mix kosher salt, ground white pepper, and baking powder. Season the wings with half of the seasonings, mix, then add the rest of the seasonings and mix to ensure each wing is evenly coated. Line the wings on a wire rack lined baking sheet ensuring there is space between each wing.
Bake the Chicken Wings – Bake at 450°F for 30 minutes (use convection if possible). Remove the wings from the oven and flip them so the bottom side can be exposed to more heat and help crisp up. Flip and bake for another 20-25 minutes, or until the skin is crispy and golden brown. Eat them dry or toss in your favorite sauce and enjoy!
PRO TIPS
CJ’s Recipe & Storage Tips
Dry chicken wings is my key tip to the best Baked Chicken Wings. Make sure to pat dry the chicken wings so they are completely dry – this will help the seasoning stick better and the skin will also crisp up more when baked!
If your oven has the convection setting, I highly recommend using it – the convection setting will help promote more air flow in the oven, which will allow the skin of the wings to get extra crispy.
Cooking Time – The cooking time may vary for the wings depending on their size – see notes in recipe card for more details. Use a thermometer probe to make sure the internal temp reads at least 165F to ensure doneness.
Storage and Reheating – Store any leftover chicken wings in an airtight container in the refrigerator for up to 3-4 days. They will soften as they sit in the refrigerator. Reheat them in the 375F for 7-8 minutes or until crispy.
If you tried this Baked Chicken Wings Recipe or any other recipe on my website, please leave a 🌟 star rating and let me know how it went in the comments below!
Baked Chicken Wings (SUPER CRISPY)

Video
Ingredients
- 3 lbs chicken wings, drummettes and flats separated, avoid small wings
- 2 tbsp baking powder
- 2 tsp kosher salt
- 1 1/2 tsp white pepper
- 2 tsp neutral oil
Instructions
- Pat chicken wings completely dry and add the wings to a large bowl. Add the neutral oil to the wings. In a small bowl, mix kosher salt, ground white pepper and baking powder until combined. Pour half of the seasoning over the wings, mix, then add the rest of the seasonings to ensure all wings are evenly coated.
- Take a large baking sheet and line it with foil. Place a wire rack on top of the baking sheet and lay the wings on the wire rack with space between each wing so they are not touching each other.
- Bake at 450F for 30 minutes (use convection if possible). Flip and bake for another 20-25 minutes until the skin is crispy.
- Toss in your favorite sauce or eat plain and enjoy!
Notes
- Use similarly sized chicken wings to ensure they cook evenly – using varying sizes may result in over or under cooked Baked Chicken Wings.
- If you are using frozen wings, I recommend defrosting them first, then patting dry before seasoning. I do not suggest cooking the wings straight from the freezer.
- Pat dry the chicken wings before seasoning. Drying the chicken wings helps the seasoning stick better to the chicken skin. Dry chicken wings also crisp up better when cooked!
- Small wings (12+ wings per pound): Bake for 30 minutes, then flip and bake for an additional 15 mintues
- Medium wings (10 wings per pound): Bake for 30 minutes, then flip and bake for an additional 20 mintues
- Large wings (8 wings per pound): Bake for 30 minutes, then flip and bake for an additional 25 mintues
Nutrition
Nutrition information is automatically calculated, so should only be used as an approximation.
This Crispy Baked Chicken Wings recipe was originally published in August 2024, and updated in November 2025.


I followed the recipe but I was using a normal oven and omg 10/10 I made an Asian zing sauce for the wings and they still stayed crispy. I never write reviews but this was truly a gem. TYSM
I just put my 5th batch of these delicious wings in the oven & I know they’ll turn out the same as the other 4 batches…so easy and consistently delicious!! I’ll never make wings any other way!❤️👍
Thanks so much, Claudia!
I have made this recipe a couple of times now and my wings come out perfect every time. It’s easy to prepare and the wings are crispy without the frying. I have made them on the regular oven baking setting and on convection and I recommend convection for sure. Although I do reduce the cooking temperature to 425 (on convection).
I really appreciate your recipe and so do my kids.
Thank you so much for the kind review, Debra!
I tried thus recipe today. The wings are crispy and delicious! I appreciate the explanations and additional tips. My family enjoyed the wings. Thanks for sharing this recipe.
Thank you Lisa!
Wings were so crispy!!!! Thanks Chris!
Thanks for the great review, Susan!
Skeptical at first, but wow, turned out great! VERY easy recipe with minimal mess in the kitchen, including the oven. Cutting the wings up was the hardest part of the recipe (hands got so darned cold!), but I did it! The only thing that I did different was to leave them in the oven for another 15 minutes after turning it off. Helped to crisp them up even more. This will be my “go to” recipe for baking wings going forward. Wonder if this will work on thighs as well?
You did that, Susan! Thanks so much for your great review! I’m glad this will be your new go to recipe for baked chicken wings!
Delicious. Must say I put wings on rack in fridge for a few hours to dry. Also cooked on low for 25 min on lower shelf ( 250 F.) Then cooked on high on top shelf. The slow cook really seemed to melt fat. Both recipes good
Thanks Jennifer! Appreciate the great review!
Just made these and they are killer!! Crispy as the video and delicious. I added smoked paprika in the seasoning.
I’m so glad you loved them, Patty!
Made these for the Super Bowl and they were a big hit! I doubled the recipe and found the salt level good (kosher salt), a bit heavy on the pepper, but that’s what gives them their nice kick, even without the hot sauce. Also nice that they are gluten free for those who need that. I will definitely make them again.
Served these for the Super Bowl. I didn’t want to cook 5 different flavor of wings so I used this recipe and had five different dipping sauces. It couldn’t have gone better. Even a few who are not normally big chicken wing fans ate a good amount of them.
I look forward to trying some of your other recipes.
Thank you Cherrilyn! I’m so glad everyone loved them!