Chicken Katsu (Super Crispy!) – VIDEO
This post may contain affiliate links. Please read our disclosure policy.
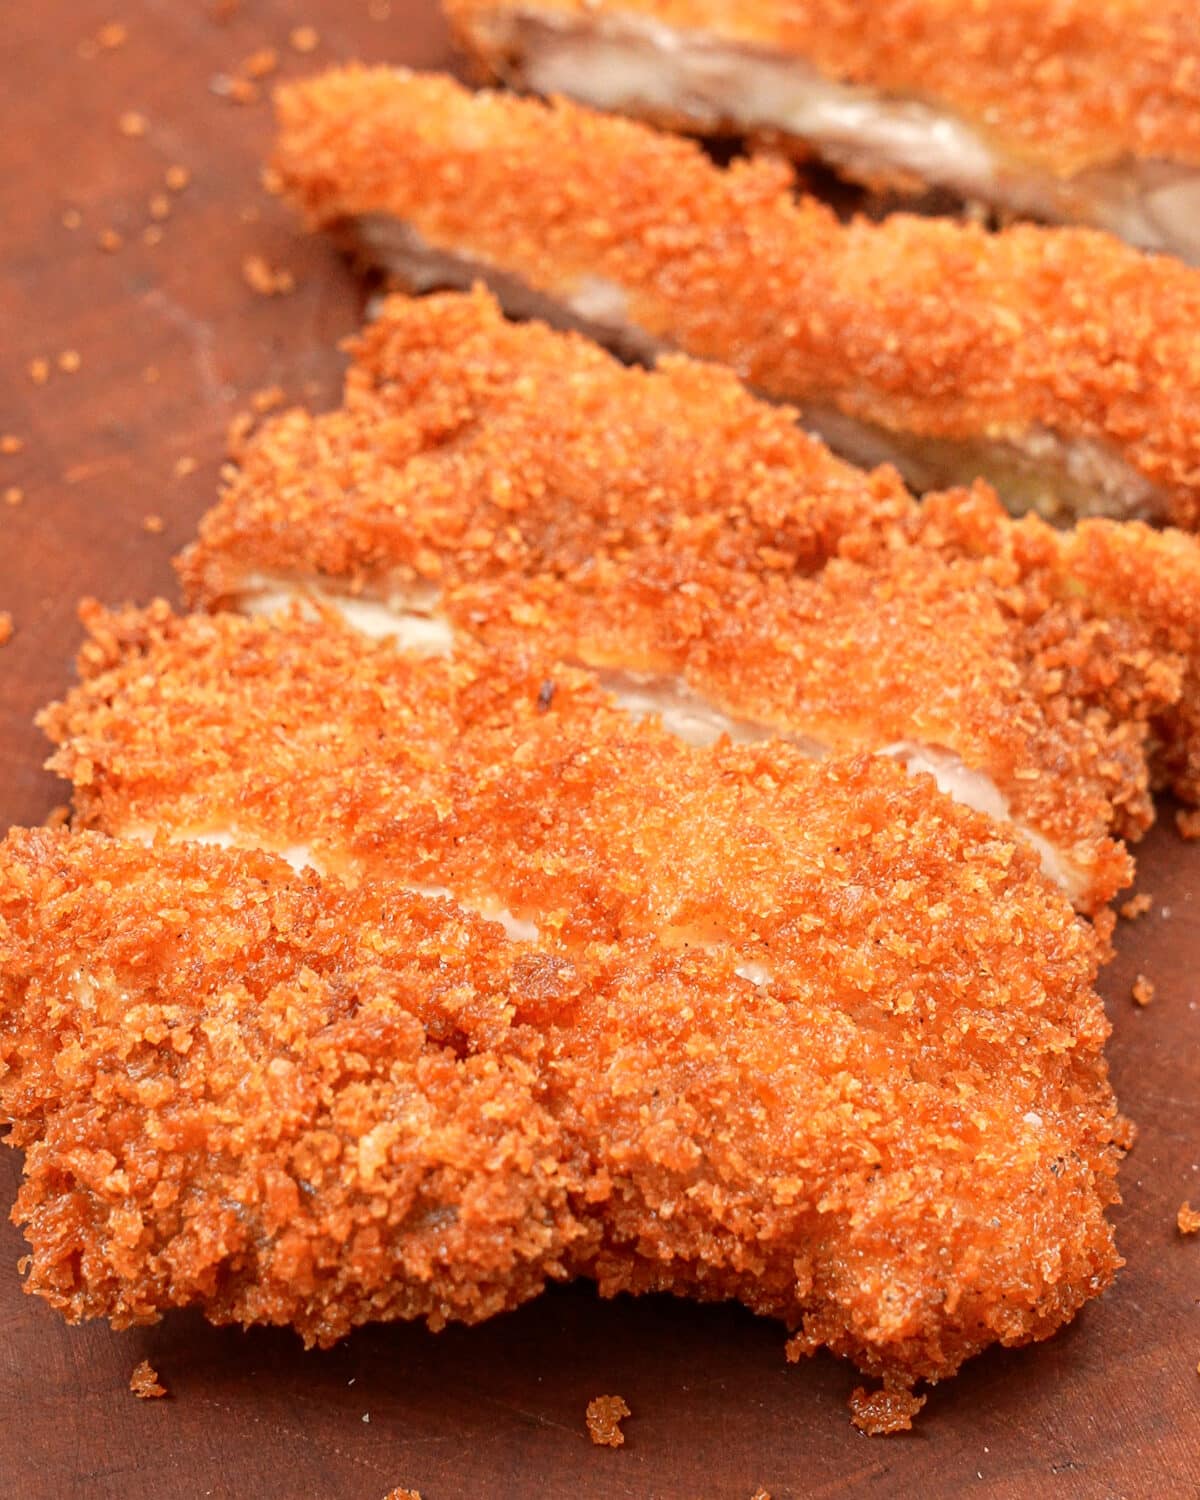
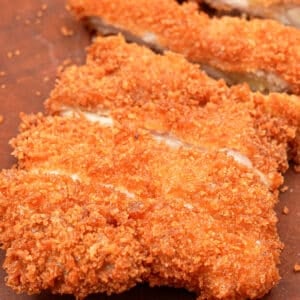
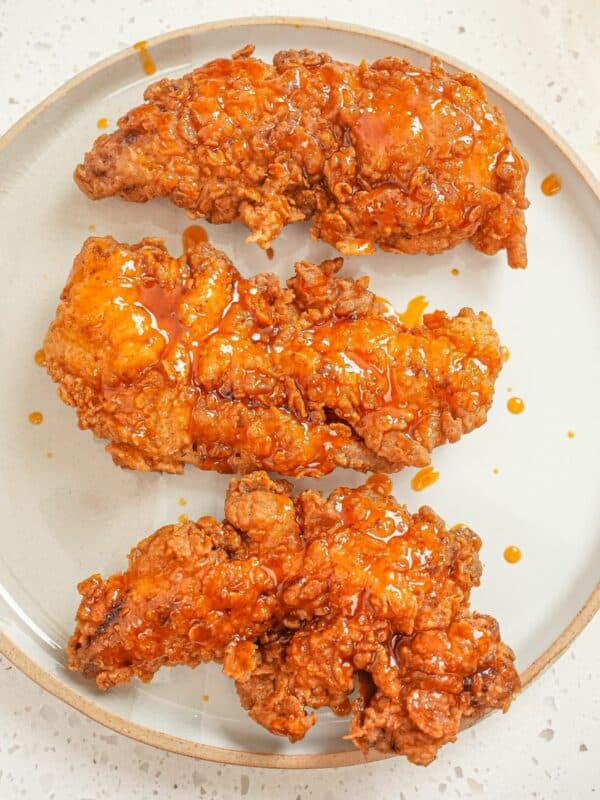
This crispy, homemade Chicken Katsu is unbelievably crispy on the outside from the panko breading and so juicy on the inside! Learn how to make it at home and serve it with homemade Tonkatsu Sauce!
Watch the Chicken Katsu Recipe Video!
A Note from CJ
Chicken Katsu just as good as the restaurants!

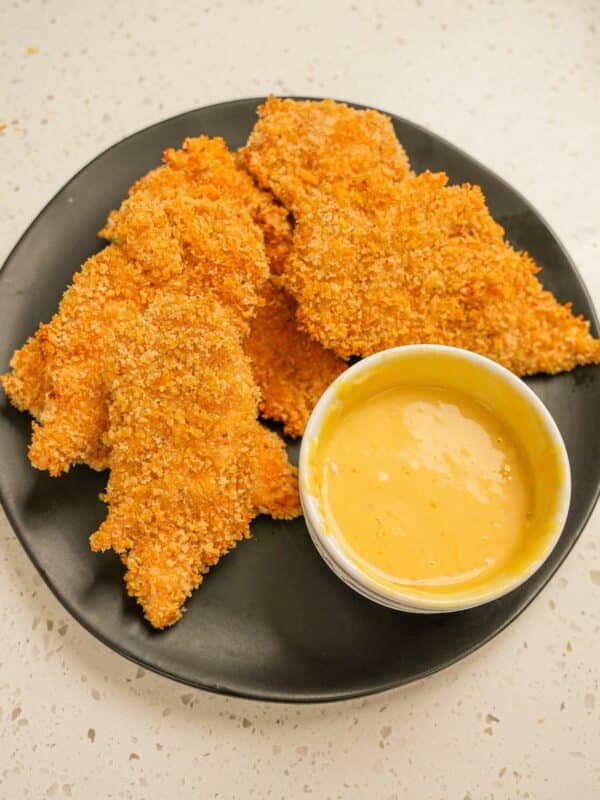
Chicken Katsu (or Pork Katsu) is one of those dishes that I always have to order when I see it on the menu! In Hawaii, it’s served as part of a ‘plate lunch’, with Mochiko Chicken, white rice and homemade Hawaiian Macaroni Salad. In Japan, it’s oftentimes served as Chicken Katsu Curry. I love it so much I developed this recipe so I could keep making it at home! (If you don’t want to deep fry, try my Air Fryer Chicken Katsu instead!)
This is the only way I make katsu now! All the flavor and texture notes hit high. An excellent recipe made easier with the skipped step of the flour dredge.
Ingredient Tips
Refer to the recipe card for the full list of ingredients and measurements!
- chicken thighs – I recommend using boneless and skinless chicken thigh, pounded to roughly 1/2″ thickness. Pounding the meat to similar thickness ensures that your chicken will cook evenly! If you have bone-in/skin-on chicken thighs, remove the bone and skin before cooking. If you want to use chicken breast, keep an eye on the cooking time as chicken breast dries out faster.
- panko breadcrumbs – this is a KEY ingredient for this recipe and I do not recommend substituting panko breadcrumbs – the dryer and flakier consistency of panko breadcrumbs allows less oil absorption when deep frying, resulting in a light and crispy Chicken Katsu.
- neutral oil for frying – My go-to neutral oil is avocado oil. You can also use canola or vegetable oil. I do NOT recommend olive oil.
How to Make Chicken Katsu
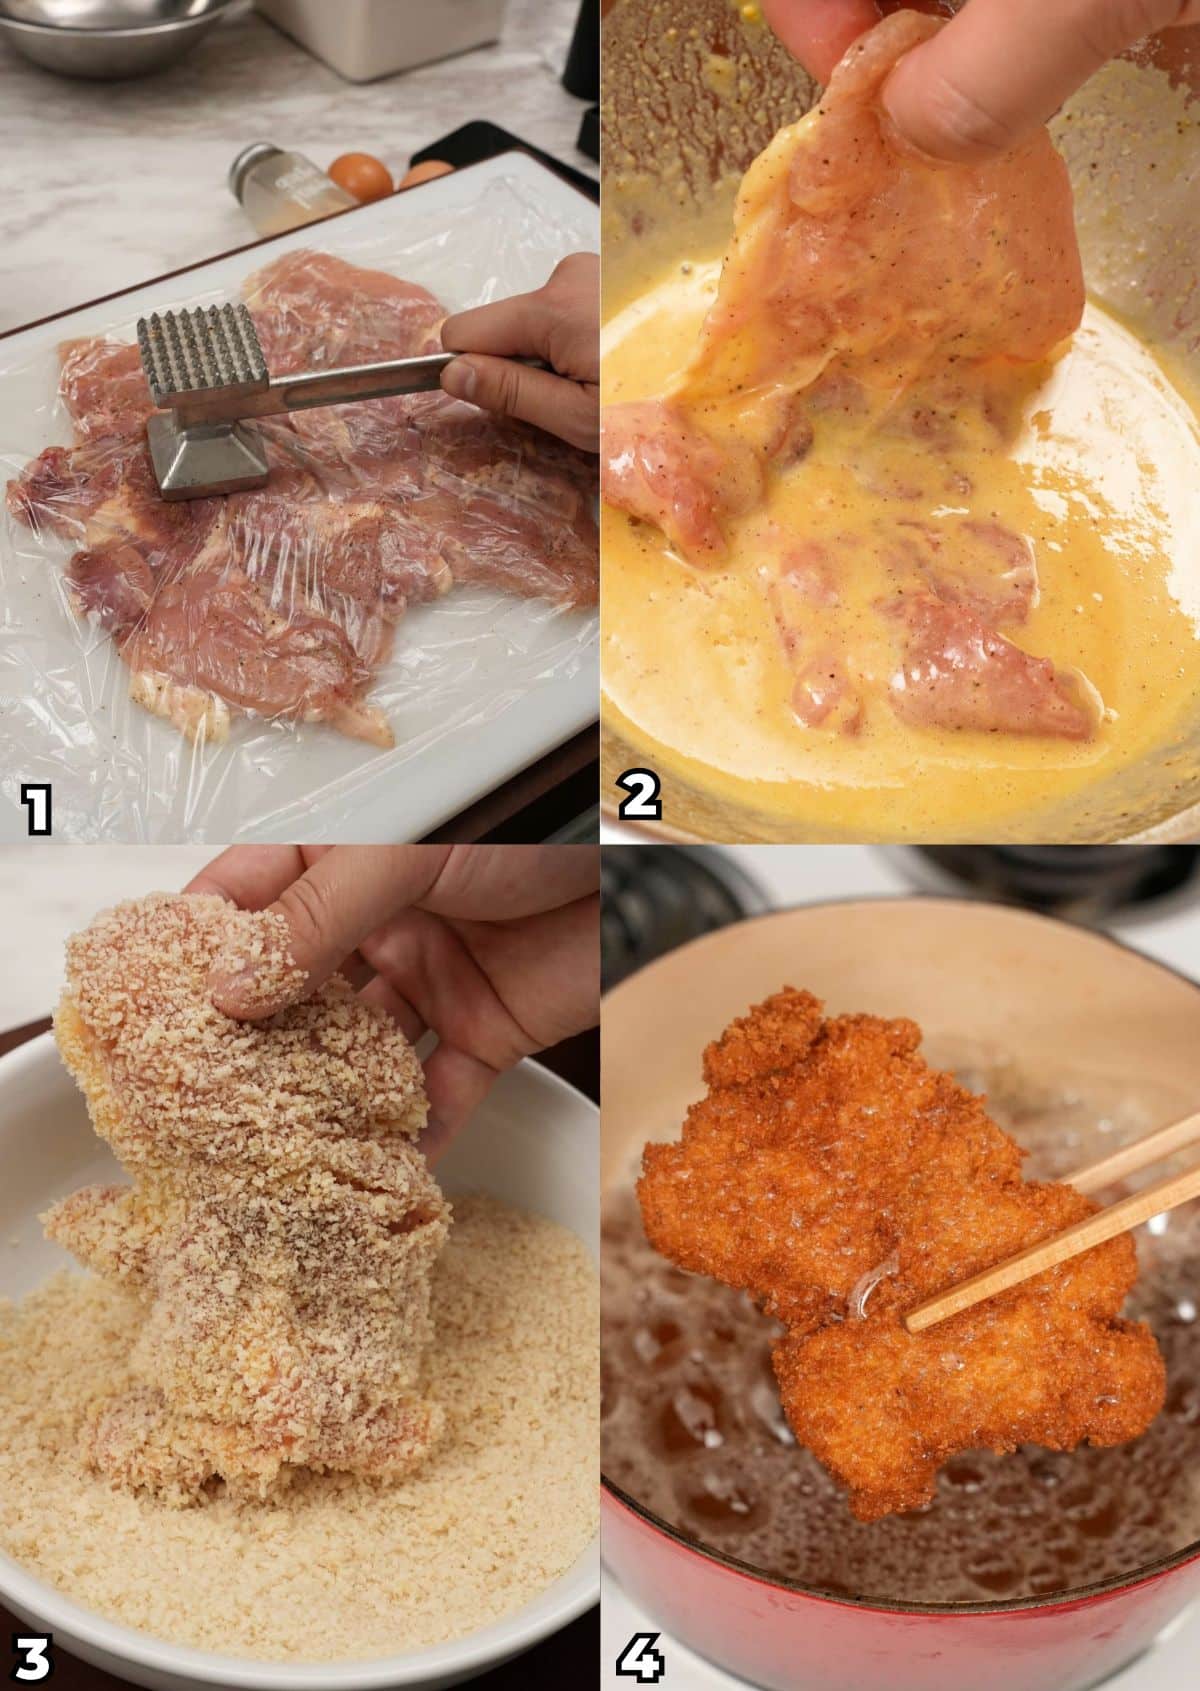
Prepare the chicken and wet batter – Pound the chicken to 1/2″ thick and season both sides with salt and pepper. In a bowl, mix together the egg, flour, salt, pepper, and garlic powder to form a wet batter. The consistency should be slightly looser than pancake batter (add water if needed).
Bread and fry the chicken katsu – Dredge the chicken completely in the wet batter and let any excess drip off. Transfer the chicken into the panko breadcrumbs and coat well, making sure there are no bald spots. Fry the chicken in 350°F oil for 4-6 minutes or until the chicken reaches 165°F. Once the chicken katsu is done, let rest on a wire rack until cool.
PRO TipS
CJ’s Expert Tips + Storage
Pound the Chicken Evenly: Use a meat mallet or rolling pin to pound the chicken thighs to an even thickness about 1/2″ thick. This will ensure that the Chicken Katsu cooks evenly and is tender throughout.
Monitor the Oil Temperature – Use a thermometer to monitor your oil temperature! If you are frying multiple pieces at one time, you may notice that your oil temperature is lower than 350°F (180°C) . If your temperature drops to below 325°F (160°C), it means you are overcrowding the pan and frying too many pieces at one time. Take a couple pieces out in order to allow the oil to come back to temperature. If your oil is too high, reduce your heat and wait for the temperature to come down before continuing.
Storage and Reheating – You can store any cooked chicken katsu in an air tight container for up to 3 days in the refrigerator. To reheat the katsu, I prefer the air fryer – reheat the chicken for 8-10 minutes at 350°F or in the oven at 400° for 15 minutes. The exterior should be crispy while keeping the inside juicy!
If you tried this Chicken Katsu or any other recipe on my website, please leave a 🌟 star rating and let me know how it went in the 📝 comments below!
Chicken Katsu (Video)
Video
Ingredients
- 1 lb chicken thigh, boneless, skinless pounded to 1/2" thick
- 2 eggs
- 3 tbsp all-purpose flour
- 1/2 tsp kosher salt
- 1/2 tsp black pepper
- 1 tsp garlic powder
- 2 cups panko breadcrumbs
- 2 quarts neutral oil, for frying
Instructions
- Pound chicken to 1/2" thickness and season both sides with salt and pepper.
- Mix together egg, flour, salt, pepper, and garlic powder to form a wet batter. The consistency should be slightly looser than pancake batter.
- Dredge chicken completely in the egg mixture and let any excess drip off. Transfer chicken into panko breadcrumbs and coat well, making sure there are no bald spots.
- In a large heavy bottom pot, heat the oil over medium high heat to 350F. Fry at 350°F for 4-6 minutes or until the chicken reaches 165°F. Set aside on a wire rack to cool. Serve with rice and mac salad and enjoy!
Notes
- Fry the Chicken Katsu in oil that has been heated to 350°F (180°C) for the best results. This will ensure that the Chicken Katsu cooks quickly and evenly without becoming too oily.
- Use a thermometer to monitor your oil temperature!
- If you are frying multiple pieces at one time, you may notice that your oil temperature is lower than 350°F (180°C) . If your temperature drops to below 325°F (160°C), it means you are overcrowding the pan and frying too many pieces at one time. Take a couple pieces out in order to allow the oil to come back to temperature.
- If your oil is too high, reduce your heat and wait for the temperature to come down before continuing.
- Once the Chicken Katsu is fried, place it on a wire rack to drain excess oil. This will help to keep the Chicken Katsu crispy.
Nutrition
Nutrition information is automatically calculated, so should only be used as an approximation.


Love this recipe!! After living in Hawaii and South Korea, my family and I love chicken katsu. I followed the recipe exactly, but I did you thinly sliced chicken breasts instead of the thighs. Still came out tasty and juicy! It’s become a family favorite!
Thank you so much, Jaime!
Hi CJ, tried the recipe and it was so good. Thanks for sharing the recipe!👍😊
I’ve made this twice already and this recipe is so great! Not only does it taste better than some restaurants, but it freezes very well (I just separated each piece between paper towels in a freezer-safe bag after cooling completely). I reheated them in my toaster oven following the tips and it’s just so good! Thanks for a new addition to my meal rotation 🙂
I really appreciate the great review, Jay!
Mahalo for recipe!
This is the best! I love all your recipes, thank you CJ!