Pork Katsu – Juicy & Crispy! (VIDEO)
This post may contain affiliate links. Please read our disclosure policy.
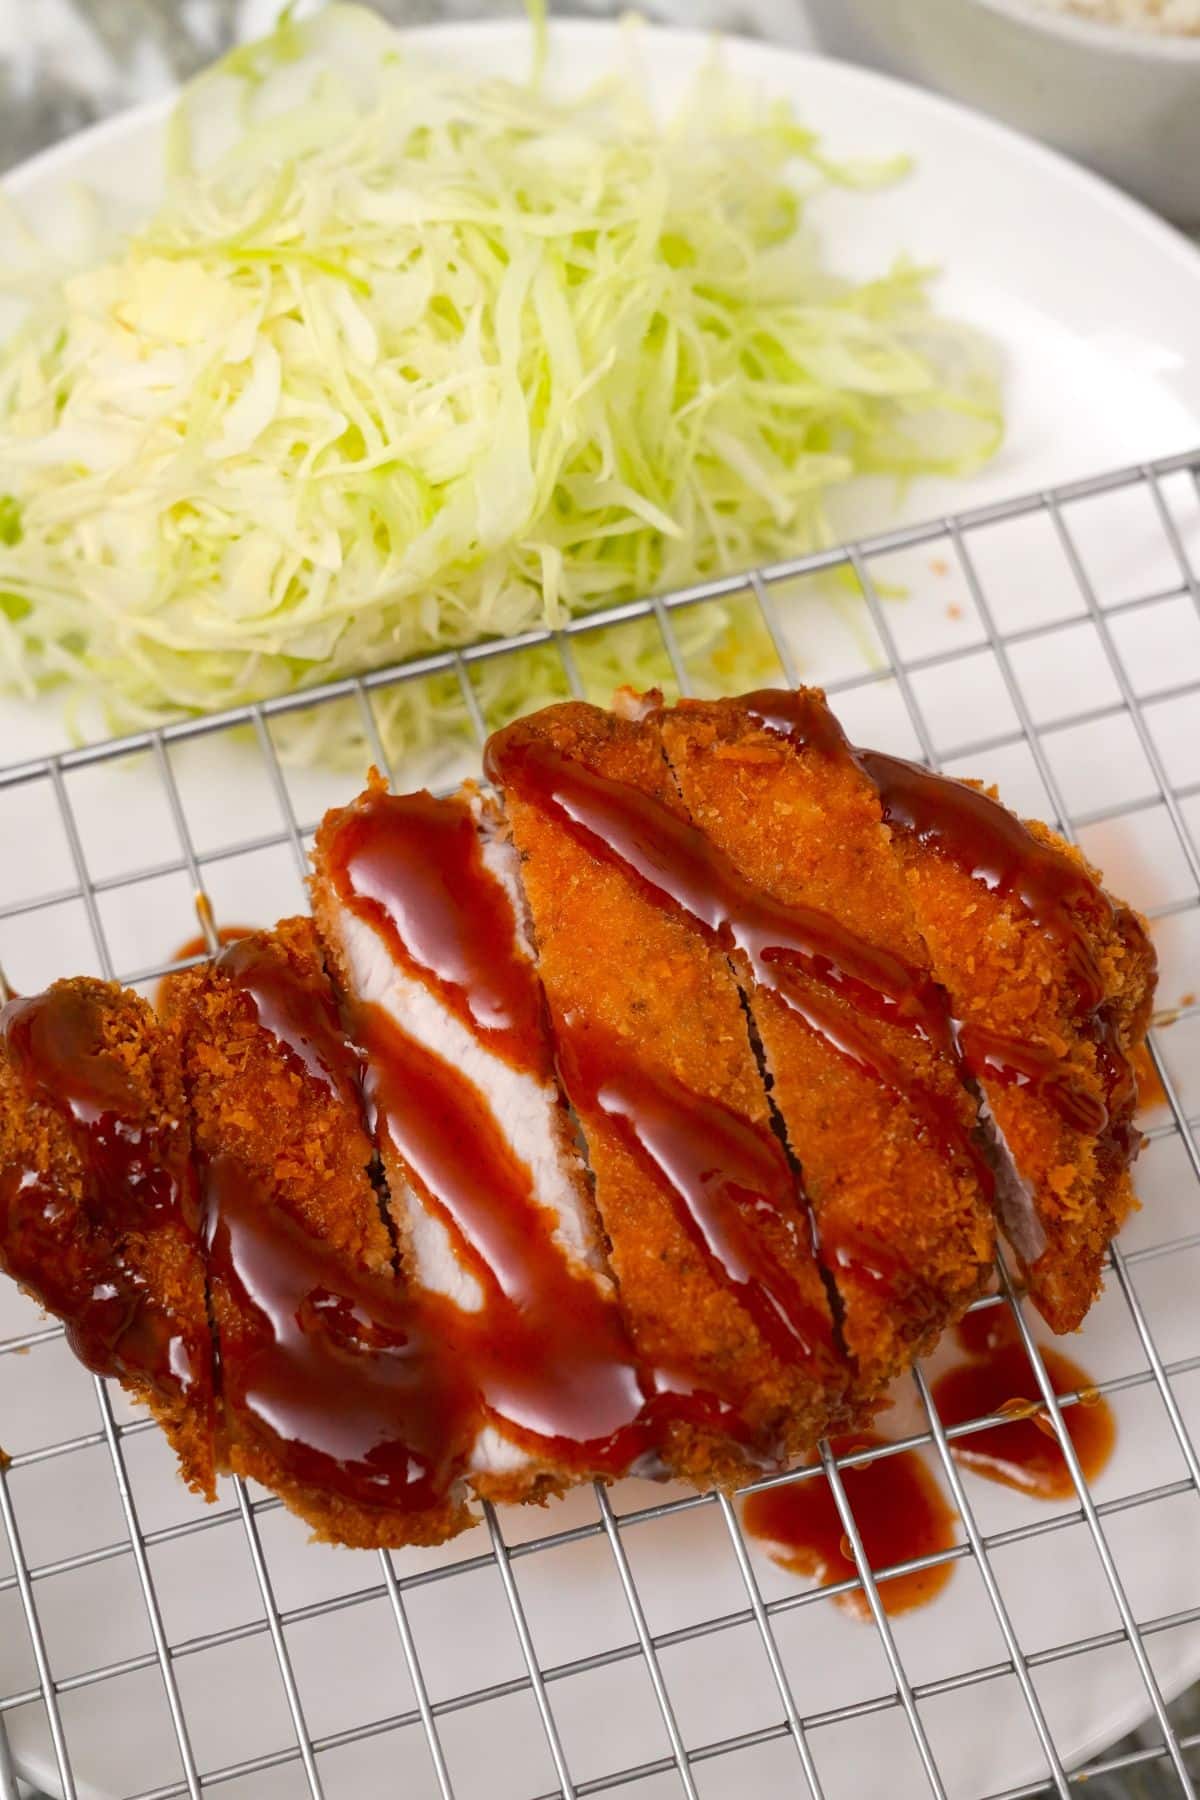
Pork Katsu (or Tonkatsu) is one of my favorite Japanese dishes – the pork cutlet is coated in panko breadcrumbs (the secret to this dish!) and fried to juicy, crispy perfection!
Watch the Pork Katsu Recipe Video Below!
A Note from CJ
This is how to make the best Pork Katsu!

Pork Katsu is juicy, crispy, and so delicious – due to the panko breadcrumbs, the pork has a crispier, lighter crunch than traditional breading! I like to serve it with homemade Tonkatsu Sauce and Hawaiian Mac Salad! If you can’t eat pork, try Chicken Katsu or Air Fryer Chicken Katsu! If you love crispy pork, make sure to try my Chinese Crispy Pork Belly or Air Fryer Crispy Pork Belly!
Made this pork katsu for dinner and it was a big hit with the family. It came out very crispy and tender!
Ingredient Tips
Refer to the recipe card for the full list of ingredients and measurements!
- pork loin filets – Use pork loin filets, preferably from the center pork loin, which has more fat, or marbling (this will result in a tastier katsu). If you prefer a leaner cut of pork, opt for a pork tenderloin. Pound the pork cutlets to even 1/2″ thickness to ensure that the pork cooks evenly!
- panko breadcrumbs – Panko breadcrumbs are made from a special type of white bread that is baked without a crust. The bread is sliced into large, thin slices and dried out; the dried bread is then ground into coarse flakes that are larger and lighter than traditional breadcrumbs – this allows for a crispier, lighter crunch than traditional breading (like for fried chicken).
How to Make Pork Katsu
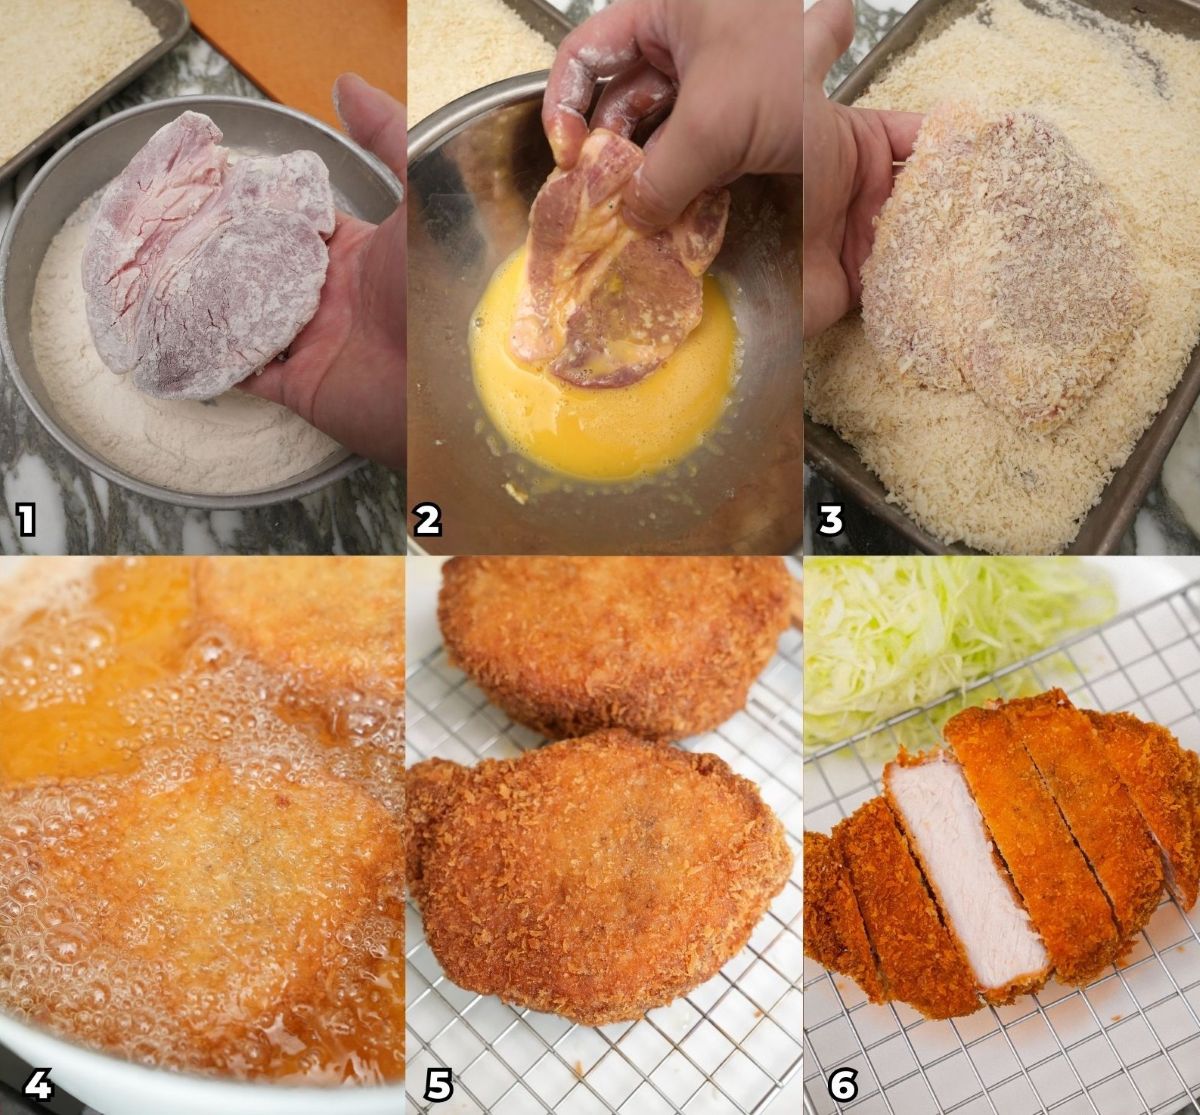
Pound and Season Pork – Using the a knife, make small slits along the fat cap and pound against the pork with the sharp side of the knife to tenderize each filet. Season both sides with salt and pepper.
Dredge Pork – Crack the eggs into a large bowl big enough to fit the pork. Beat thoroughly until combined. Place the flour in another bowl or tray that is large enough to fit the pork. Dredge pork in flour and shake off any excess. Dip the pork in the egg and let the excess egg drip off, then coat thoroughly in panko breadcrumbs.
Fry Pork – Heat oil to 350F and fry for 4-5 minutes or until the pork reaches 145F.
My Pro Tip
CJ’s Expert Tips + Storage
Frying Tips for Multiple Pieces or Multiple Batches – If you are frying multiple pieces at one time and the temperature drops to below 325°F (160°C), it means you are overcrowding and frying too many pieces at one time. Take a couple pieces out in order to allow the oil to come back to temperature.
If you are frying multiple batches, use a fine mesh strainer to pick up any loose breading that has fallen into the oil. Doing this in between frying will prevent the breading from burning and turning your oil bitter.
Pork Internal Temperature – Use a meat thermometer to check the Pork Katsu after frying – pork needs to reach an internal temperature of 145F to be safe to eat.
Storage and Reheating – Store any leftover Pork Katsu (already cooked) in an air tight container for up to 3 days in the refrigerator. I don’t recommend breading the pork and storing it uncooked. To reheat the Pork Katsu (or Tonkatsu), I prefer the air fryer – reheat the pork for 8-10 minutes at 350°F or in the oven at 400° for 15 minutes. The exterior should be crispy while keeping the inside juicy!
If you tried this Pork Katsu Recipe or any other recipe on my website, please leave a 🌟 star rating and let me know how it went in the comments below!
Pork Katsu (Tonkatsu) – SUPER CRISPY!
Equipment
Ingredients
Pork
- 4 pork loin filets, 1/2" thick cutlets
- 1/2 tsp salt
- 1/2 tsp black pepper
- 2 large eggs
- 1/4 cup all-purpose flour
- 2 cups panko breadcrumbs
Serve With
- thinly sliced cabbage
- rice
- tonkatsu sauce, try my homemade version!
Instructions
- Using the a knife, make small slits along the fat cap and pound against the pork with the sharp side of the knife to tenderize each filet. Season both sides with salt and pepper.
- Crack the eggs into a large bowl big enough to fit the pork. Beat thoroughly until combined. Place the flour in another bowl or tray that is large enough to fit the pork.
- Dredge pork in flour and shake off any excess. Dip the pork in the egg and let the excess egg drip off, then coat thoroughly in panko breadcrumbs.
- Heat oil to 350F and fry for 4-5 minutes or until the pork reaches 145F.
Video
Notes
- If you are frying multiple pieces at one time and the temperature drops to below 325°F (160°C), it means you are overcrowding and frying too many pieces at one time. Take a couple pieces out in order to allow the oil to come back to temperature.
- If you are frying multiple batches, use a fine mesh strainer to pick up any loose breading that has fallen into the oil. Doing this in between frying will prevent the breading from burning and turning your oil bitter.
- Use a meat thermometer to check the Pork Katsu after frying – pork needs to reach an internal temperature of 145F to be safe to eat.
Nutrition
Nutrition information is automatically calculated, so should only be used as an approximation.
This Pork Katsu recipe was originally published in September 2021, and updated in February 2026.



Love your recipes and this tonkatsu recipe is simple, easy to follow, and most of all delicious. My mom taught me how to lay panko out on a cookie sheet and lightly mist with a spray bottle. This causes the panko to expand which gives you a larger crumb. Can’t wait to make this again!
Reiko – thanks so much for the kind words! I love your mom’s tip and will definitely have to try that next time!
Made this pork katsu for dinner and it was a big hit with the family. It came out very crispy and tender. Also made the Hawaiian mac salad along with the katsu sauce.
Thanks, Chong! I appreciate the kind words!
Delicious! Thanks! Your tip worked! Frying at the right temp cooked quickly and evenly!!
I’m so glad you enjoyed it!
Two thumbs up
AMAZING! So delish!! Just another great dish from CJ!
Used this recipe but baked instead of fried. Still tasted great!
We LOVE this Katsu recipe. Adding the flour to the eggs is genius. It’s perfect and crispy every time. I have even had to let the pork rest breaded for an hour or so and it never gets soggy it stays crunchy and crispy. It’s a week-night staple in our house.
So glad you and your family are enjoying, Noell!