Perfect Grilled Steak – BEST METHOD! (VIDEO)
This post may contain affiliate links. Please read our disclosure policy.
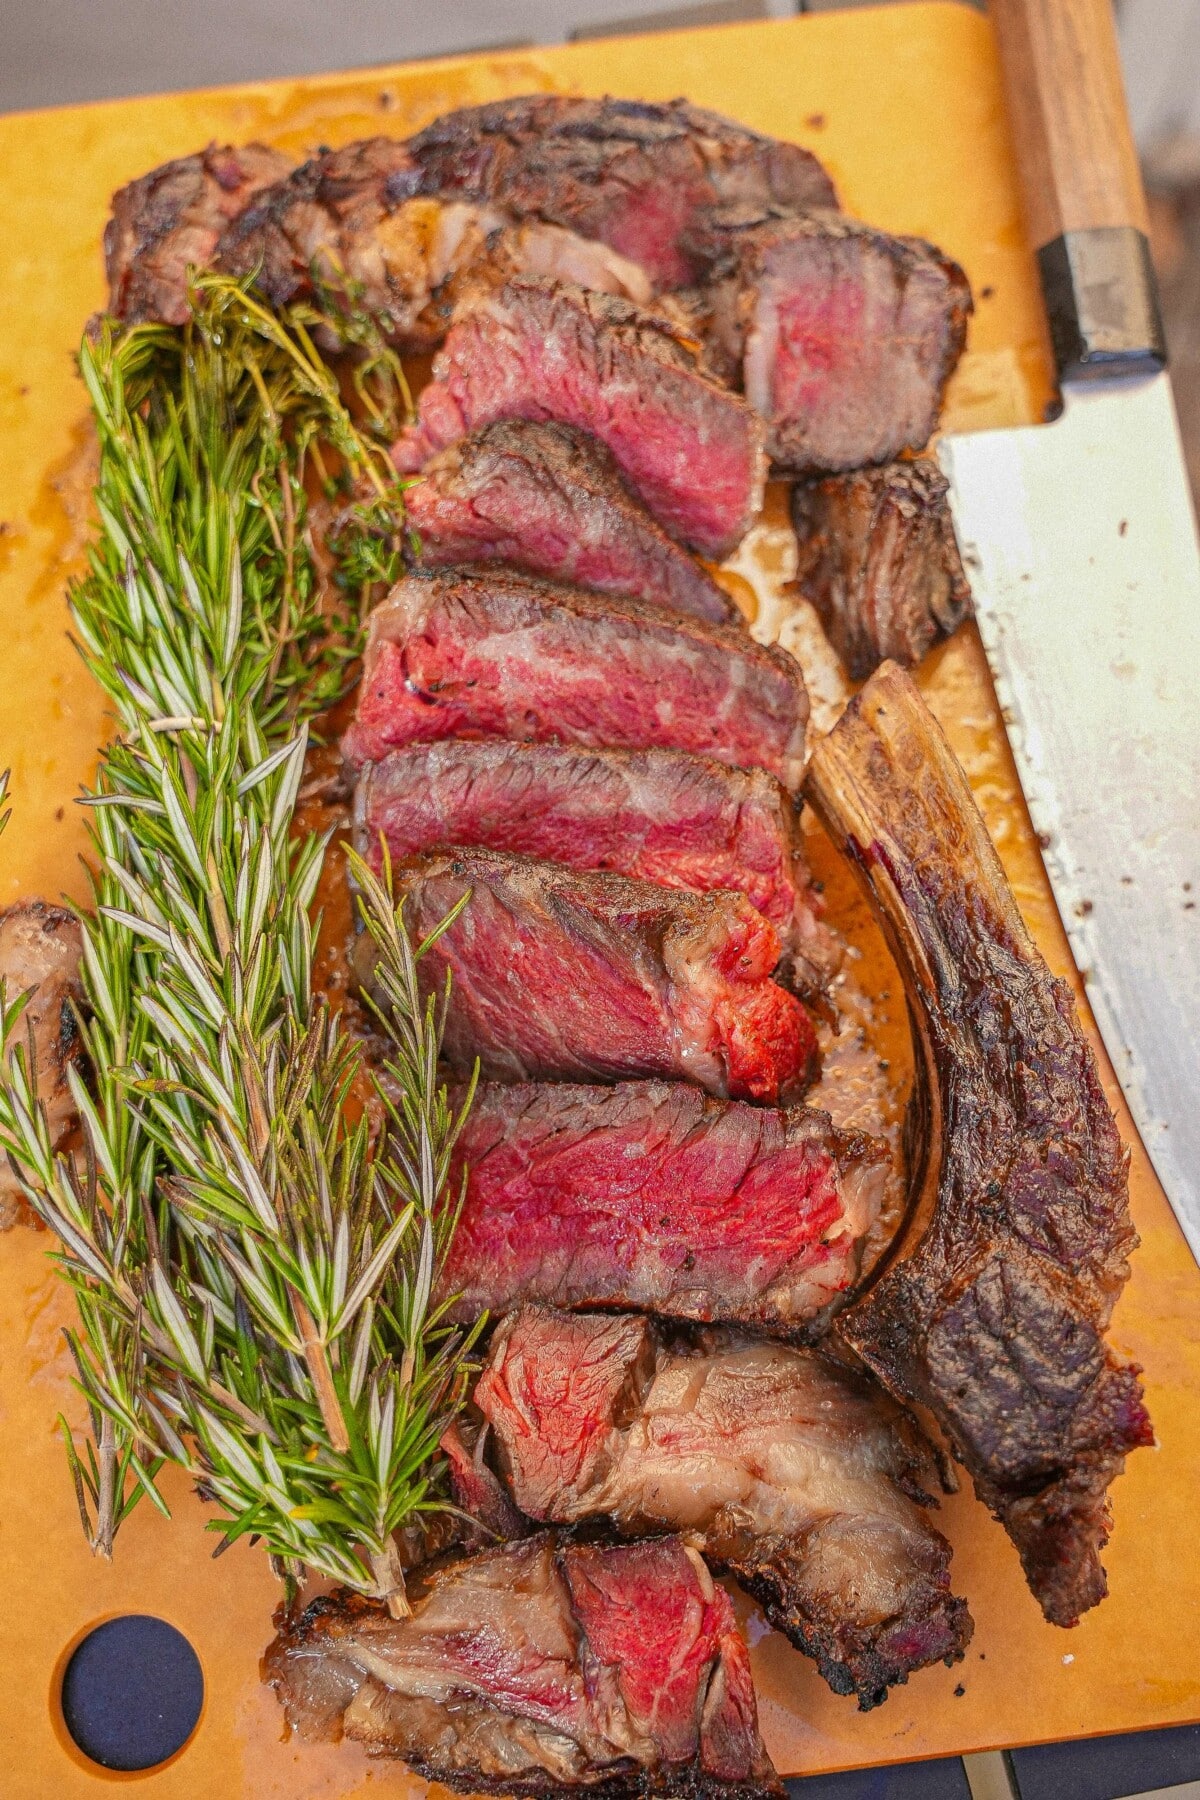
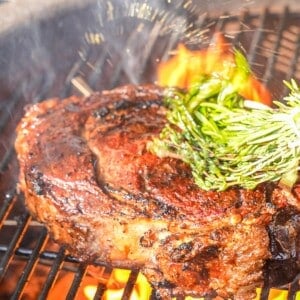
This is how you grill the Perfect Steak at home – just like the fancy steakhouses! Grilled Steak is one of my favorite things in the world – I love how juicy, tender, and smokey the steak gets. I used Ribeye Steaks in my recipe but any thick-cut steak will work! Keep reading for all of my tips and tricks for grilling the best steaks this summer!
Watch the Grilled Steak Recipe Video Below!
Table of Contents
- Watch the Grilled Steak Recipe Video Below!
- Grilling Makes Everything Taste Better (Like this Steak!)
- What Ingredients do I need to cook a Perfectly Grilled Steak?
- Grilled Steak: Step-By-Step Recipe Instructions
- Grilling Heat Zones 101
- Use Two Thermometers
- Steak Pull Temps and Final Temps
- What Should I Serve with Grilled Steak?
- Expert Tips for Making The BEST Grilled Steak at Home!
- Storage and Reheating Tips
- Perfectly Grilled Steak – BEST METHOD Recipe
Grilling Makes Everything Taste Better (Like this Steak!)
I love to grill at home, especially during the warmer months (which, in Southern California, is basically every month) – there’s nothing quite like the smoke and flavors of Korean Marinated Short Ribs or Juicy Grilled Chicken Thighs cooking over charcoal! I think everything tastes better grilled and it’s so much easier than you think it is! This Grilled Steak recipe is the perfect way to start your grilling journey – trust me, you’re going to be known for your grilled steaks once you’ve tried this recipe! If you’re a beginner, you can even just start with cooking Beef Bulgogi or Spicy Pork Bulgogi on a grilling pan or skillet!
What Ingredients do I need to cook a Perfectly Grilled Steak?
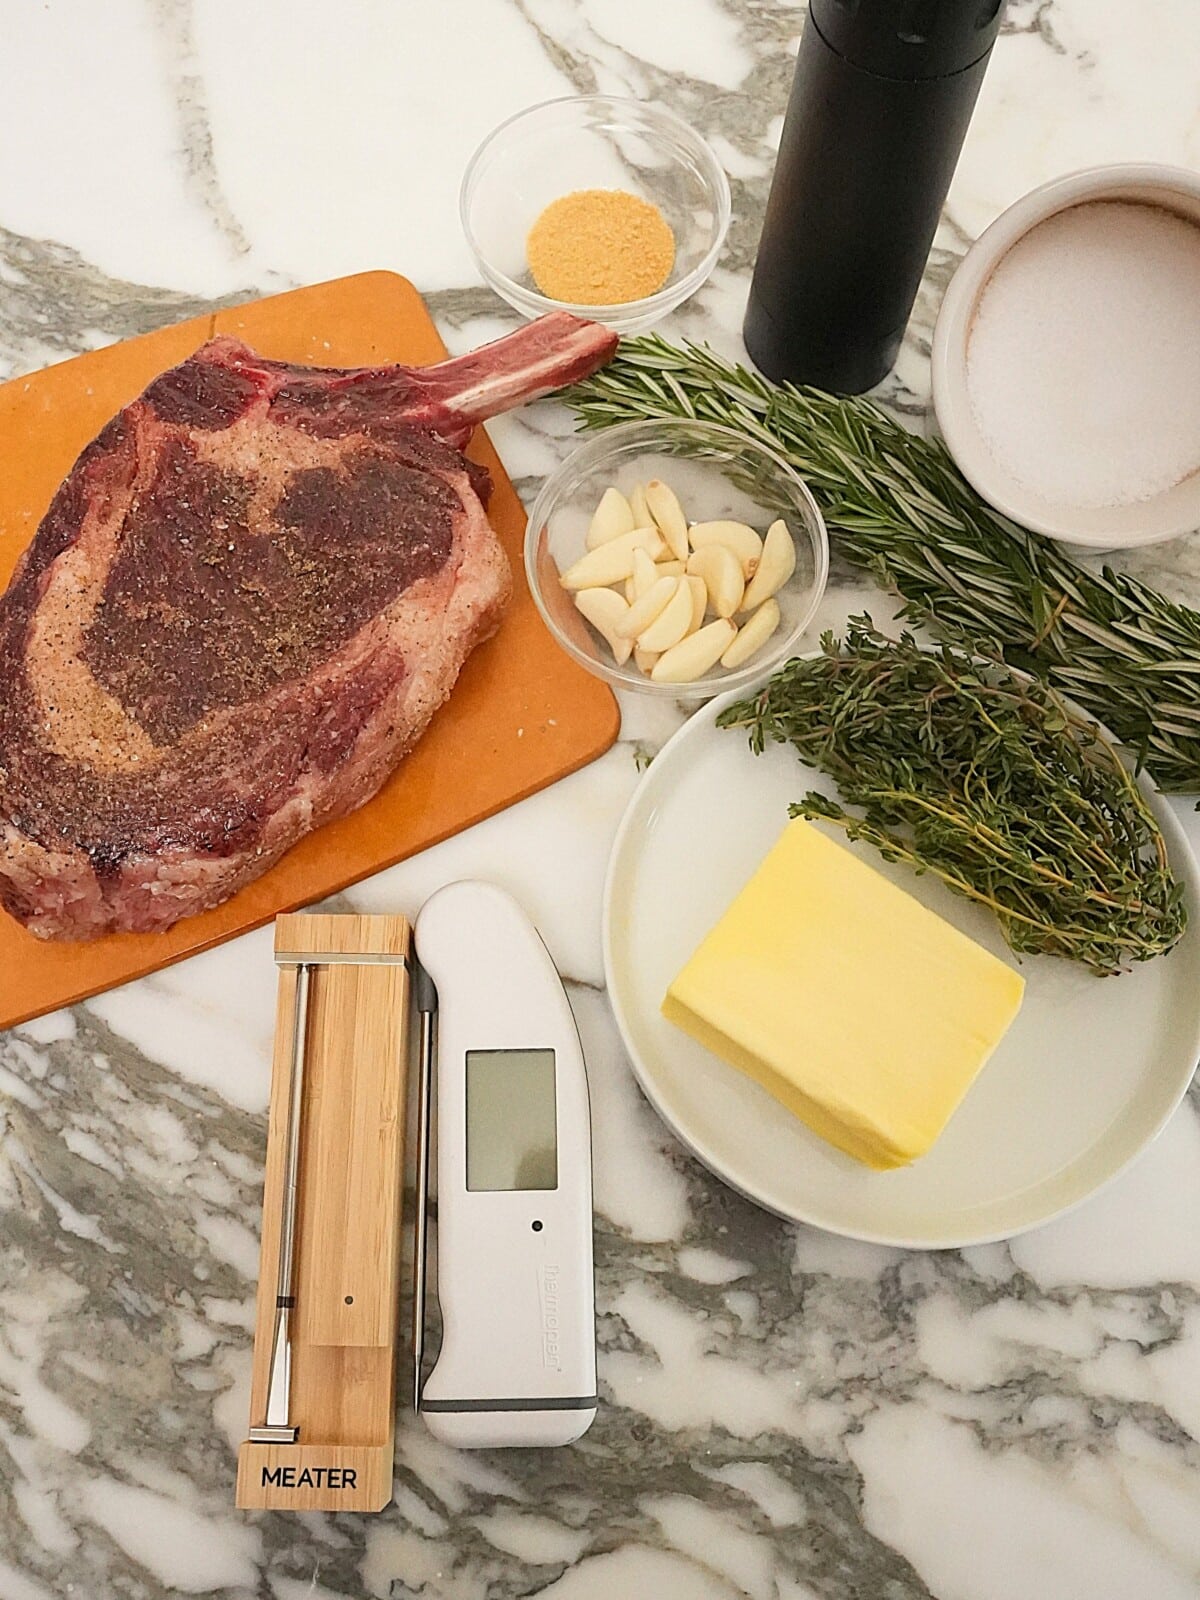
- ribeye, 1 ½ to 2 inches thick – try not go thinner than this!
- You can use thinner steaks but if so, adjust the grilling time to avoid overcooking the steaks. I would remove the steaks from the grill when they reach an internal temperature of 120°F for medium rare, taking into account searing time. Don’t forget that during searing the steaks over direct heat, the internal temperature will increase.
- Kosher salt: This recipe calls for salting the steak with 1.5% of its weight in salt. Therefore, you will need a scale to measure your steak and then multiply by .015 to get the specific amount.
- The additional 1/2 teaspoon kosher salt will be for your exterior steak seasoning to help develop a great crust!
- ground black pepper: Use freshly ground pepper if possible.
- garlic powder
- neutral oil: My go to neutral oil is avocado oil but you can also use canola or vegetable oil.
Herb “Brush”
An herb brush is a simple way to really elevate your steak and give it that steakhouse flavor and finish. The herbs will soak up the garlic herb butter which will be used to baste the steak at the end over the direct charcoal. You must use fresh herbs – dried herbs will not work as a substitute for this herb brush, as you need the stems.
- rosemary twigs
- thyme twigs
- 1 roll butchers twine
Herb Butter
I’m providing an herb butter recipe below but you can also use my Garlic Herb Compound Butter!
- chopped rosemary
- chopped thyme
- garlic, chopped
- butter – use unsalted butter; my favorite is Kerrygold!
Grilled Steak: Step-By-Step Recipe Instructions
1. Salt the Steak and why you should dry brine It
Salting the steak with 1.5% of its weight in salt will help ensure a seasoned steak throughout (a tip I learned from restaurants!). This method is called “dry brining” and allows the salt to be absorbed by the steak, seasoning it all throughout and to the core (vs solely the exterior). I highly recommend not skipping this step.
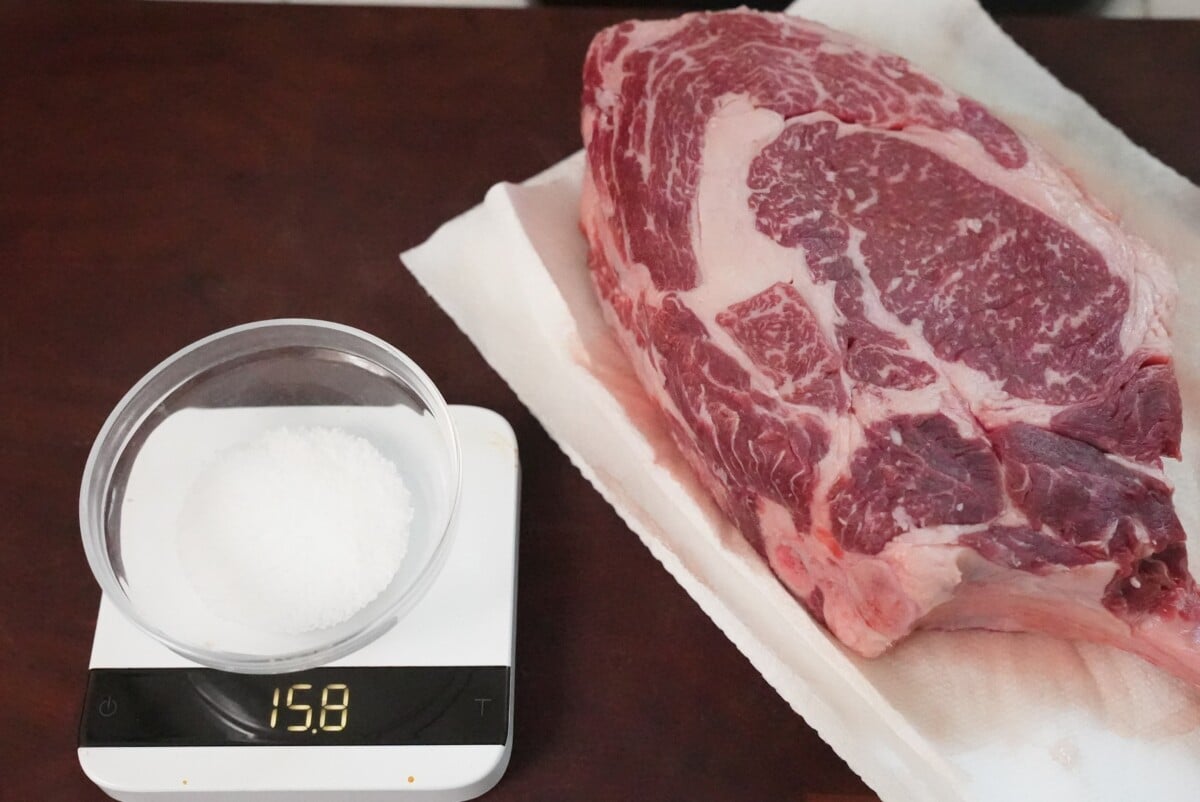
For best results, use a kitchen scale to measure the steak in grams. Multiply the weight of the steak by 1.5% to get the amount of kosher salt you should be using. Use a kitchen scale to weigh out the amount of kosher salt needed.
Pat the steak dry with paper towels. Salt all sides with the kosher salt. Place the salted steak on a wire rack uncovered – leave in the fridge for 1-2 days.
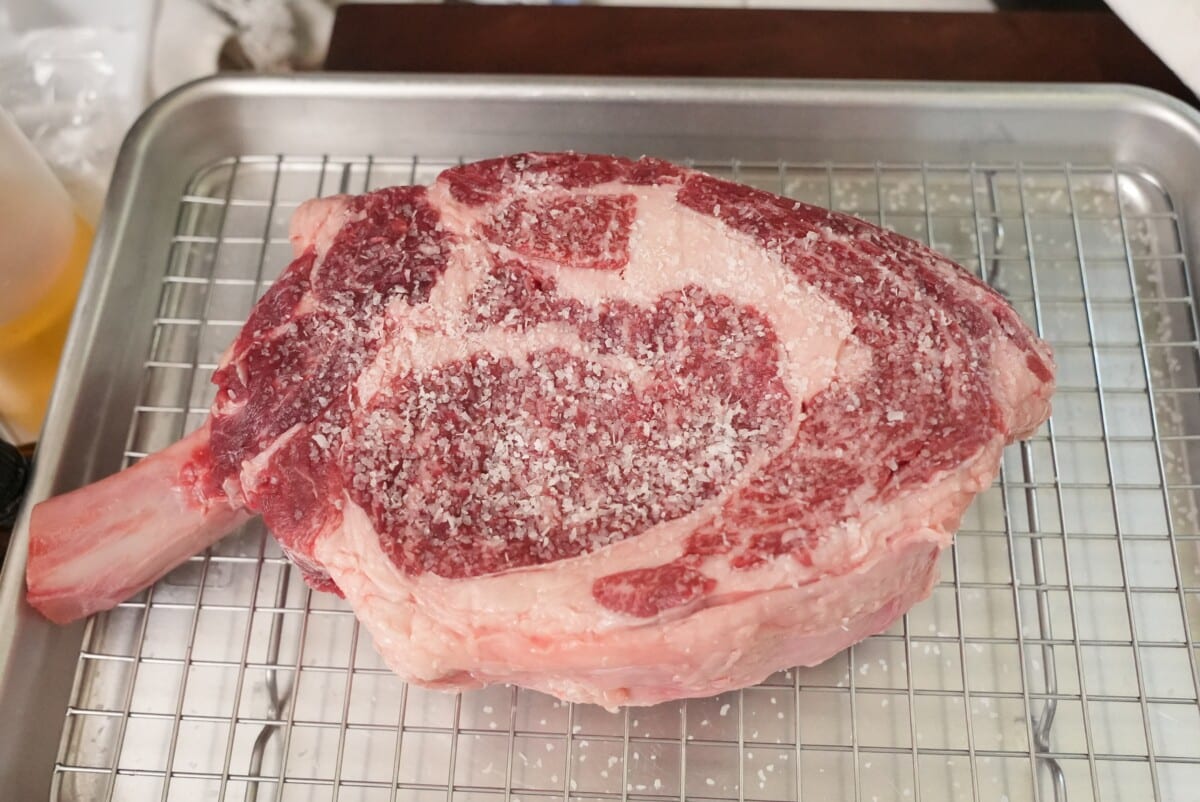
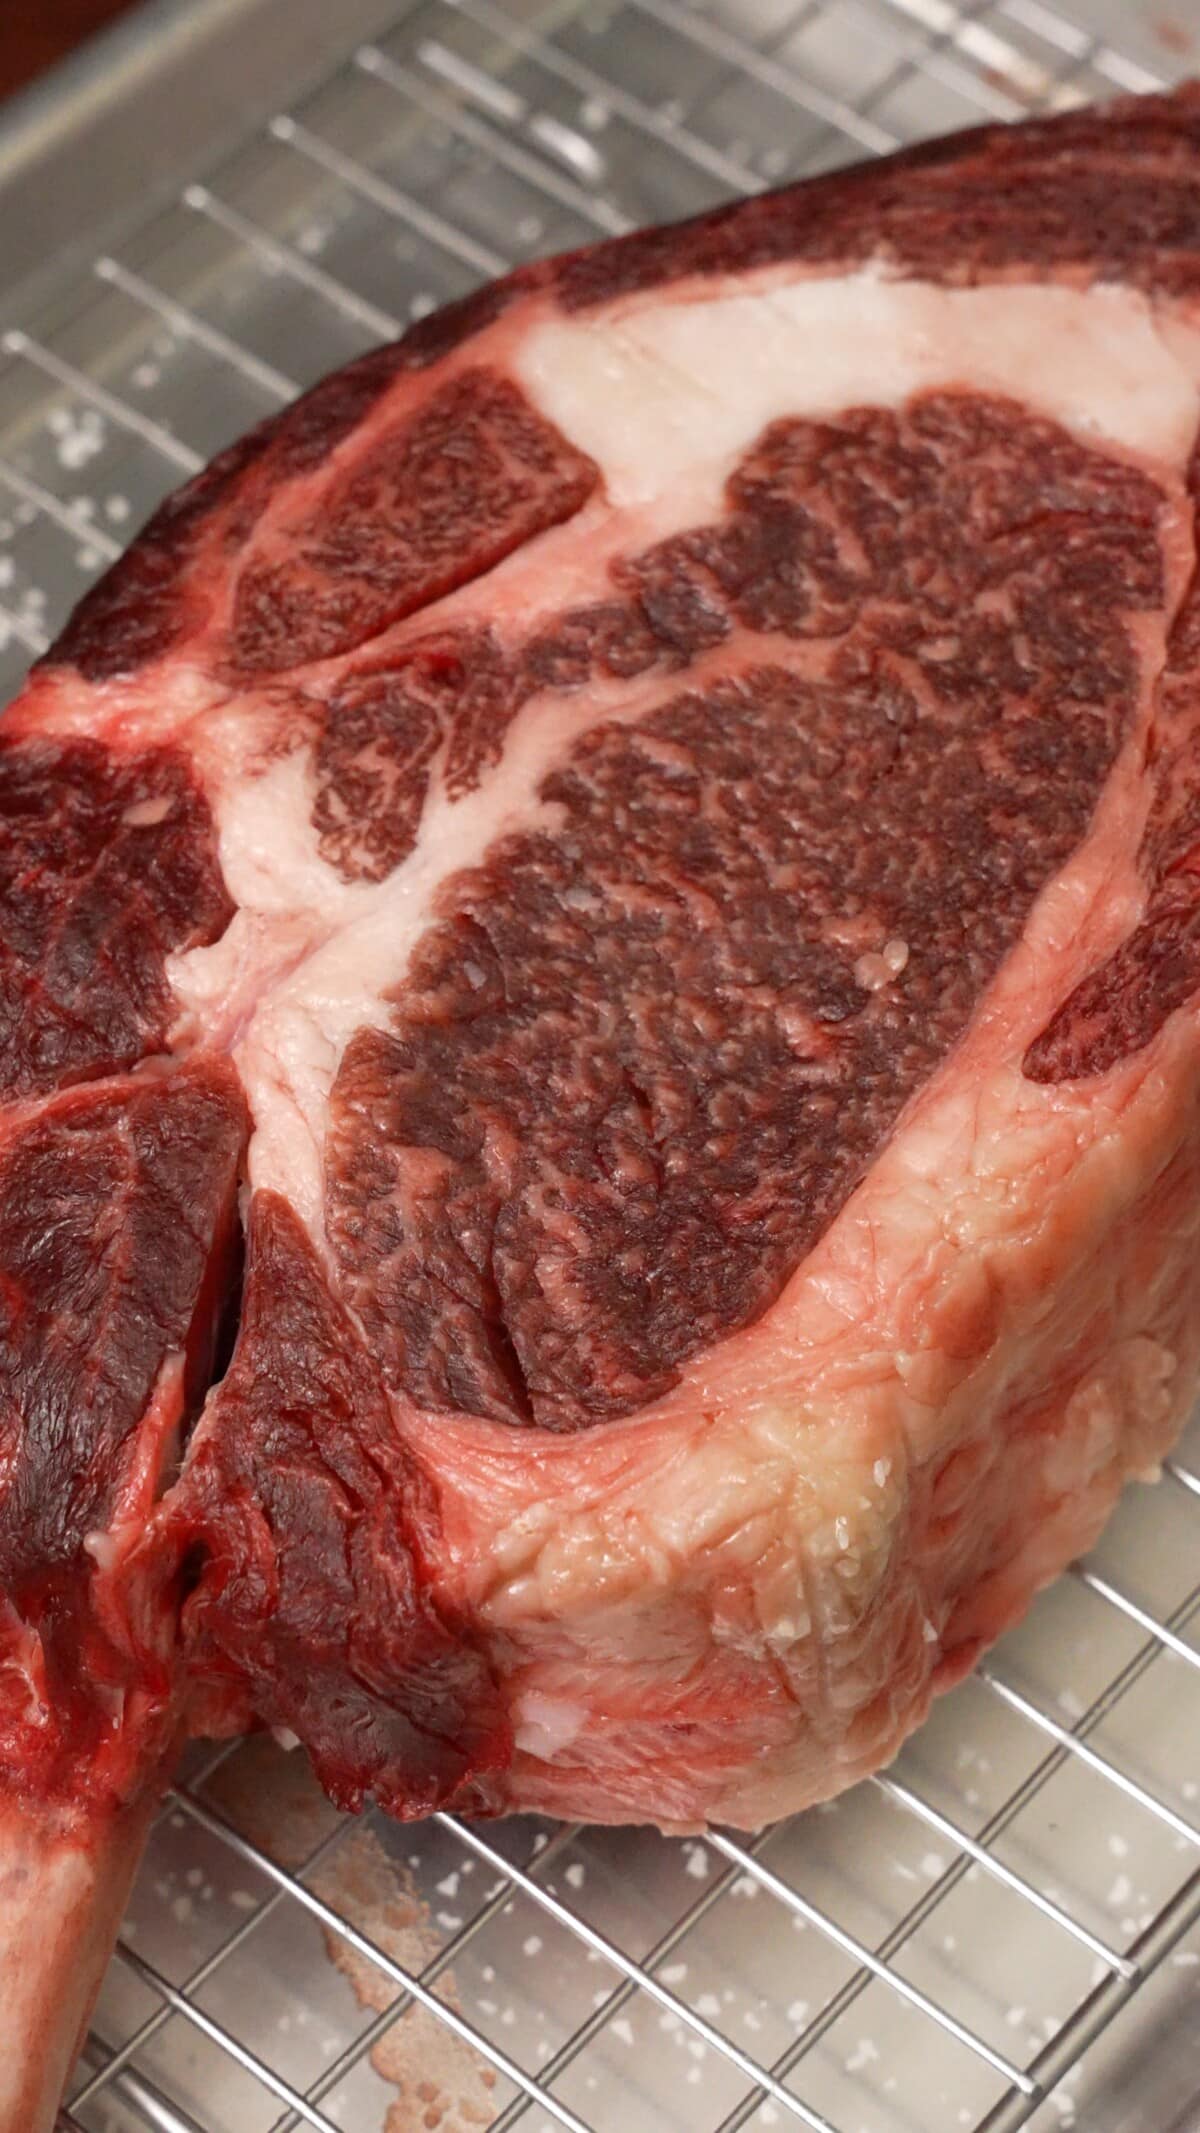
When you remove the steak from the fridge, the exterior will be darker and firmer – this is OK! The steak will have actually lost weight due to the water content in the steak evaporating, which will result in the meat enzymes intensifying, resulting in a more meaty, flavorful steak!
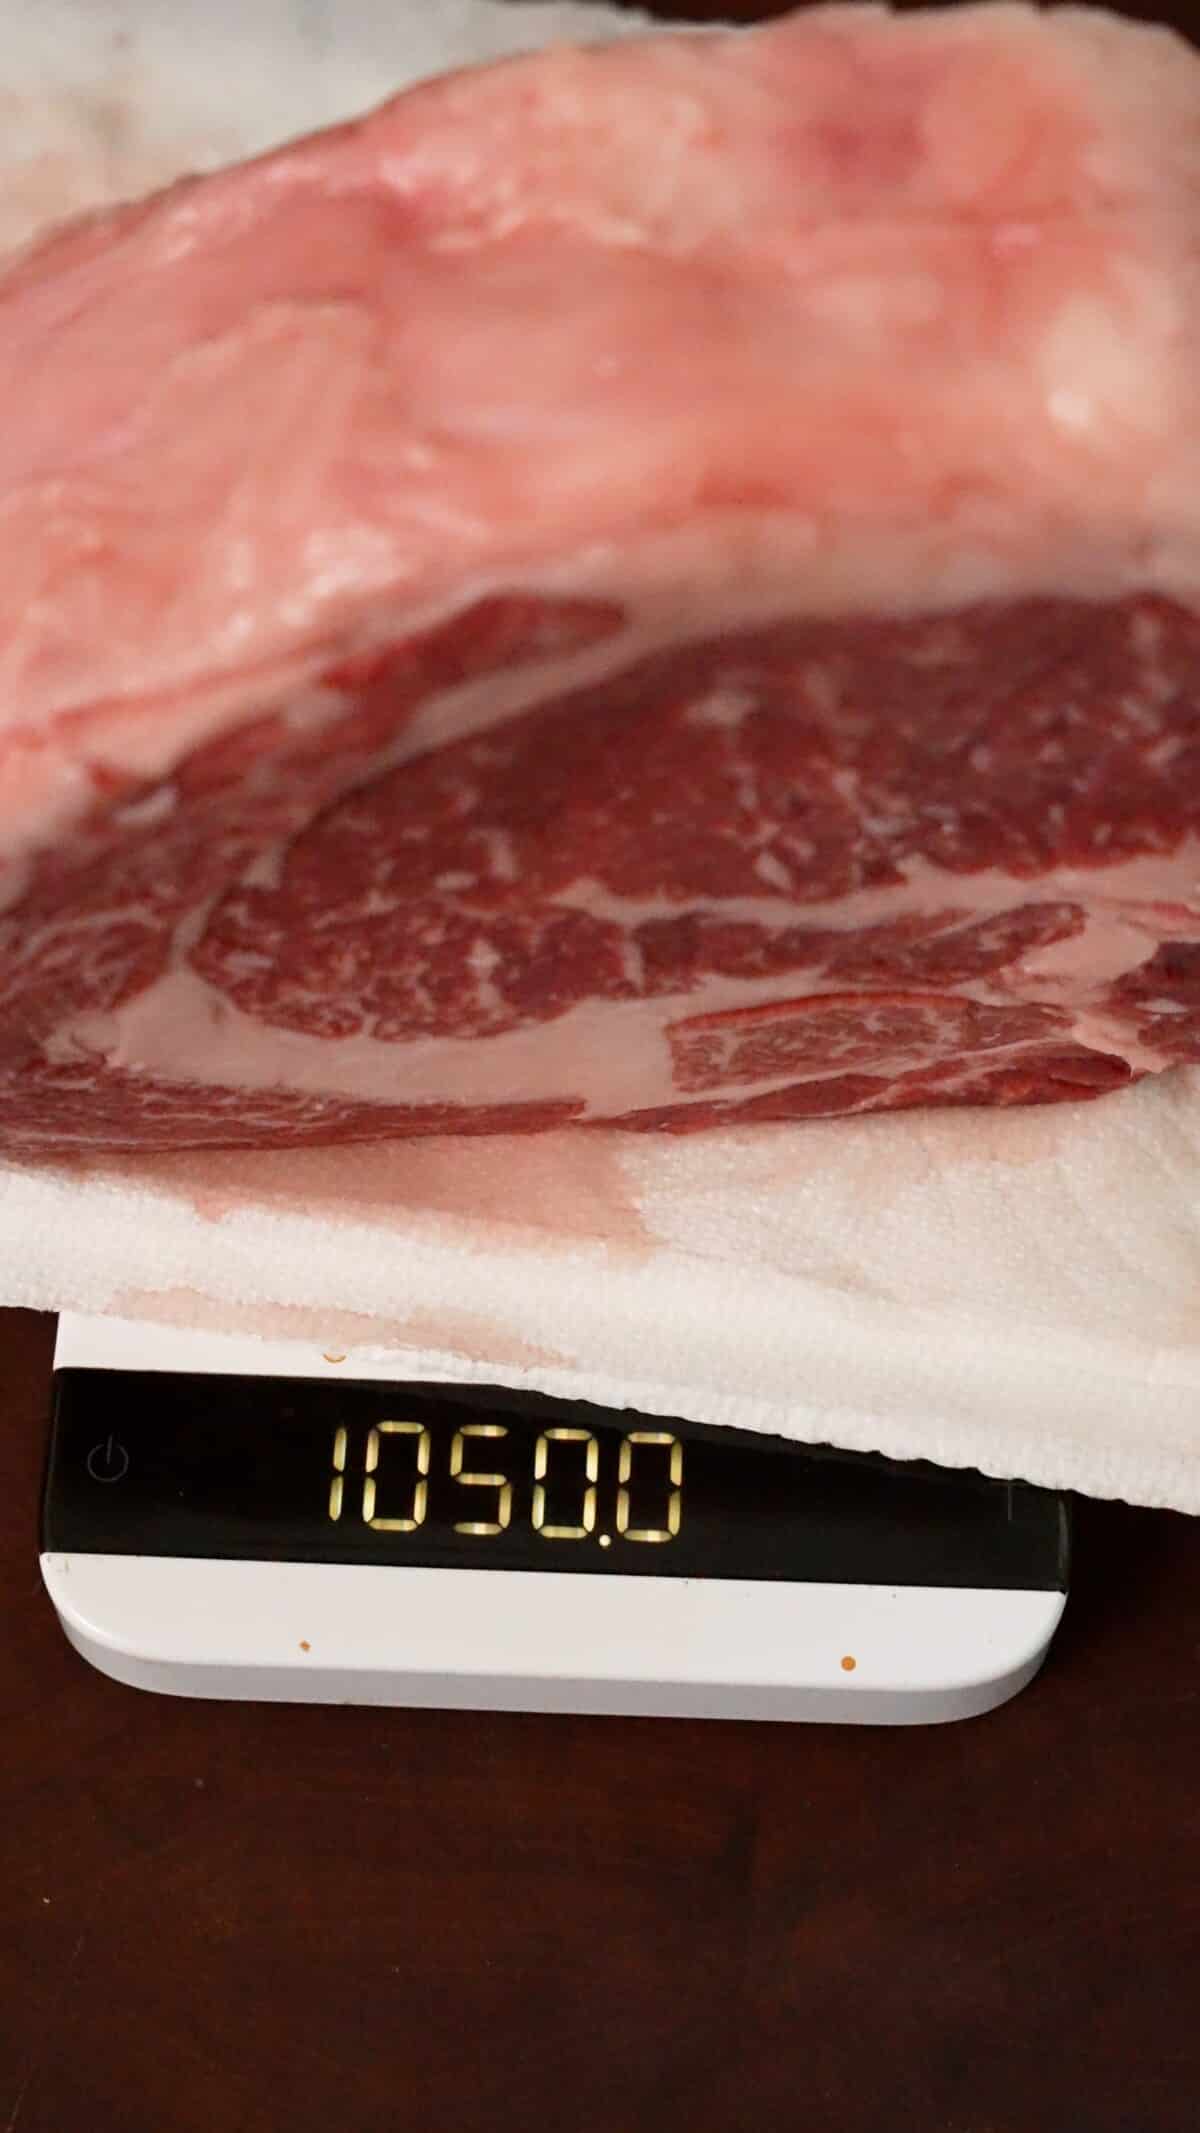
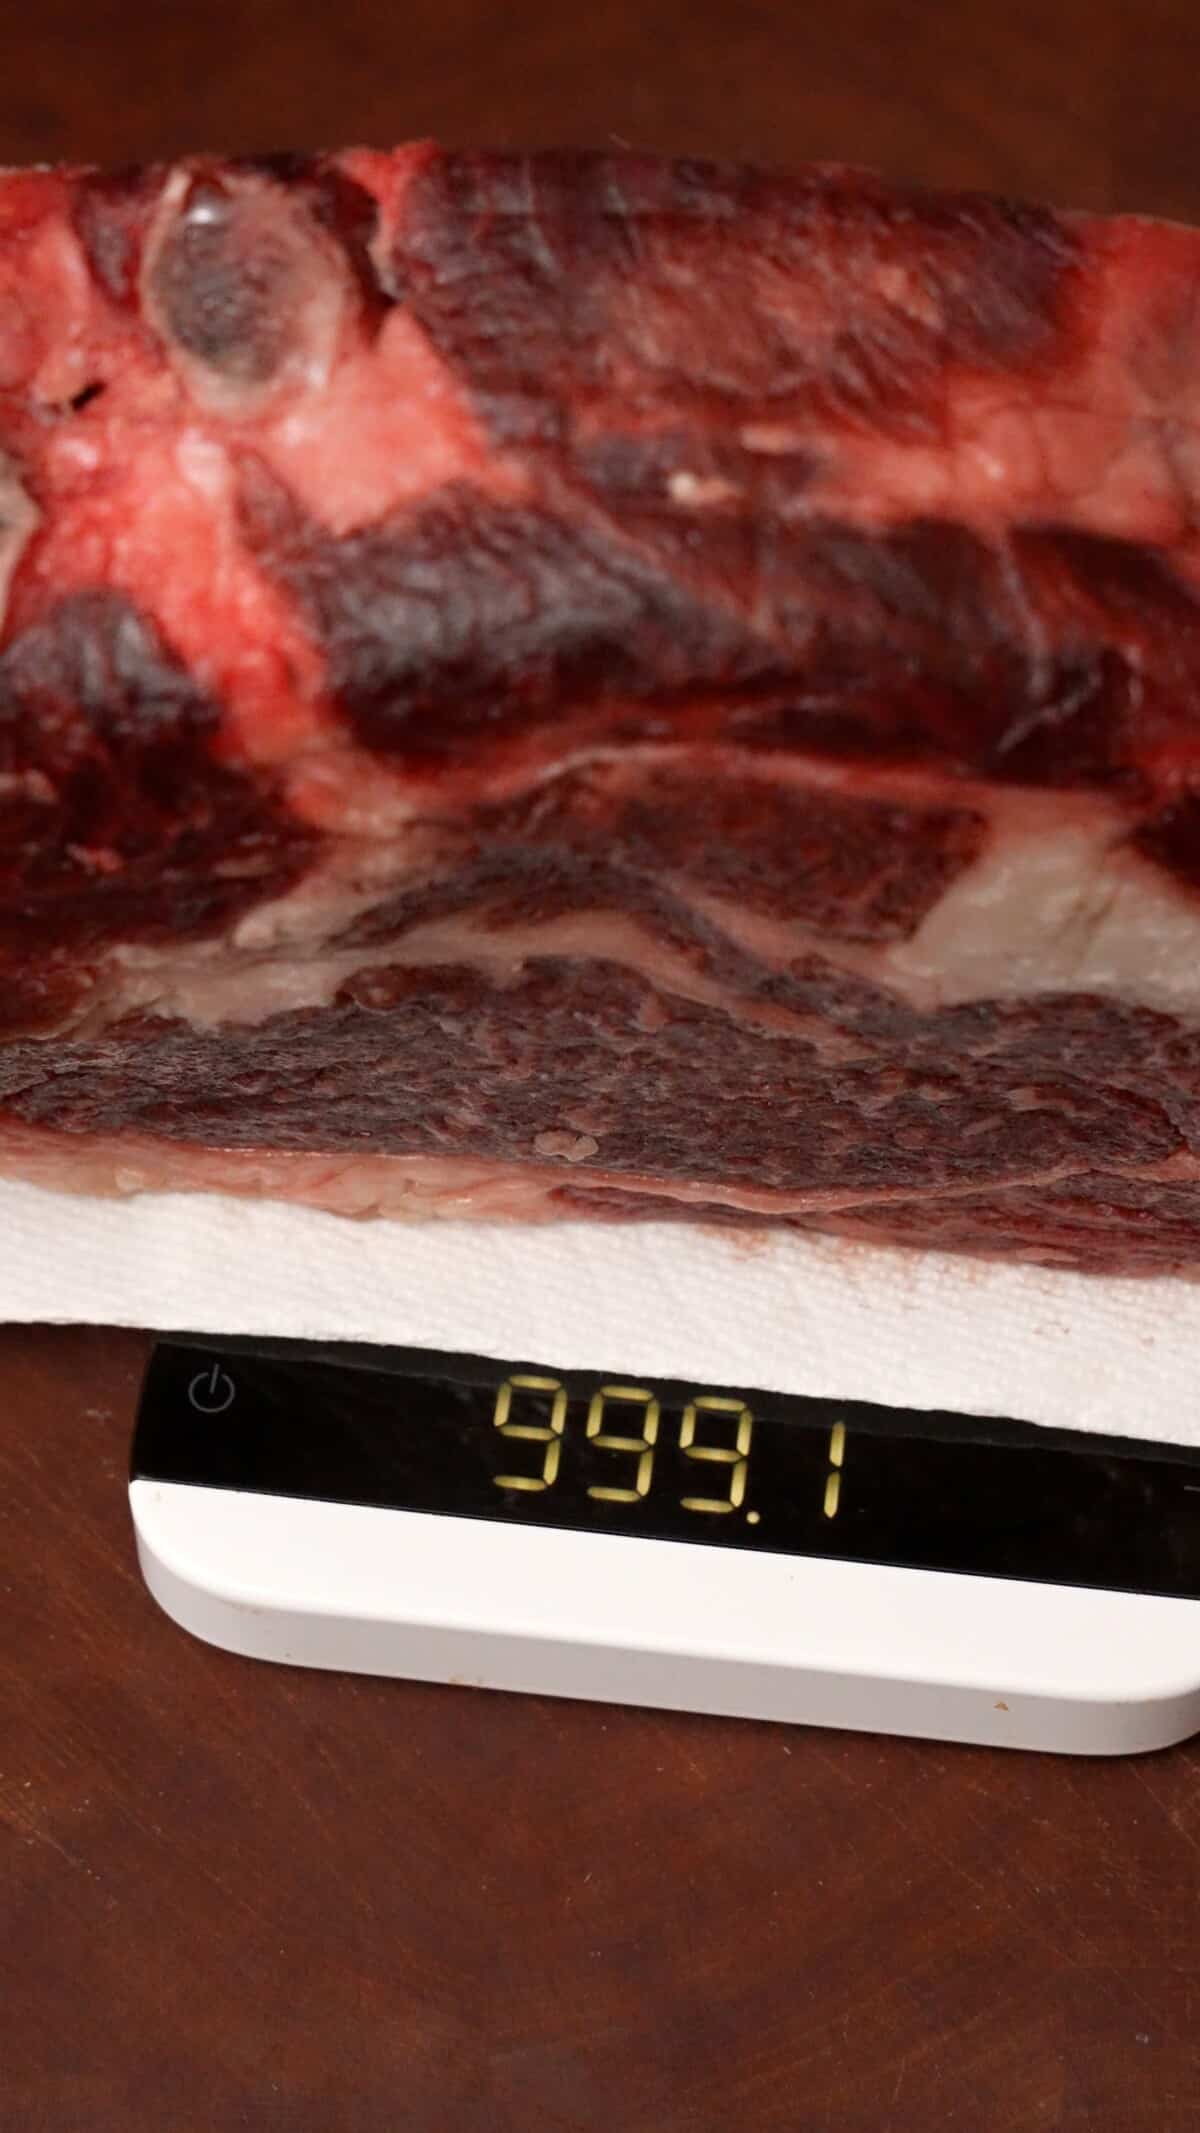
Remove the steak from the fridge 1 hour before cooking – this is to bring it to room temperature.
2. Season the Steak
Mix together ½ teaspoon kosher salt, black pepper, and the garlic powder in a small bowl.
Drizzle the steak with neutral oil (I used avocado oil). Sprinkle the seasoning mixture all over the surface of the steak and rub so it is evenly distributed on all sides of the steak. Then head to the grill!
Key Tip
Grilling Heat Zones 101
Creating two zones of “direct” and “indirect” heat allows you to choose the best temperature to grill your food.
“Direct” heat is good for food that cooks quickly (like thin patties for burgers), while “indirect” heat is better for food that take longer or could burn or dry out if cooked over “direct” heat, like vegetables.
The “indirect” method works like a convection oven, circulating heat to cook food evenly on all sides without needing to be turned (versus over “direct” heat, where you would need to flip the food to avoid getting scorched).
3. Heat the Grill
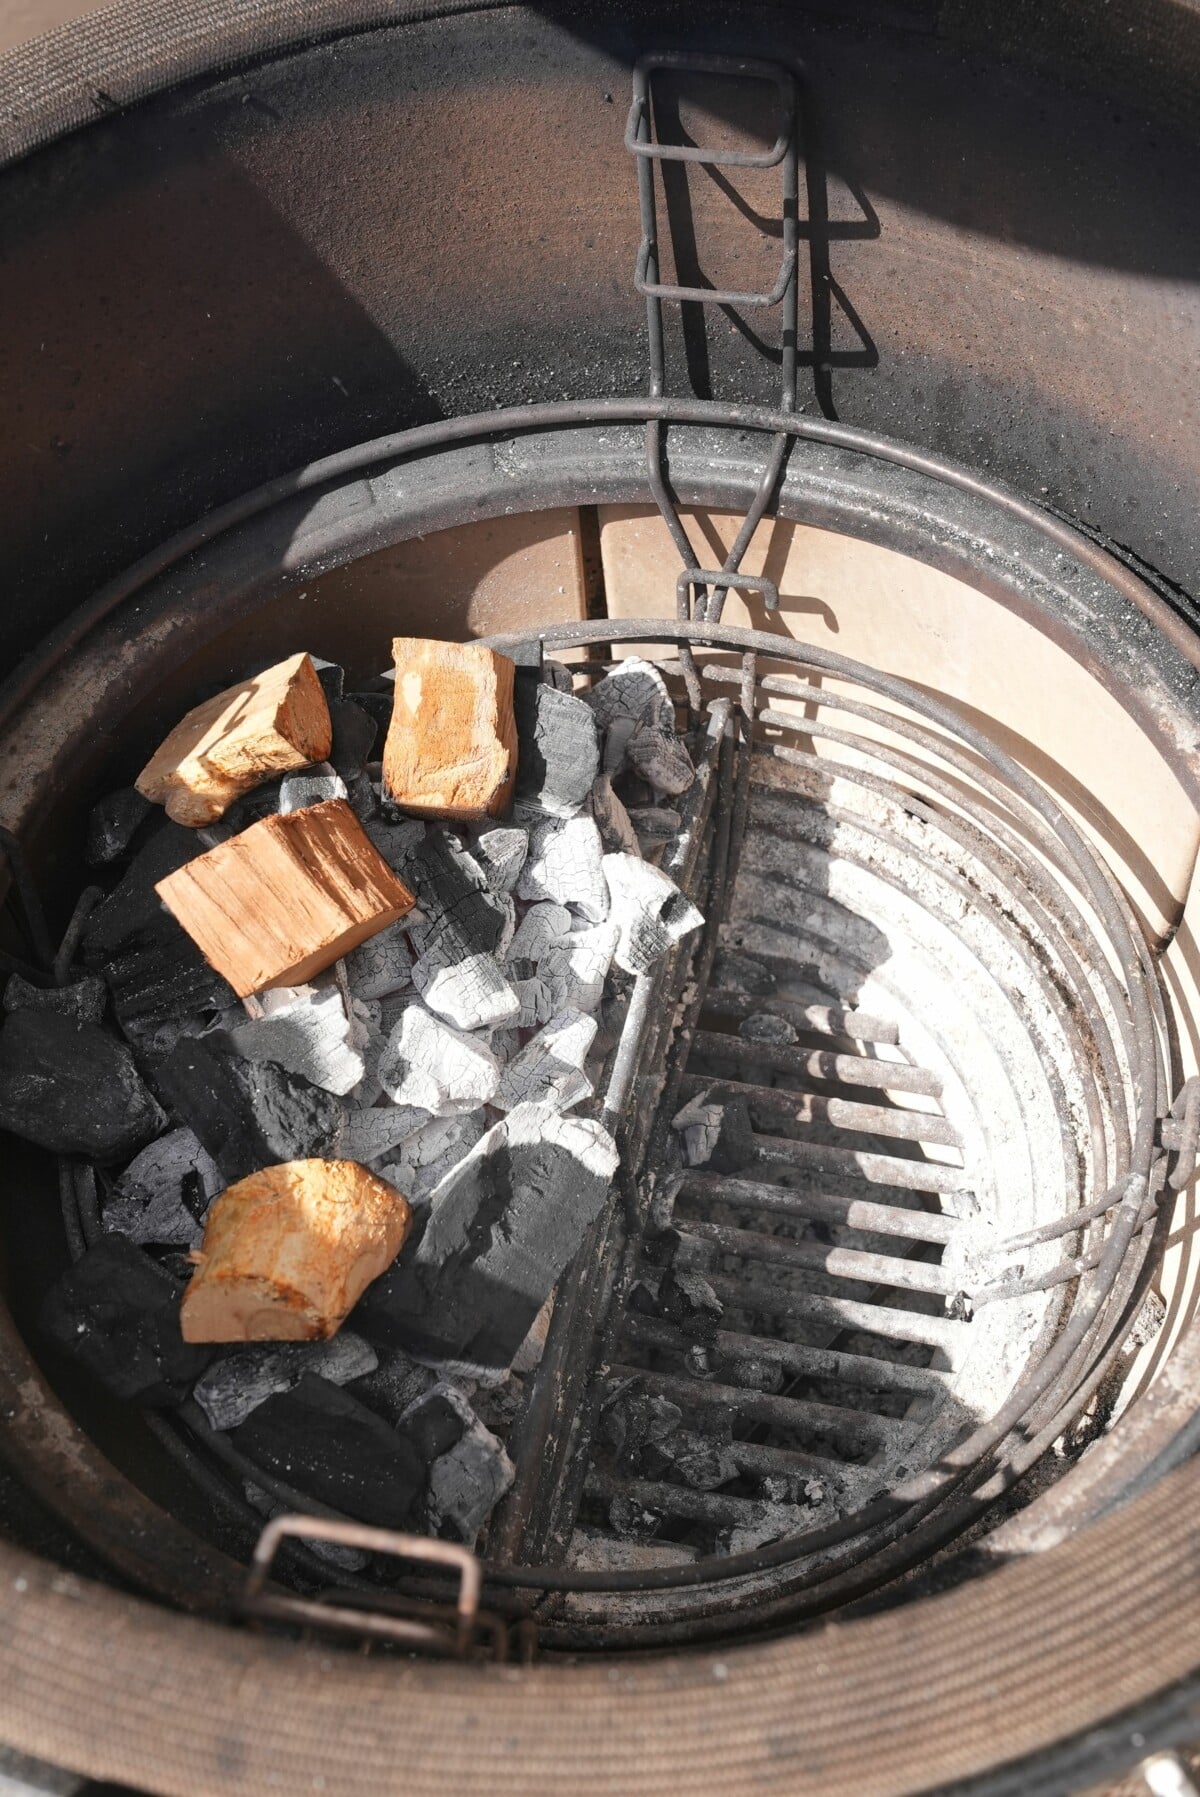
Add charcoal to ½ of the grill to create 2 zones – 1 for direct heat and 1 for indirect heat. Optional: add a piece of wood, such as cherry or pecan, at the base of the charcoal to add additional flavor to the steak.
Light the charcoal so they are fully lit and the smoke runs clear out of the vents. Adjust the vents until the inside of the grill reaches 225-250F.
Key Tip
Use Two Thermometers
I highly recommend using thermometers when grilling – in this recipe for Grilled Steak, you should use two:
- 1 Probe Thermometer – this is to monitor the internal temperature of your steak.
- 1 Instant Read Thermometer – I always like having a “second opinion” thermometer to test other parts of the steak – because all steaks are shaped differently, and the grilling heat will determine how quickly the steak will cook, an instant read thermometer is handy for reading other parts of the steak to ensure they are not cooking too quickly.
Using thermometers when grilling is the only way you can confirm your food is safe to eat and also at your desired level of doneness:
- Undercooked meat can have harmful bacteria that can make you or your guests sick. Using a thermometer is the only way you can confirm the internal temperature is high enough to have destroyed them.
- Grilling can sometimes feel like guesswork – it’s difficult to tell when your meat is over or undercooked. Using a thermometer to check the temperature of your food means you can confirm where it is in the cooking process and achieve your desired level of doneness.
4. Grill the Steak
Insert the probe thermometer into the thickest part of the steak. Add the steak to the indirect side of the grill.
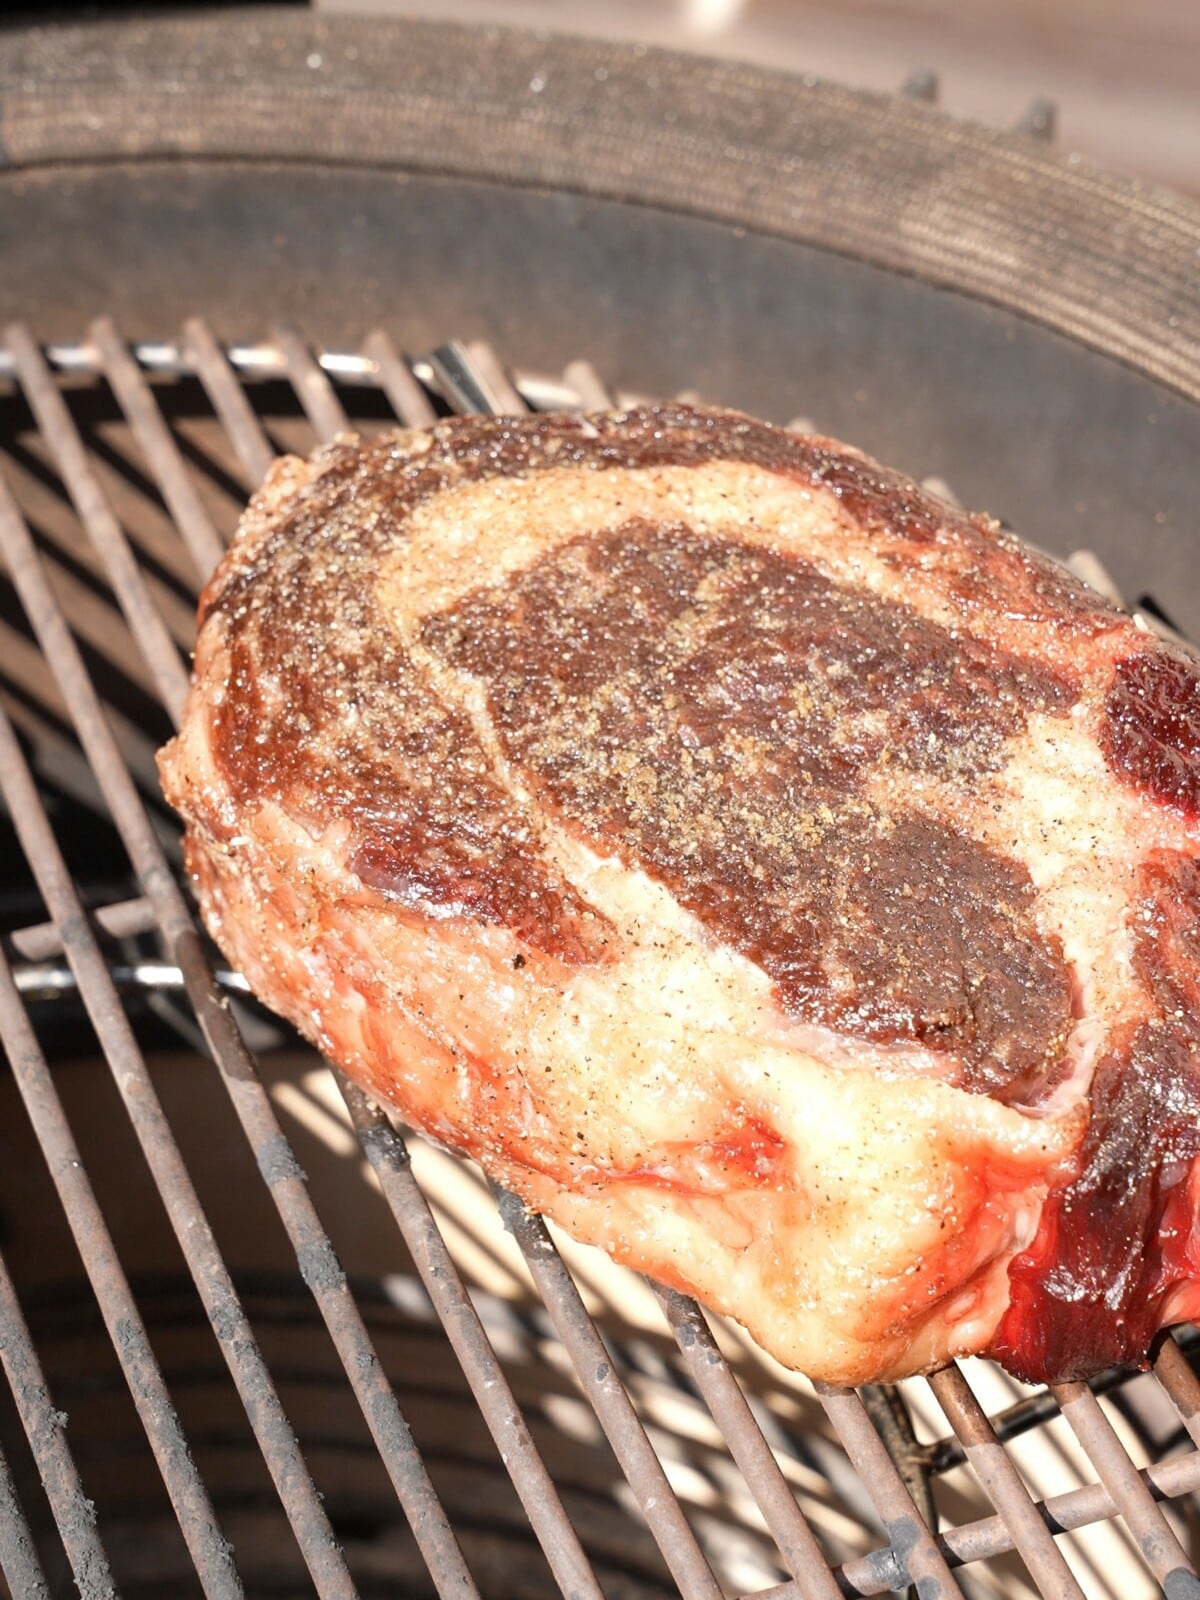
What temperature should you set your probe to? Here’s a quick guide based on how you like your steak cooked, accounting for the temperature increase once they get that final sear over high, direct charcoal.
KEY TIPS
Steak Pull Temps and Final Temps
When cooking steaks first over indirect heat, I recommend pulling the steaks onto the direct side for searing when they are 10°F less than where you want them to end. This will account for the internal temperature increase during searing each side for a minute each over very high direct heat.
Please note: this is for steaks that are 1 1/2 to 2 inches thick. If your steaks are thinner than this, pull them at 15°F before your final internal temp.
- Rare (cool red center): 120-125°F degrees; pull from indirect heat at 110°F
- Medium rare (warm red center): 130-135°F degrees; pull from indirect heat at 120°F
- Medium (warm pink center): 140-145°F degrees; pull from indirect heat at 130°F
- Medium well (slightly pink center): 150-155°F degrees; pull from indirect heat at 140°F
- Well done (no pink): 160°F+ degrees; pull from indirect heat at 150°F
Personally, I like my steaks medium rare, so I’ll set my probe thermometer to 120°F during the indirect cooking process. For this steak, it took about 45 minutes for it to reach 120°F at a grill temp of around 250°F.
5. Make the Herb Brush and Herb Brush
While the steak cooks, tie together the herb brush with butchers twine. You want this to look like a brush, with the herbs as the bristles and the stems as the handle.
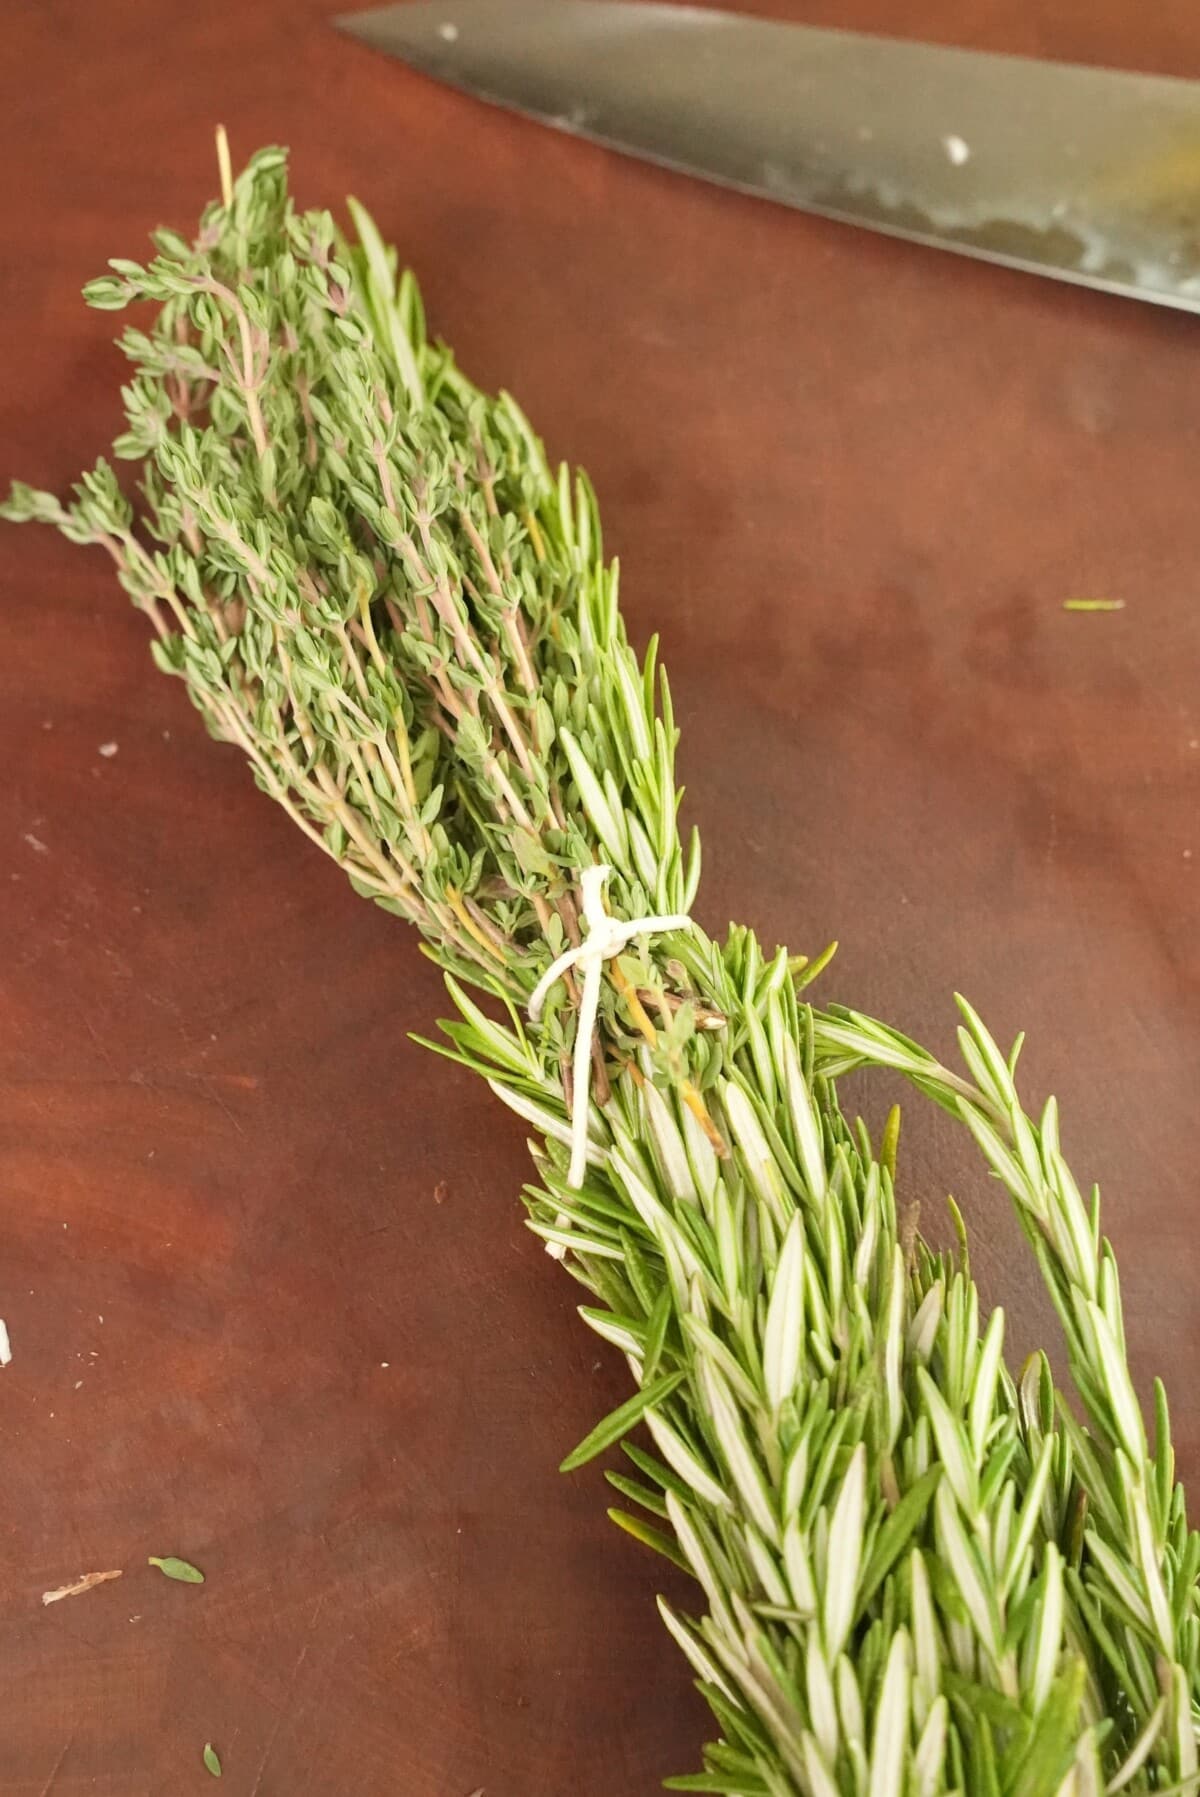
While the steak cooks over indirect heat, tie together the herb brush. Melt butter in a small saucepan over medium high heat and sauté chopped garlic for 30 seconds. Add in the chopped herbs and turn off the heat to let steep.
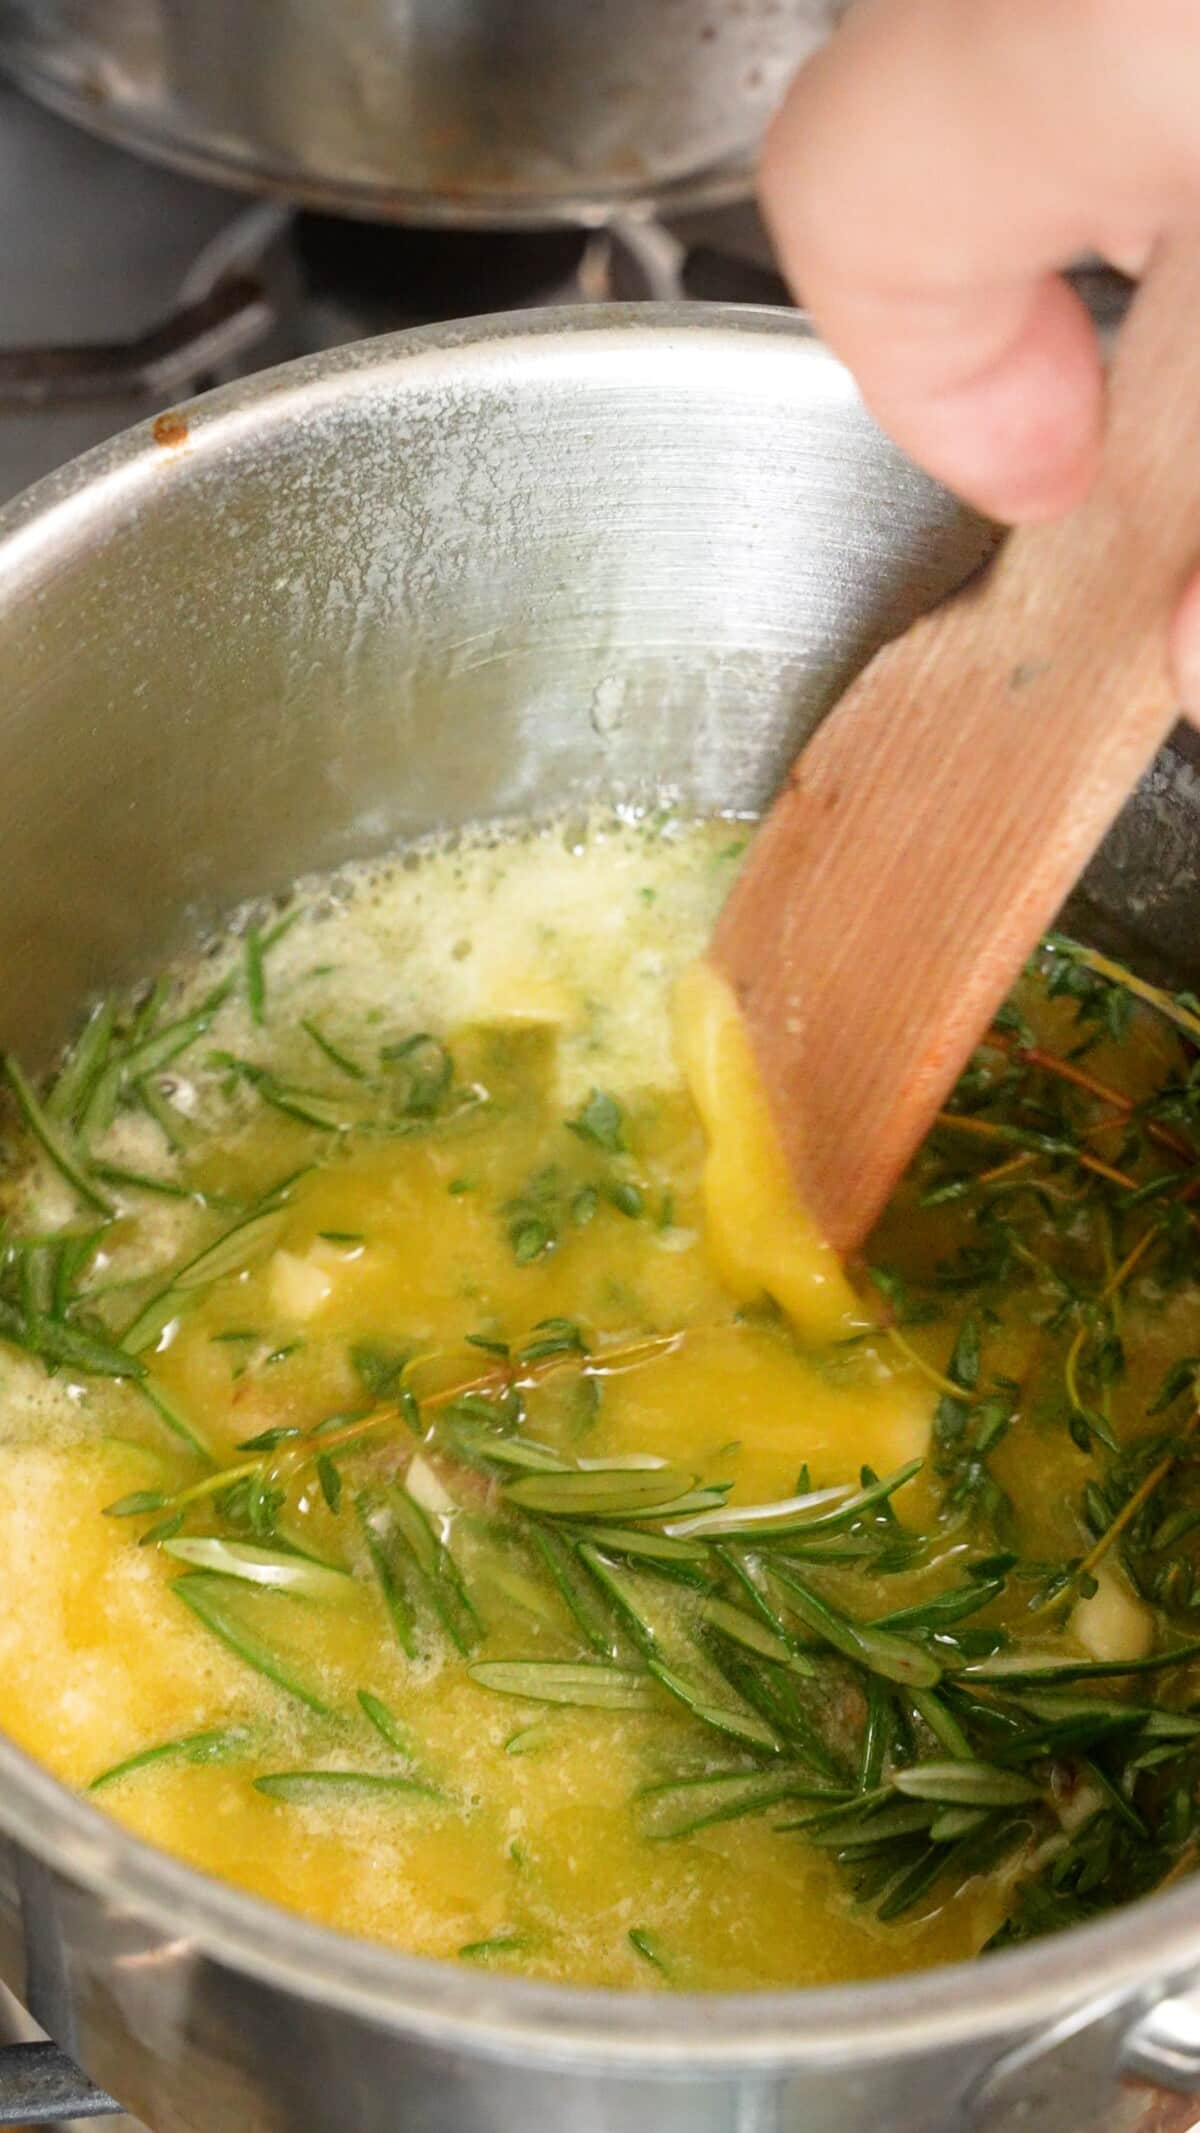
6. Brush the Grilled Steak with Garlic Herb Butter
Remove the probe thermometer from the steak (unless your probe thermometer can withstand 1000°F like the Meater 2 Plus – which I love!). Open all the vents to reach a grill temperature of 500-550°F (you may need to add more charcoal).
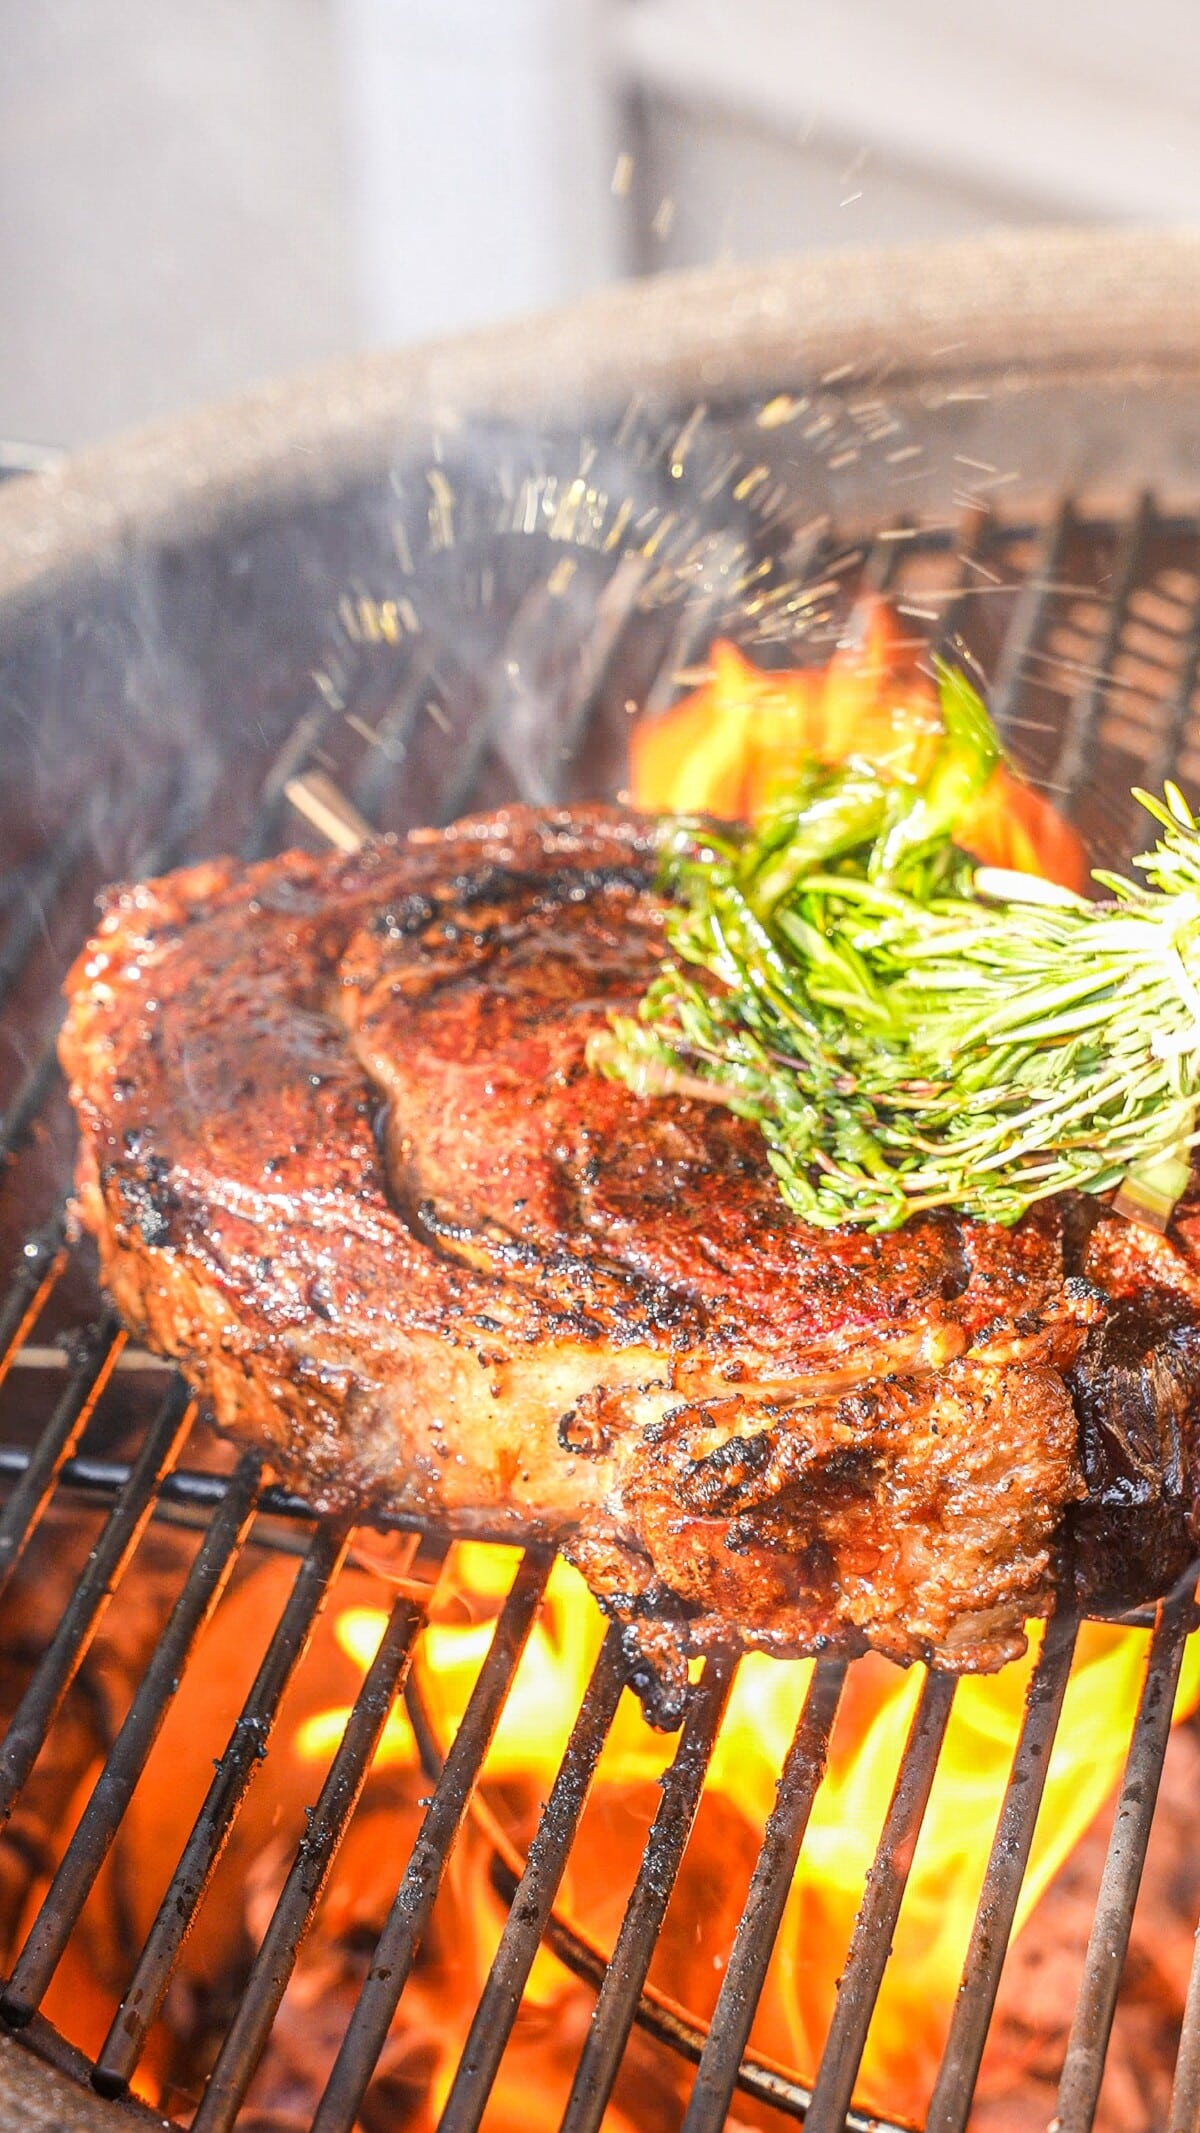
Once the steak reaches the desired internal temperature, use the herb brush to brush the garlic herb butter on all sides of the Grilled Steak over the direct heat side of the grill. The herb butter will also stoke the hot charcoals causing some flare ups, which is a good thing for creating a beautiful crust, but be very careful! I recommend using heat resistant gloves when handling the herb brush and garlic herb butter to baste the steak.

7. Sear the Steak
Sear the steak for 1 minute on one side. If you want your Grilled Steak to have cross pattern grill marks, make sure to turn the steak 45° at the 30 second mark to achieve these.
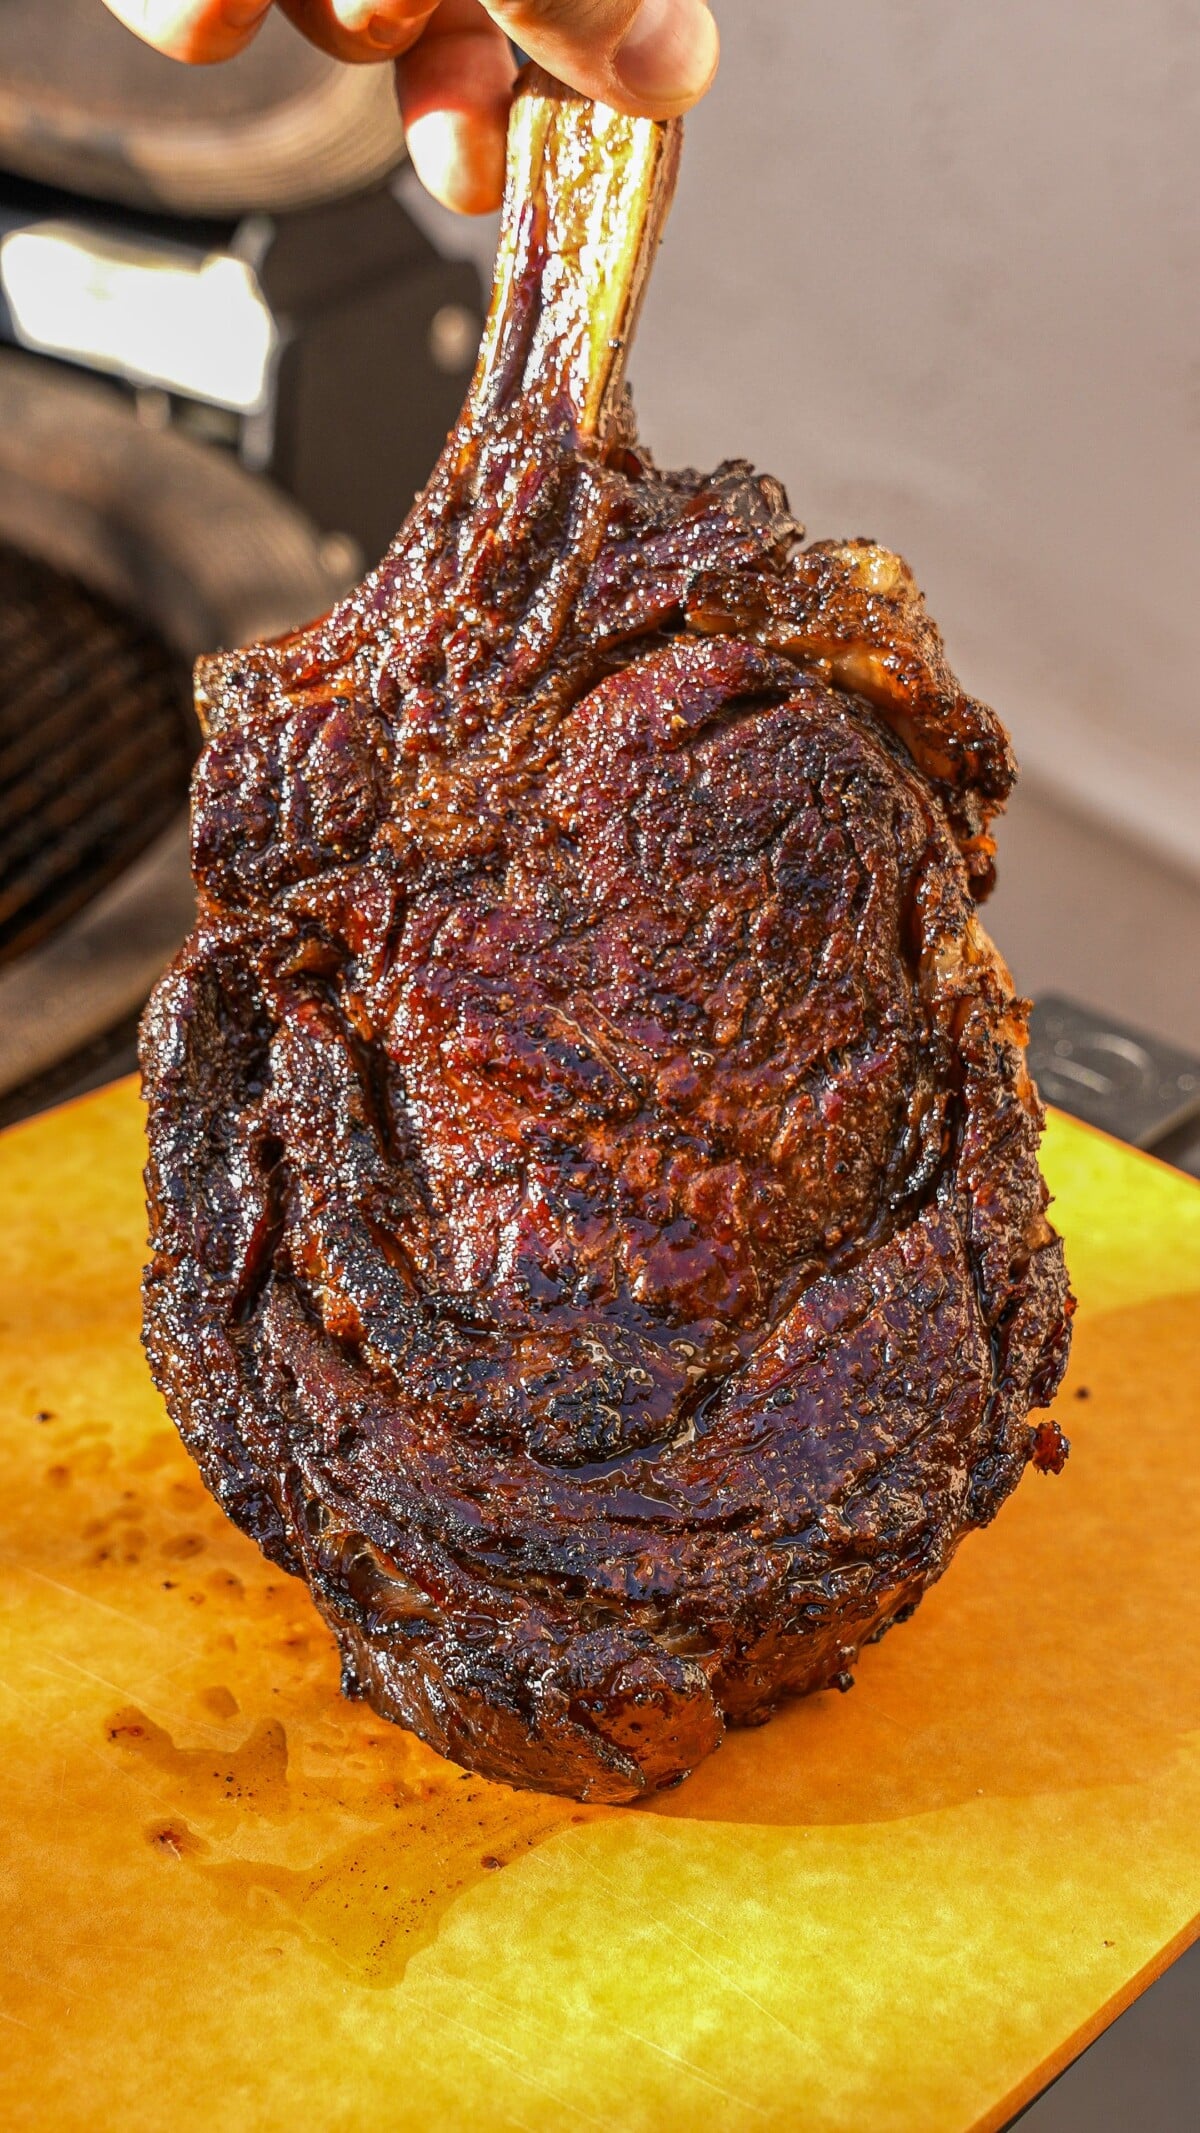
After searing the steak on both sides, remove the Grilled Steak and place on a cutting board. Cover the steak with foil and let it rest for at least 15 minutes before slicing.
Slice and enjoy!
What Should I Serve with Grilled Steak?
First, you’ll need to make my Peppercorn Sauce for Steaks – it’s SO good! I always like to serve steaks with a side of Garlic Herb Compound Butter. Nothing goes better with steaks than super creamy Mashed Potatoes, and classic Baked Mac and Cheese.
I find it’s so easy to roast vegetables in the oven while grilling – try my Roasted Brussels Sprouts (or Air Fryer Roasted Brussels Sprouts), Honey Roasted Carrots, Roasted Cauliflower, or Roasted Green Beans with Bacon!
When grilling, make sure to include my Hawaiian Macaroni Salad! My personal favorite during the warmer weather is a refreshing cucumber salad, like my viral Din Tai Fung Cucumber Salad, Chinese Smashed Cucumber Salad, or 10 minute Korean Cucumber Salad.
PRO TIPS
Expert Tips for Making The BEST Grilled Steak at Home!
- Restaurants season their steak with kosher salt equaling about 2% of their weight. I recommend seasoning your Grilled Steak with 1.5% of its weight in kosher salt. Allow the salt to fully absorb into the steak before cooking will ensure an even and well seasoned steak!
- Creating two heat zones (indirect and direct) allows for you to both fully cook your Grilled Steak without burning the exterior (over the indirect heat) and get a beautiful restaurant-style crust via a fast sear (over the direct heat).
- For smaller steaks, you can use this same method of using both indirect and direct heat zones – however, since the steaks are thinner, I would remove the steaks from the grill when they reach an internal temperature of 120°F to avoid overcooking. Don’t forget that you’ll be searing them at the end, so that additional cooking time will help increase the internal temperature.
- I recommend experimenting with different types of wood to add a smoky flavor to your steak. Apple, Cherry, Pecan, and Oak woods all bring a unique flavor to the grill. For red meats, I love using cherry or pecan woods.
- Use a thermometer!
- Using a thermometer is the only way you can confirm the internal temperature is high enough to have destroyed any harmful bacteria that lives in undercooked meat.
- Checking the temperature of your food with a thermometer helps you confirm where it is in the cooking process and achieve your desired level of doneness.
Storage and Reheating Tips
You can store any leftover Grilled Steak in an airtight container in the refrigerator for up to 3-4 days. Before storing in the fridge, slice any leftover pieces into thick, 2 inch slices. To reheat the steak, I suggest searing the pieces in a ripping hot pan on the stove in neutral oil or butter. The thickness of the steak pieces will allow for the middle to warm through without overcooking the steak.
Alternatively, you can reheat the steak pieces in the air fryer or oven at 350F for 6-8 minutes until warmed through.
If you tried this Grilled Steak Recipe or any other recipe on my website, please leave a 🌟 star rating and let me know how it went in the comments below!
Perfectly Grilled Steak – BEST METHOD
Ingredients
- 2.5 lb ribeye , 1 ½ to 2 inches thick
- Kosher salt + ½ teaspoon, see note
- ½ teaspoon Ground Black Pepper
- 1 teaspoon Garlic Powder
- 1 teaspoon neutral oil
Herb "Brush"
- 4 sprigs Rosemary
- 4 sprigs Thyme
- 1 roll butchers twine
Herb Butter
- 1 tablespoon chopped rosemary
- 1 tablespoon chopped thyme
- 8 cloves Garlic chopped
- 2 sticks Butter
Instructions
- Use a kitchen scale to measure the steak in grams. Multiply the weight of the steak by 1.5% to get the amount of kosher salt. (ex. if your steak weighs 1000g, use 15g of kosher salt)
- Pat the steak dry and salt on all sides with the kosher salt. Place the steak on a wire rack uncovered and leave it in the fridge overnight. Remove the steak from the fridge 1 hour before cooking to bring it to room temperature. Pat dry to remove any excess moisture.
- Mix together ½ teaspoon kosher salt, black pepper, and the garlic powder. Drizzle the steak with neutral oil. Sprinkle the seasoning mixture all over the surface of the steak.
- Add charcoal to ½ of the grill to create a zone for direct heat and indirect heat. Optional: add a piece of cherry or pecan wood at the base of the charcoal to add additional flavor to the steak. Light the charcoal so they are fully lit and the smoke runs clear out of the vents. Adjust the vents until the inside of the grill reaches 225-250F.
- Add the steak to the indirect side of the grill. Set the probe thermometer to your desired internal temperature depending on how you prefer your steak cooked (refer to notes below). The target temperature should be 10°F less than the final desired temperature. This will take about 30-45 minutes depending on your grill temp and desired internal temp.
- While the steak cooks over indirect heat, tie together the herb brush. Melt butter in a small saucepan over medium high heat and saute chopped garlic for 30 seconds. Add in the chopped herbs and turn off the heat to let steep.
- Once the steak reaches the desired internal temperature, brush with the rosemary & thyme brush with the garlic herb butter on all sides.
- Remove the probe and open all the vents to reach a grill temperature of 500-550°F (add more charcoal if necessary).
- Sear the steak for 1 minute on one side, turning it 45° at the 30 second mark to achieve the cross pattern grill marks, if desired, basting the steak with the herb brush and garlic herb butter.
- Cover the steak with foil and let the steak rest at least 15 minutes before slicing.
Video
Notes
- Restaurants season their steak with kosher salt equaling about 2% of their weight. I find that seasoning the steak with 1.5% of its weight in kosher salt and allowing it to absorb into the meat before cooking will ensure a seasoned steak throughout.
- Creating an indirect and direct zone on the grill allows the internal temperature of the steak to cook on the indirect side without burning the exterior. Once the steak reaches your desired internal temperature, a hot and fast sear will get that restaurant style crust.
- I recommend experimenting with different types of wood to add a smoky flavor to your steak. Apple, Cherry, Pecan, and Oak woods all bring a unique flavor to the grill. For red meats, I love using cherry or pecan woods.
- For smaller steaks, you can use this same method, but since the steaks are thinner, give yourself extra wiggle room with the internal temperature. It will take some time to get a proper sear so you don’t want your steak to be overdone by the end.
Steak Pull Temps and Final Temps
When cooking steaks first over indirect heat, I recommend pulling the steaks onto the direct side for searing when they are 10°F less than where you want them to end. This will account for the internal temperature increase during searing each side for a minute each over very high direct heat. Please note: this is for steaks that are 1 1/2 to 2 inches thick. If your steaks are thinner than this, pull them at 15°F before your final internal temp.- Rare (cool red center): 120-125°F degrees; pull from indirect heat at 110°F
- Medium rare (warm red center): 130-135°F degrees; pull from indirect heat at 120°F
- Medium (warm pink center): 140-145°F degrees; pull from indirect heat at 130°F
- Medium well (slightly pink center): 150-155°F degrees; pull from indirect heat at 140°F
- Well done (no pink): 160°F+ degrees; pull from indirect heat at 150°F
Storage and Reheating
You can store any leftover Grilled Steak in an airtight container in the refrigerator for up to 3-4 days. Before storing in the fridge, slice any leftover pieces into thick, 2 inch slices. To reheat the steak, I suggest searing the pieces in a ripping hot pan on the stove in neutral oil or butter. The thickness of the individual steak pieces will allow for the middle to warm through without overcooking the steak all the way through (like mini steaks!) Alternatively, you can reheat the steak pieces in the air fryer or oven at 350F for 6-8 minutes until warmed through.Nutrition
Nutrition information is automatically calculated, so should only be used as an approximation.

